How to Create and Manage Customer Appointments Efficiently in Invent ERP
Learn how to schedule appointments, assign resources, manage availability, and improve customer booking experiences.
Step-by-Step Process
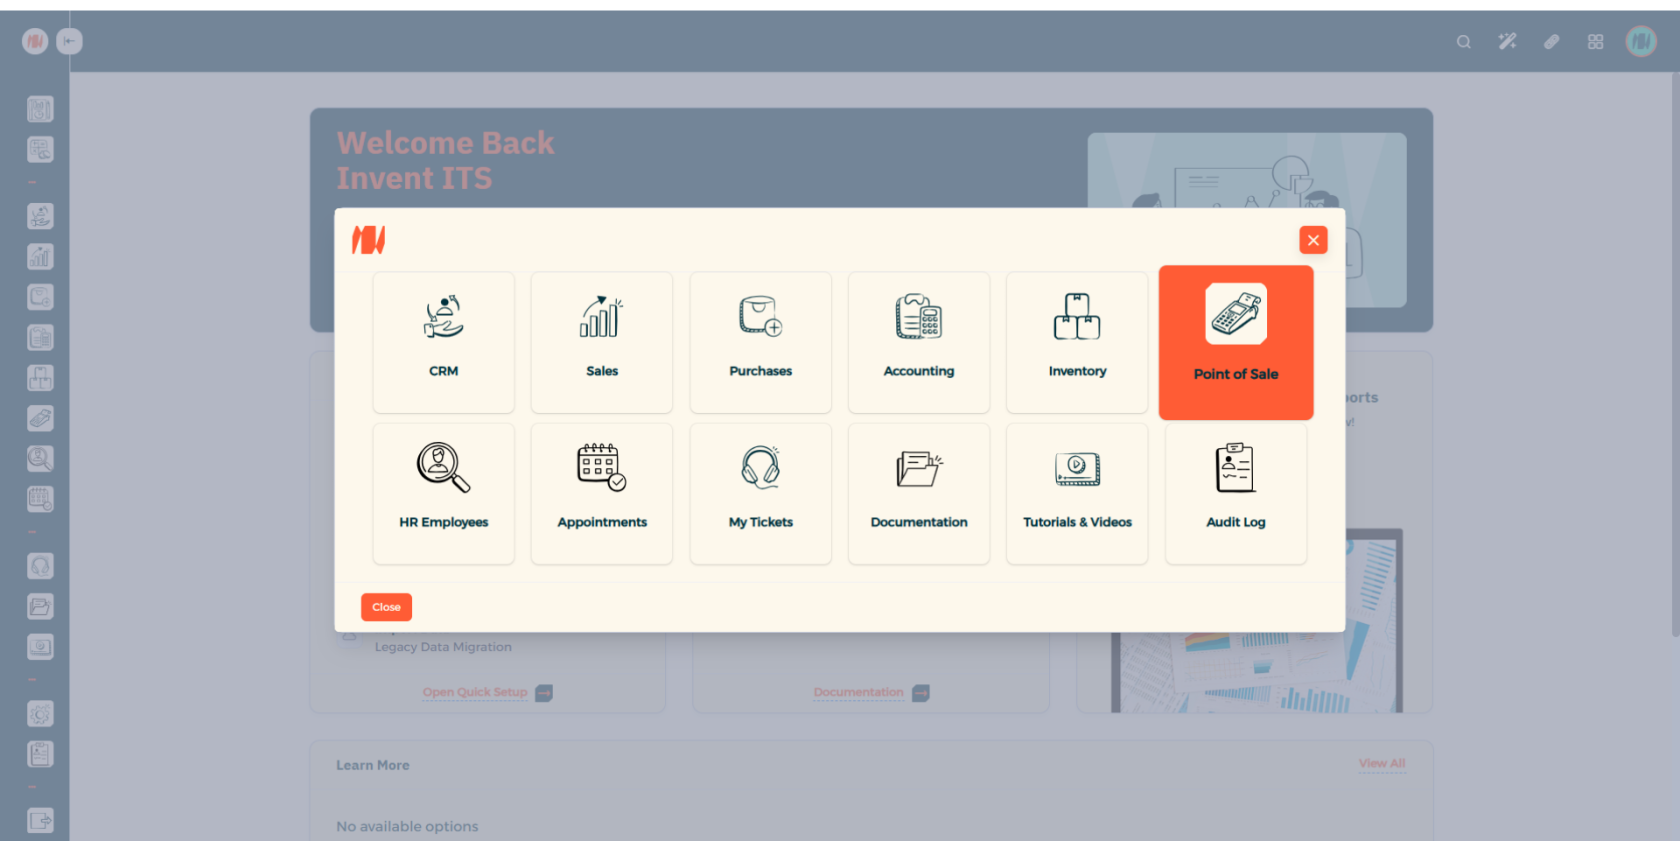
Step 1: Navigate to Point of Sale
From the Main Menu, in the top right corner, click on all apps, then Point of Sale
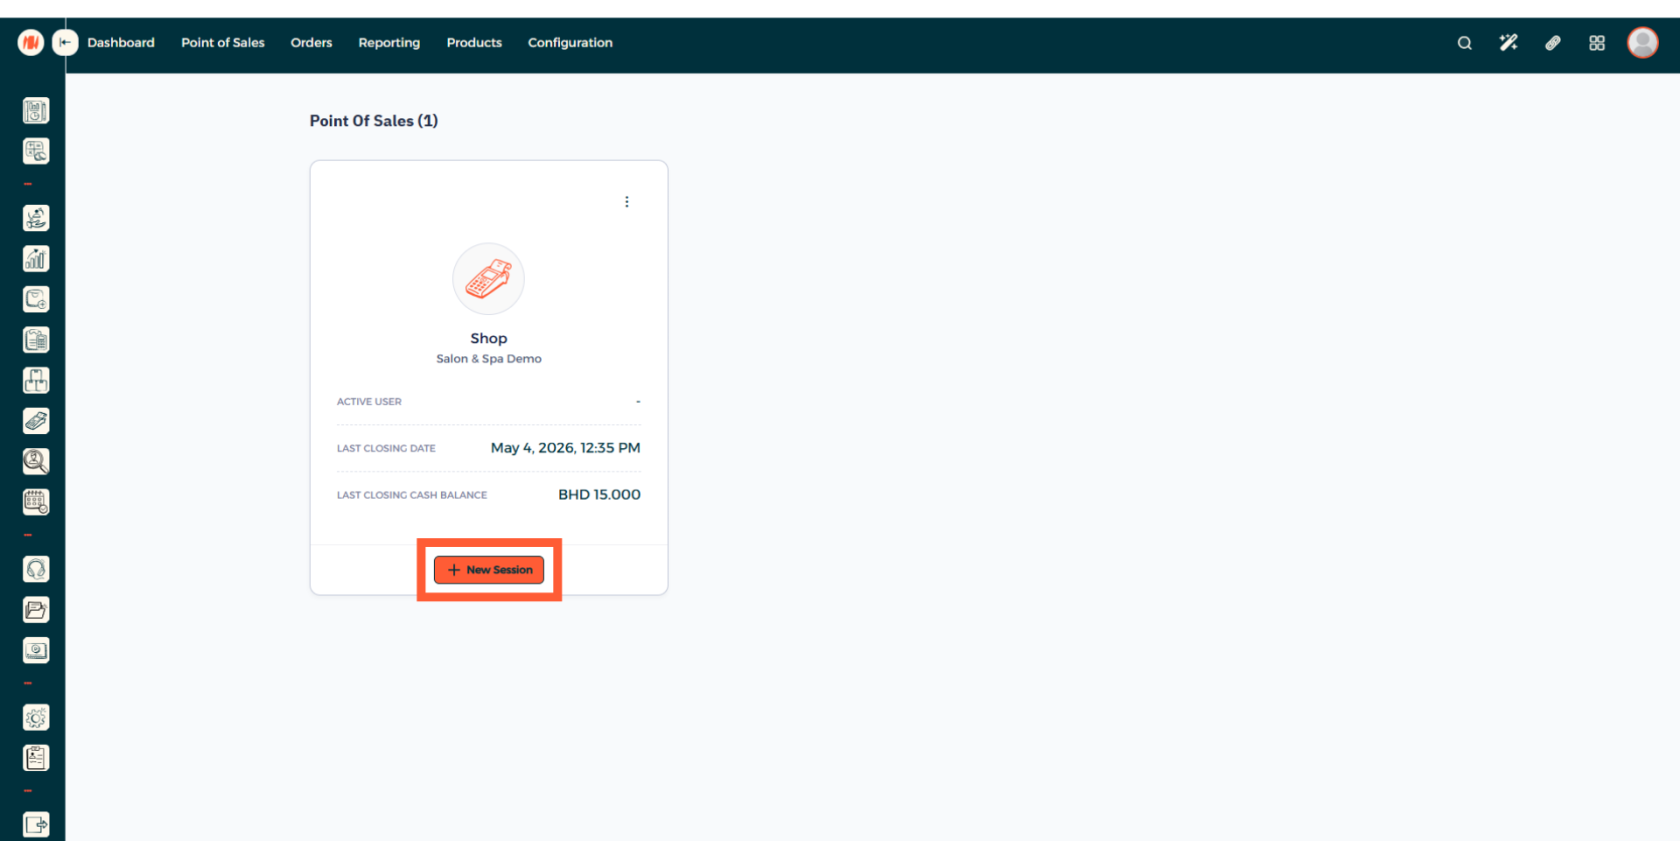
Step 2: Open a new Point of Sale Session
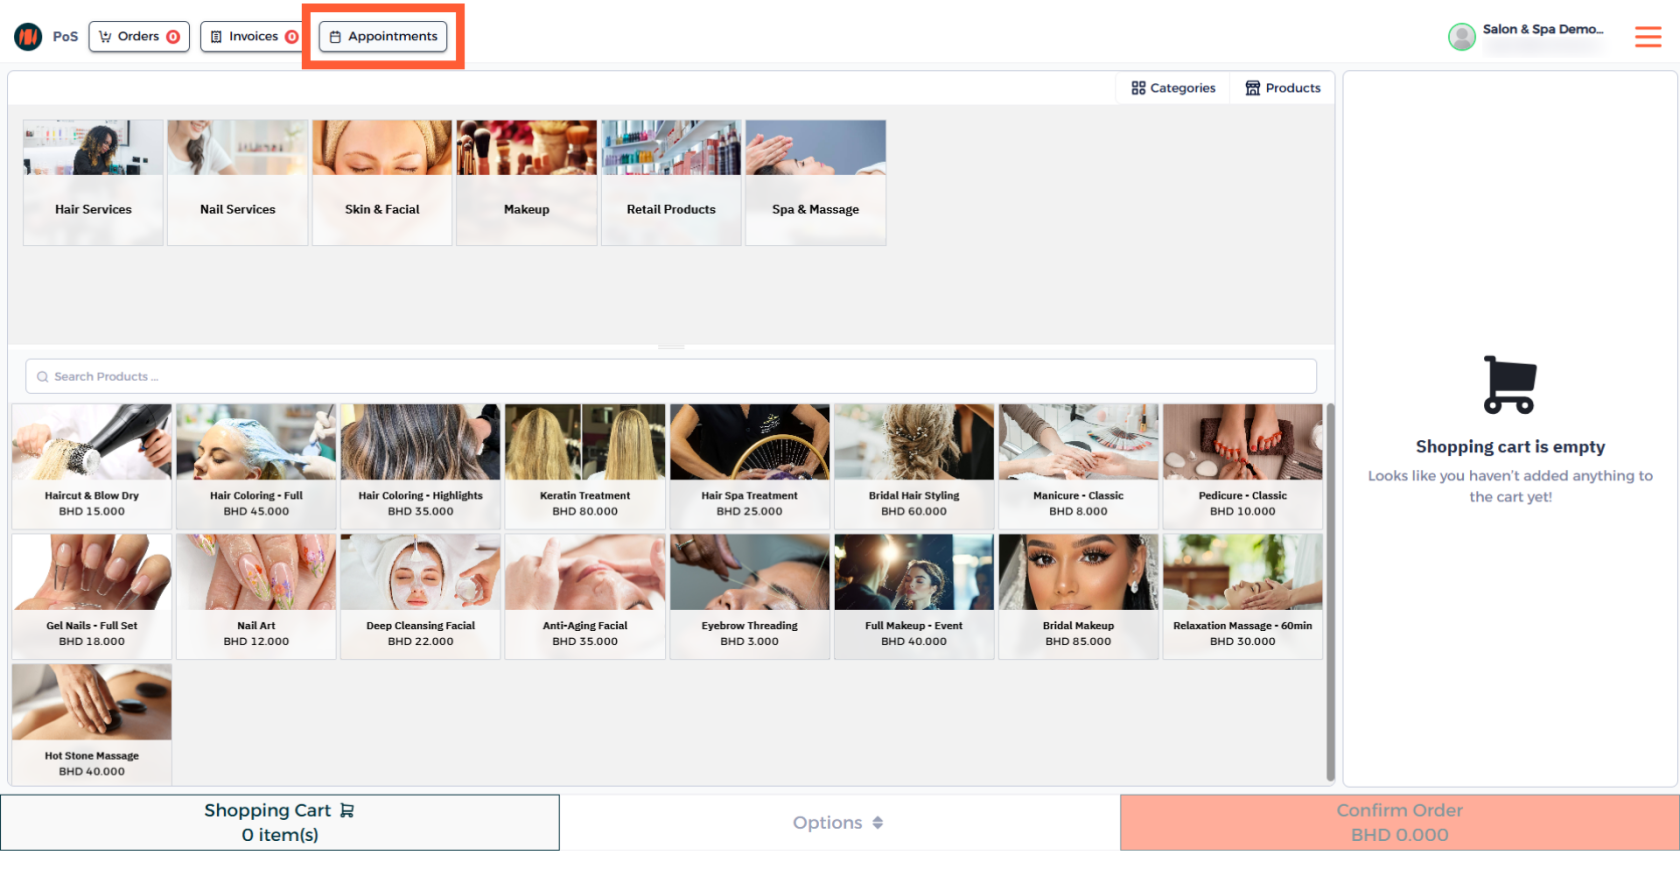
Step 3: Head to Appointments
In your POS session, click on Appointments located at the top of the screen.
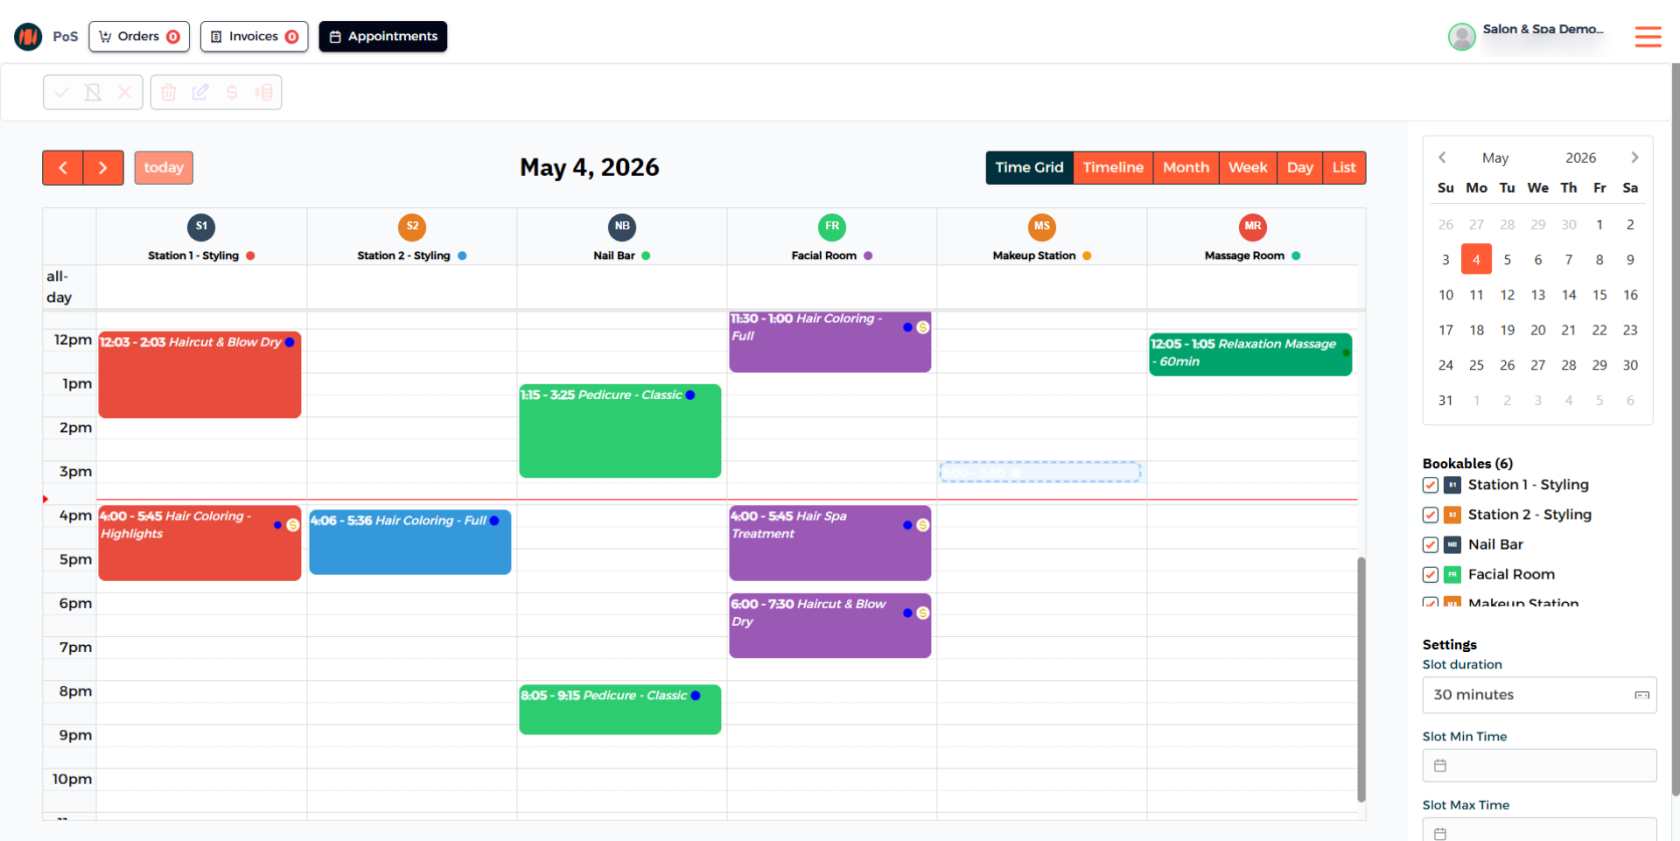
Step 4: Select an Available Slot
Choose an available time slot on the calendar for a new appointment
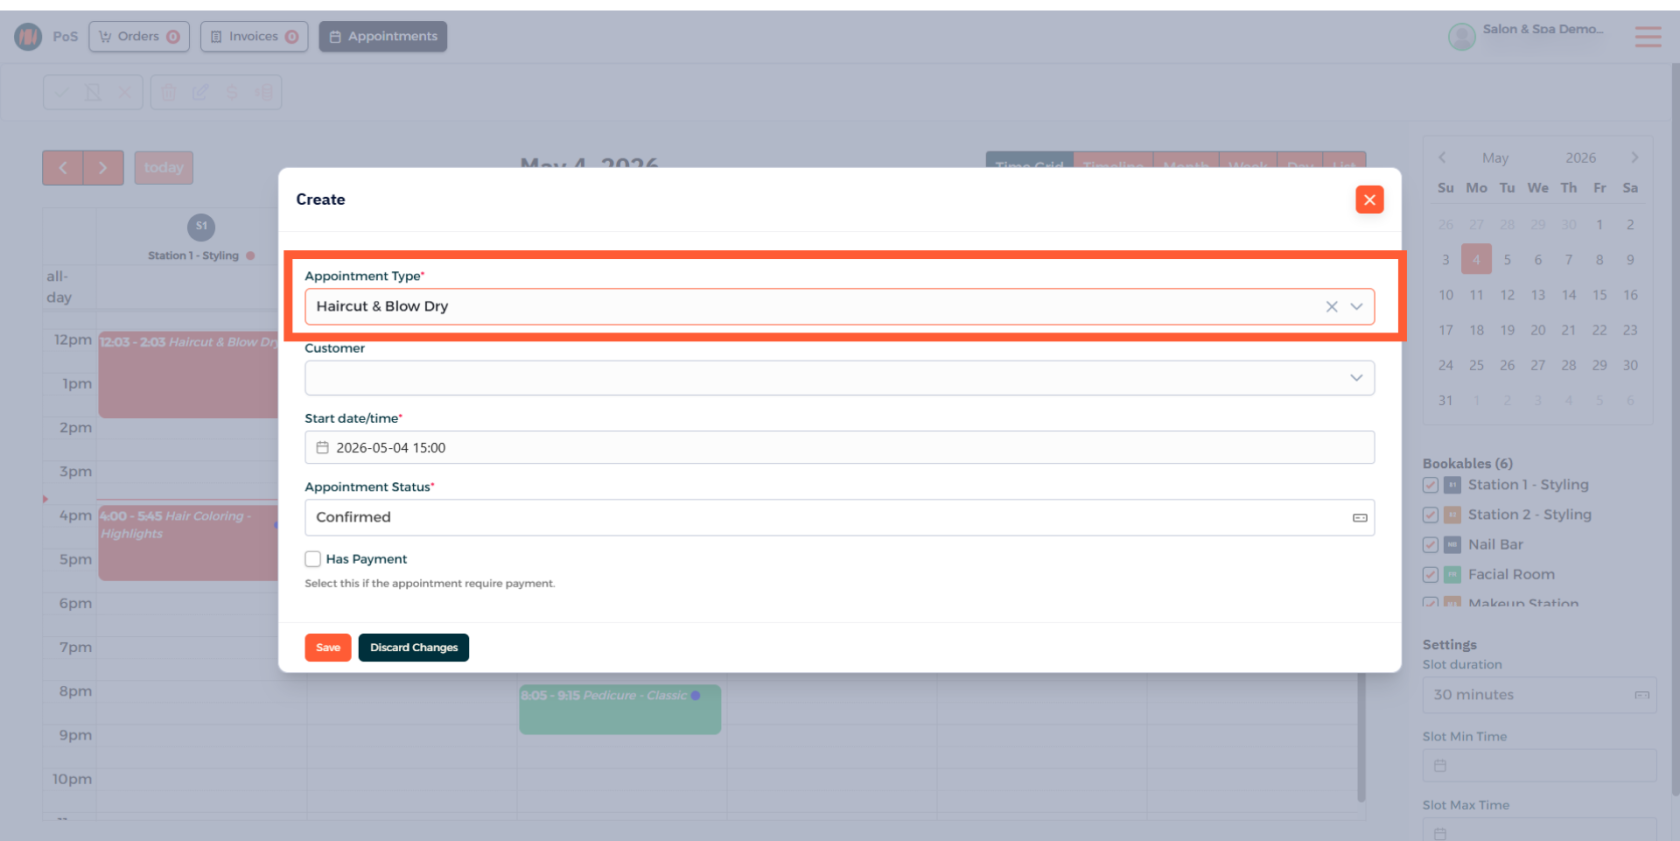
Step 5: Choose an Appointment Type
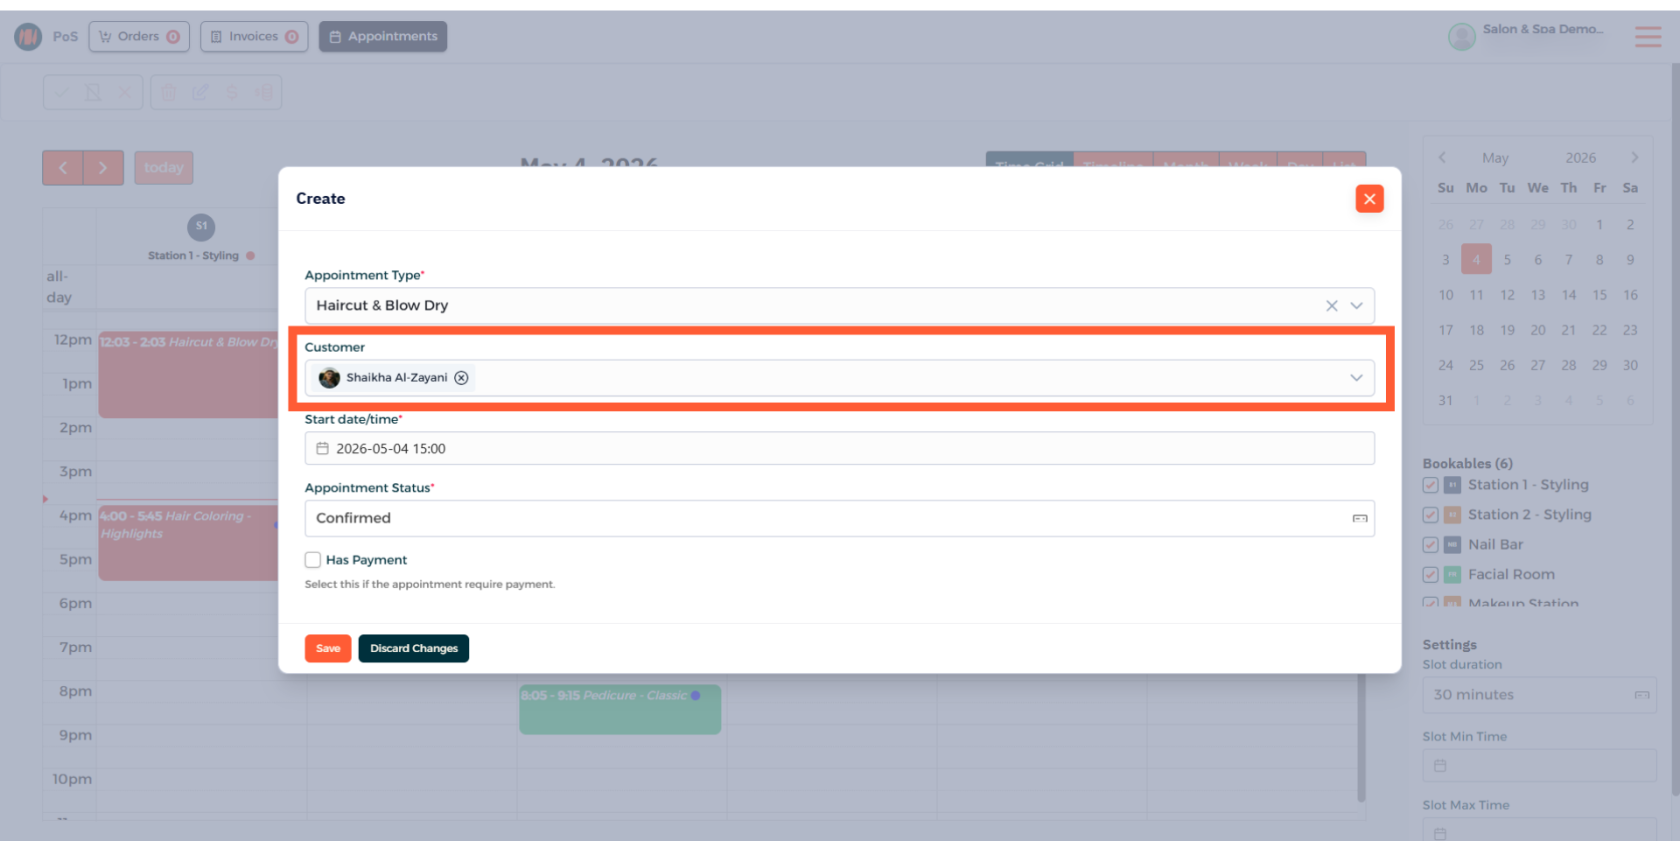
Step 6: Select a Customer
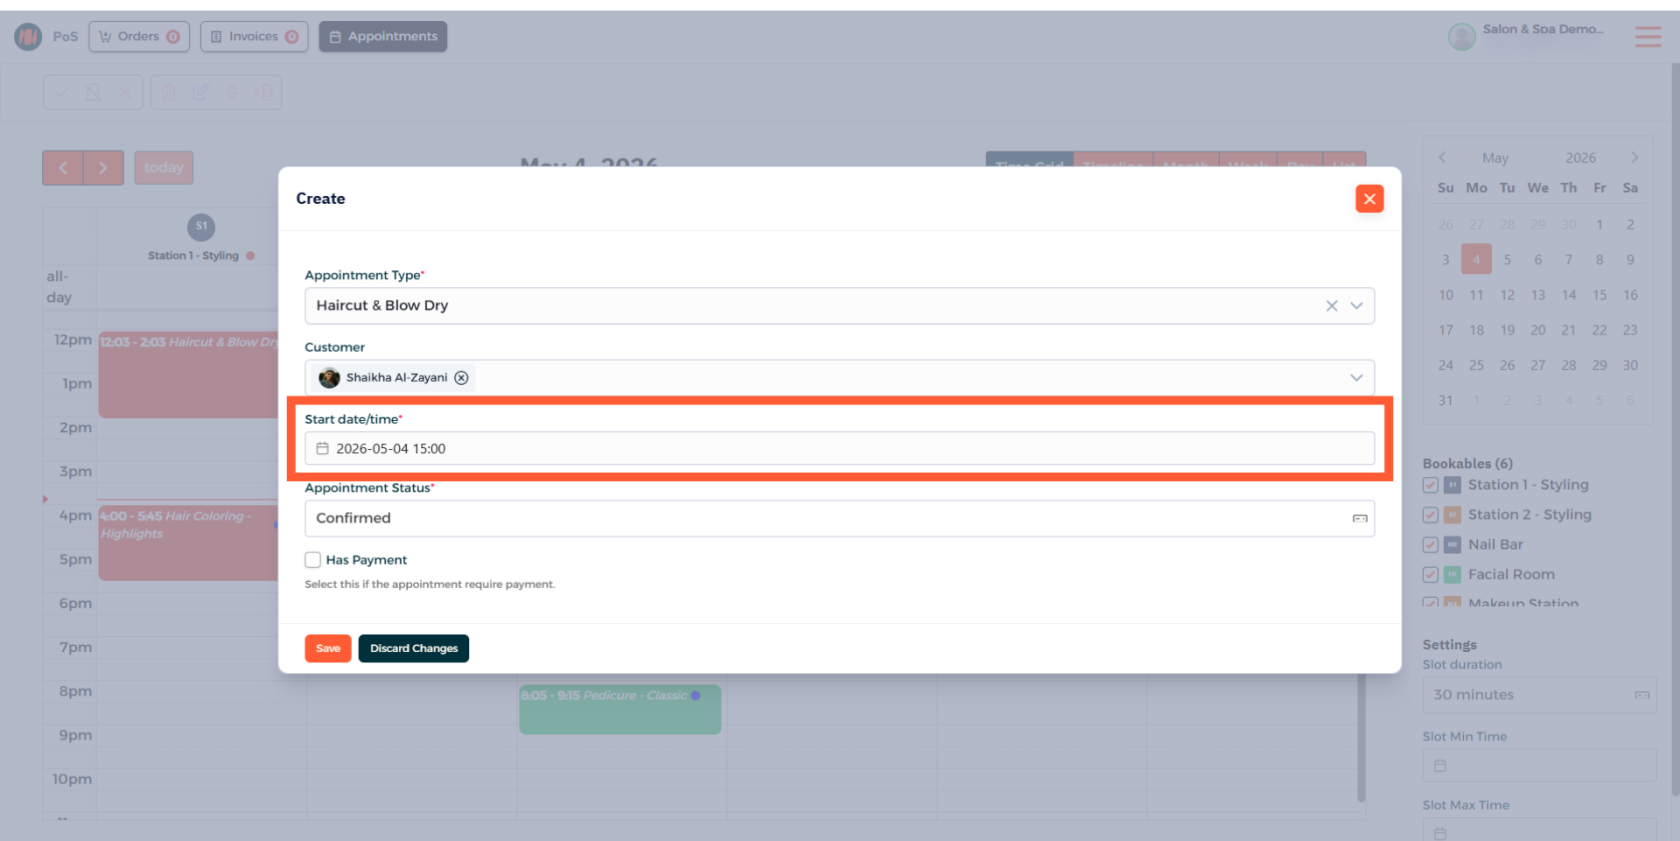
Step 7: Confirm Appointment Date and Time
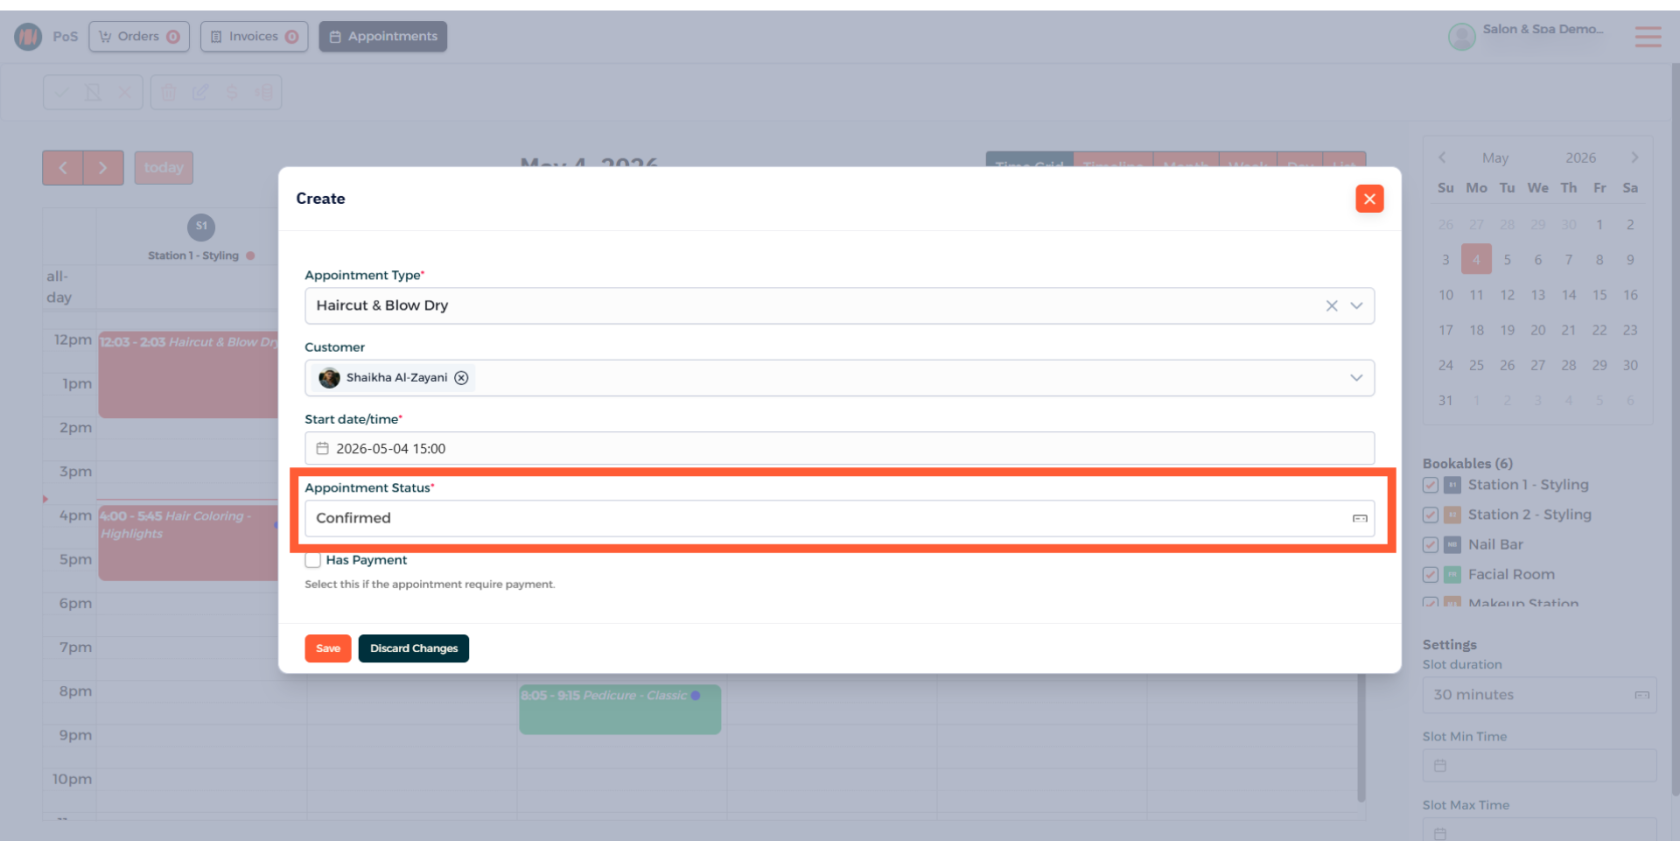
Step 8: Verify Appointment Status
Step 9: Add Services
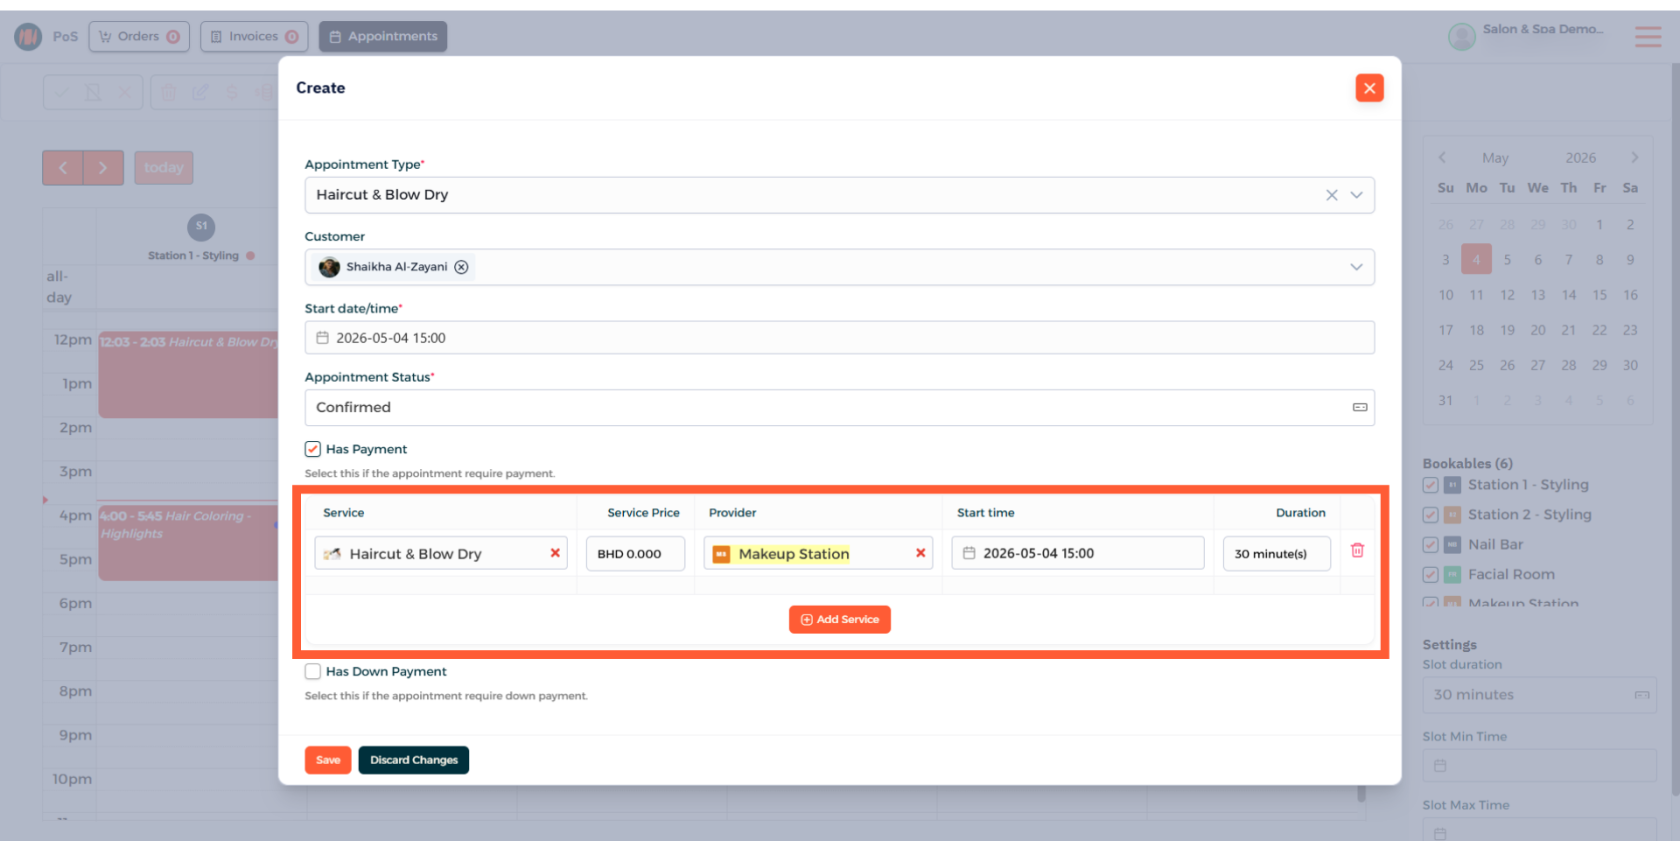
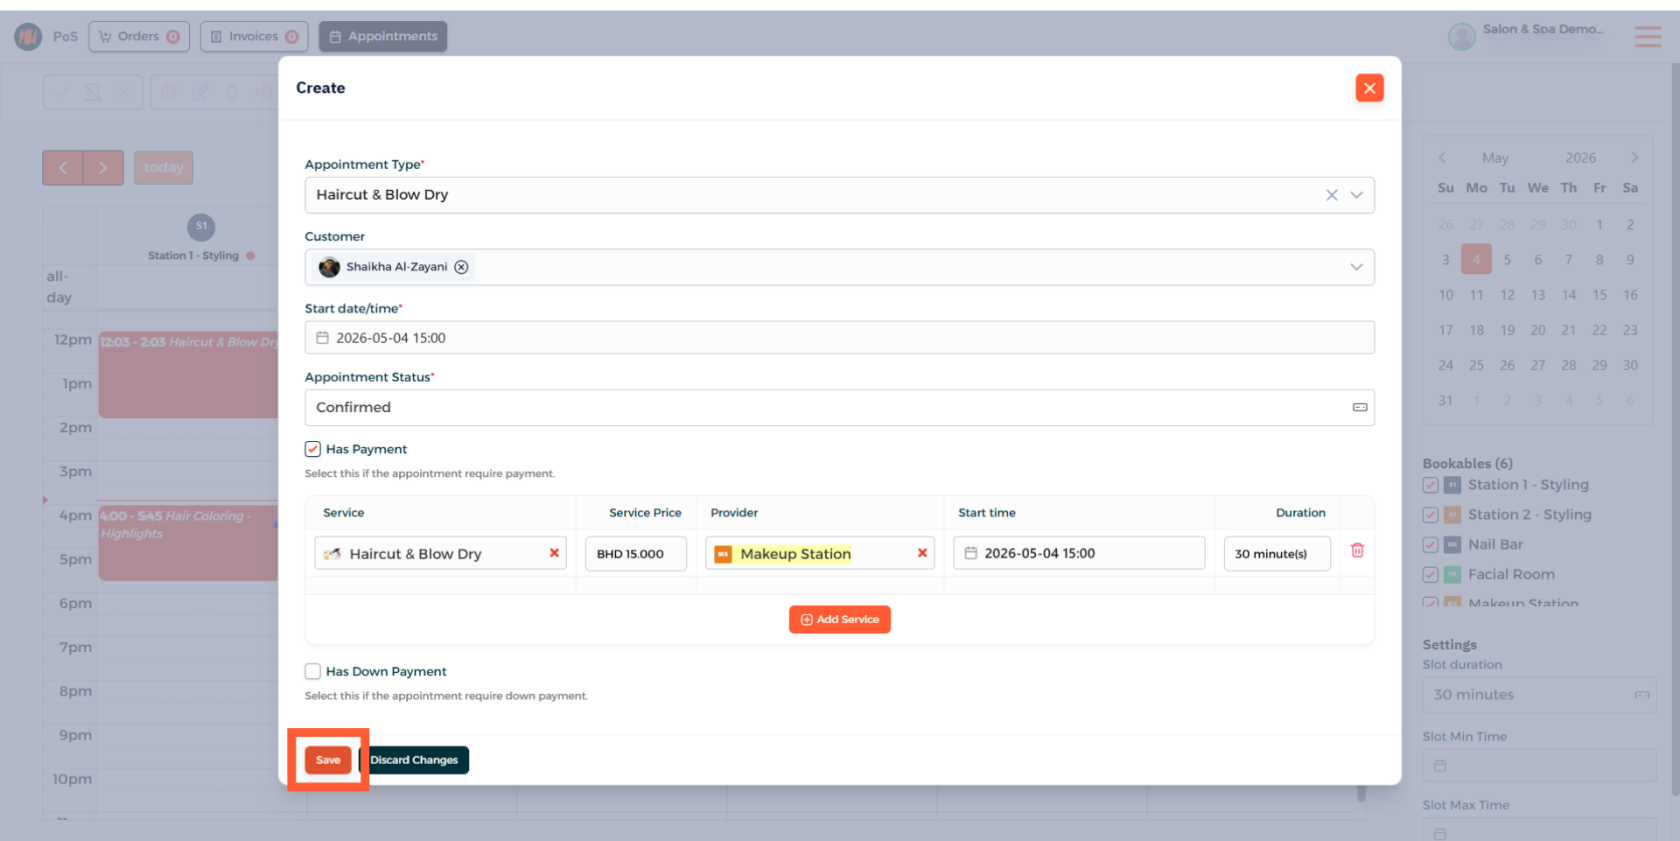
Step 10: Save Appointment Details
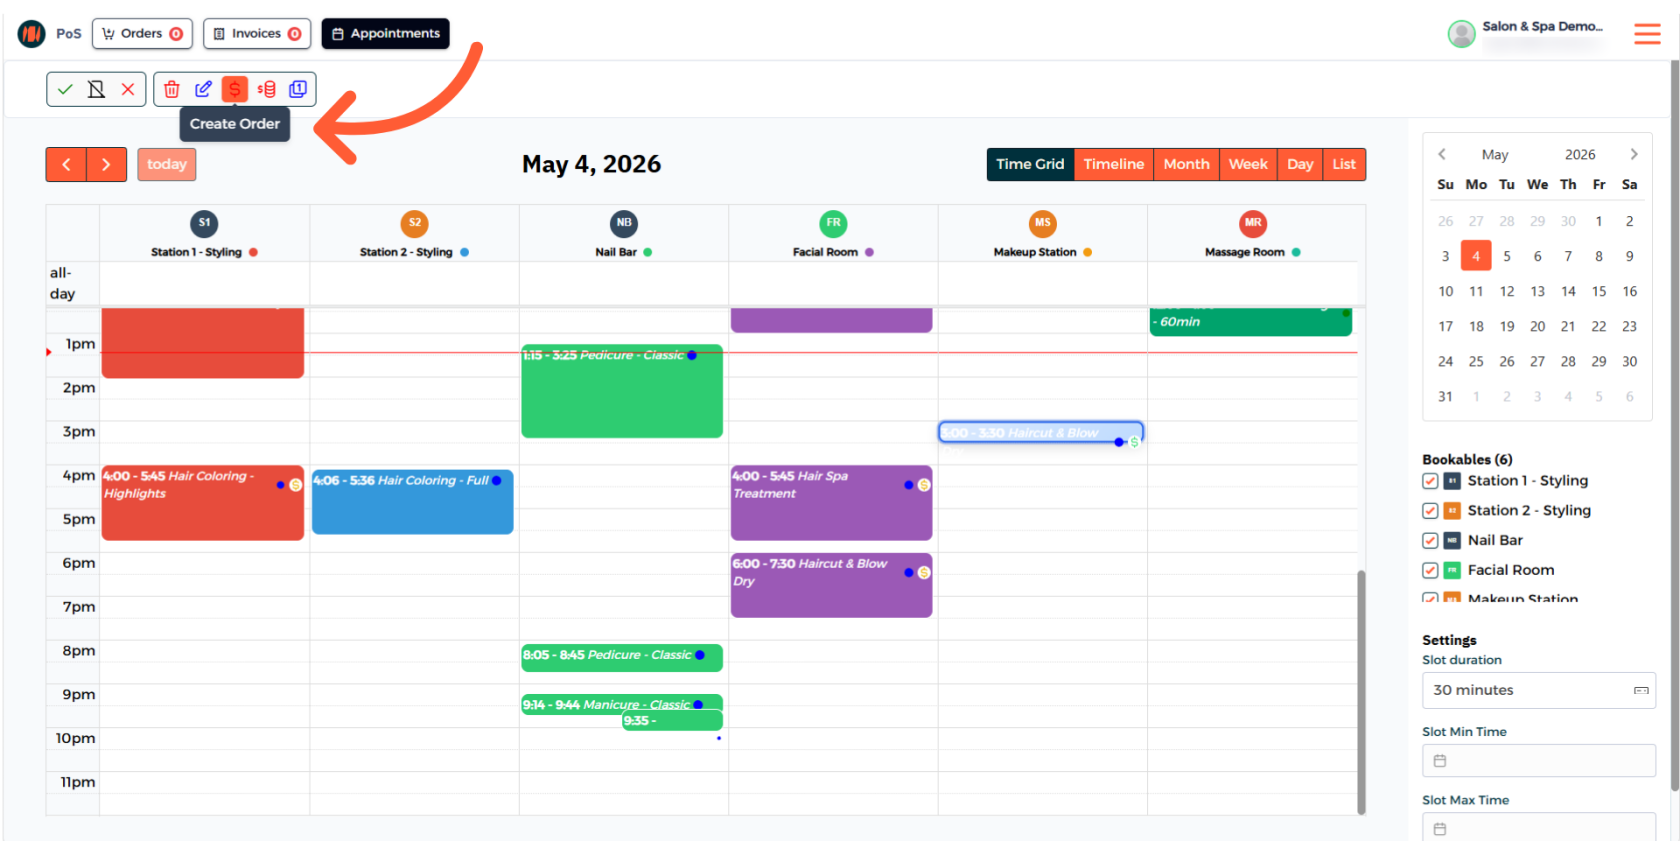
Step 11: Select Appointment and Create Order
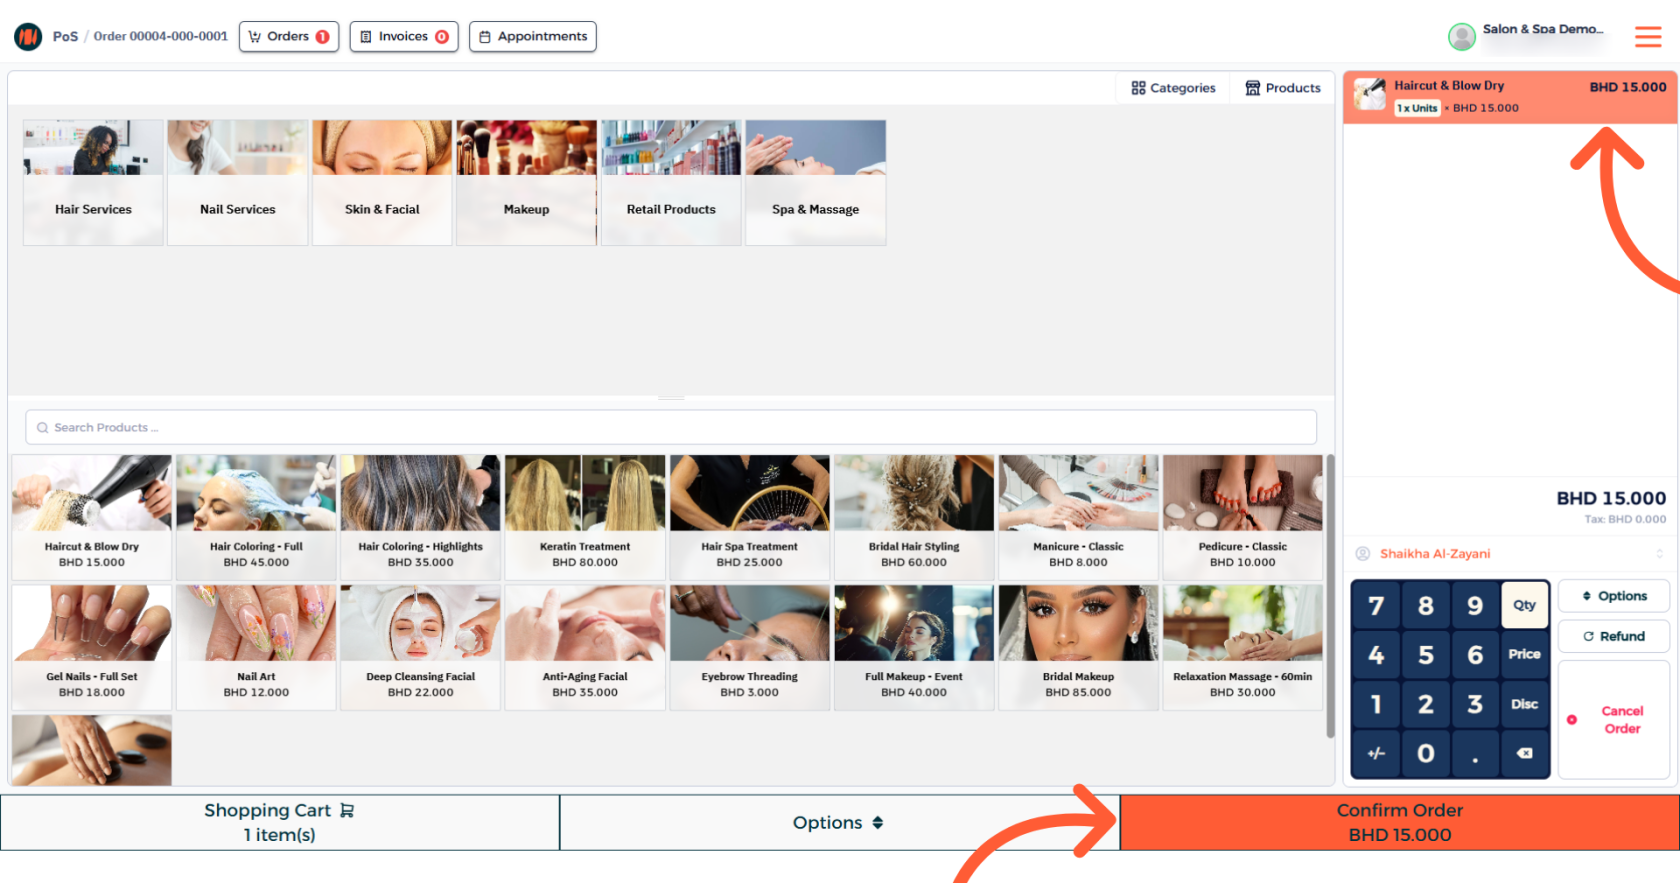
Step 12: Complete Order Process
That's it! You know now how to create an appointment in Invent ERP.
Notes & Tips
- Double-check the calendar slot you tap so the correct date and time are set.
- Confirm the customer contact and service details before saving to avoid issues
FAQ
Q: How do I pick a date and time for an appointment? Tap a calendar slot; the date and time will be set automatically based on the slot you selected.
Q: Can I reschedule or move an appointment? Yes, select the appointment and then enter the new date and time to reschedule it.