How to Configure Google OAuth Authentication for Email Integration in Invent ERP
Learn how to connect Google services securely and configure email authentication within Invent ERP.
OAuth is a standard for authorisation in the field of technology, which allows users to authorise an app or service to sign in to another without revealing sensitive information such as usernames or passwords. The OAuth 2.0 protocol is used for authentication and authorisation with Google APIs.
Step-by-Step Process
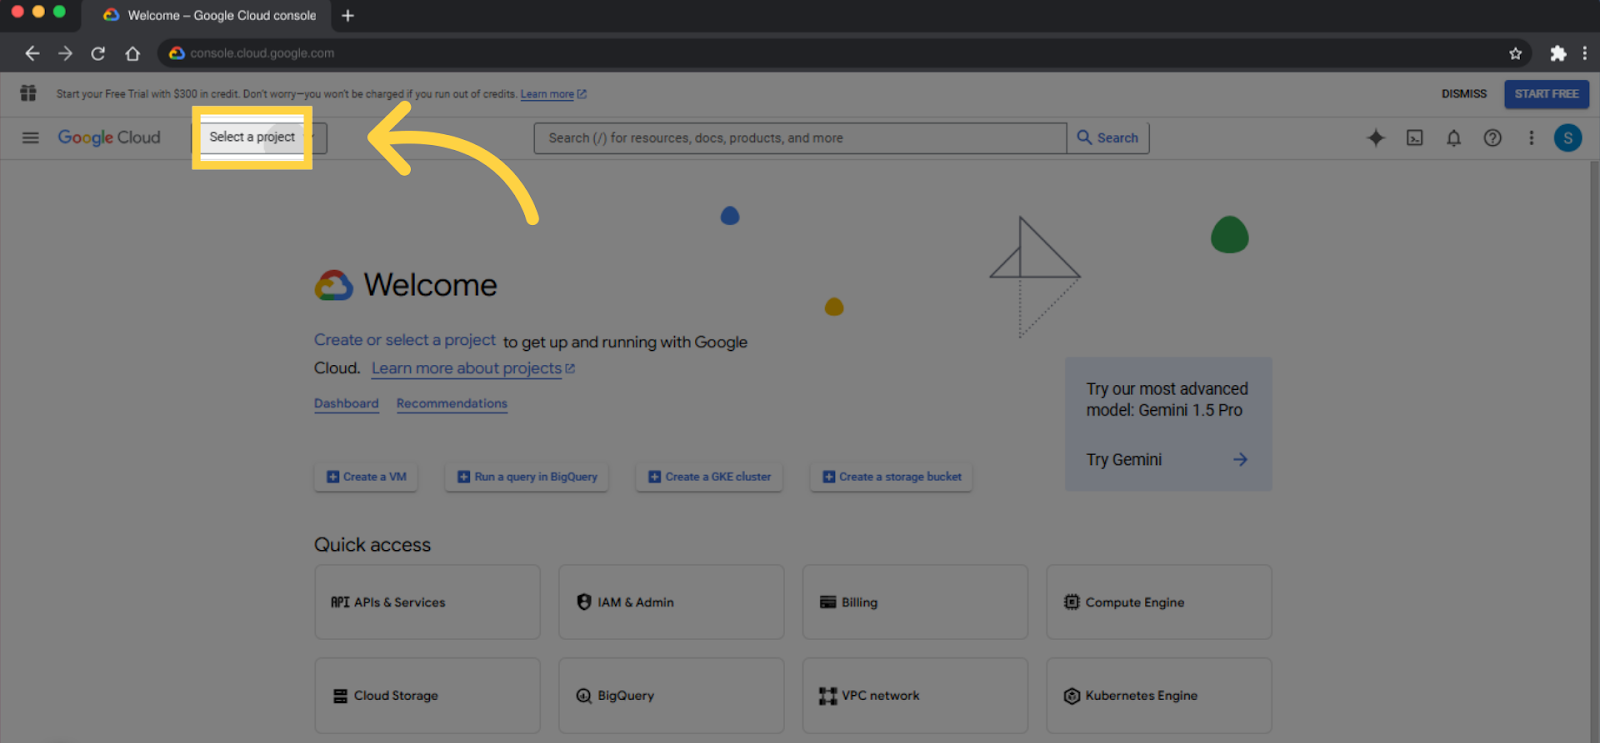
- Sign in or create an account on Google Cloud Platform
- Click Select a Project
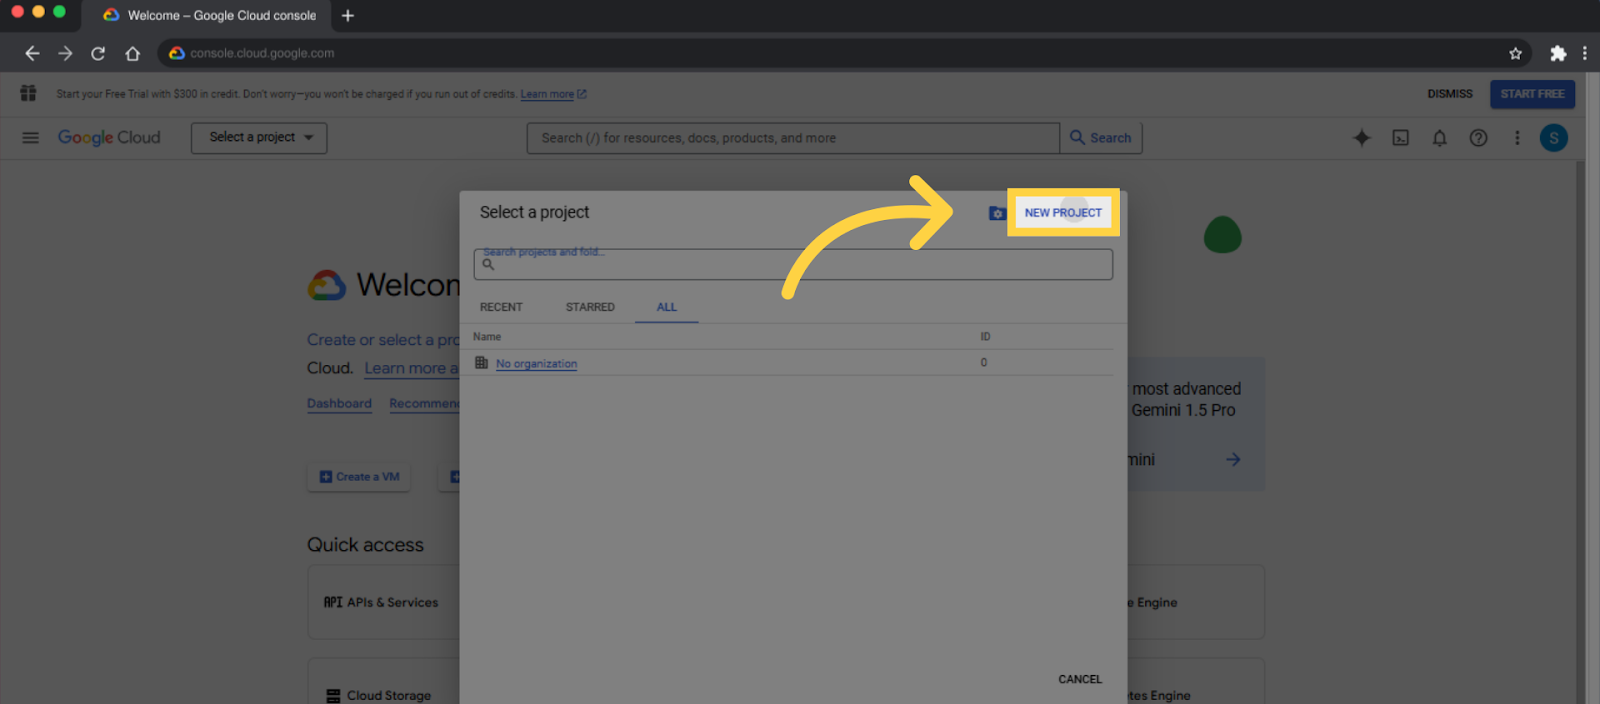
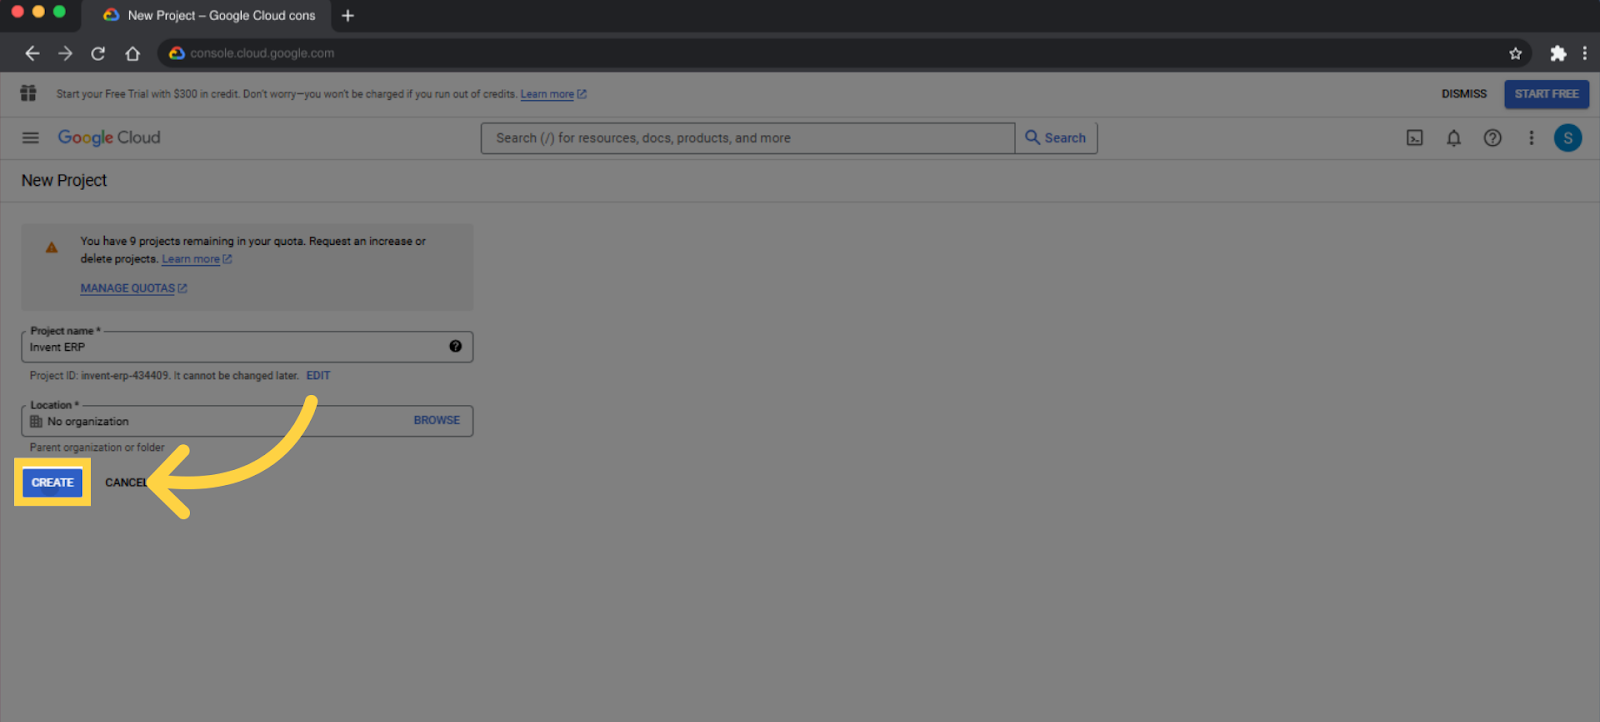
- Press New Project
- Fill in the Project Name field
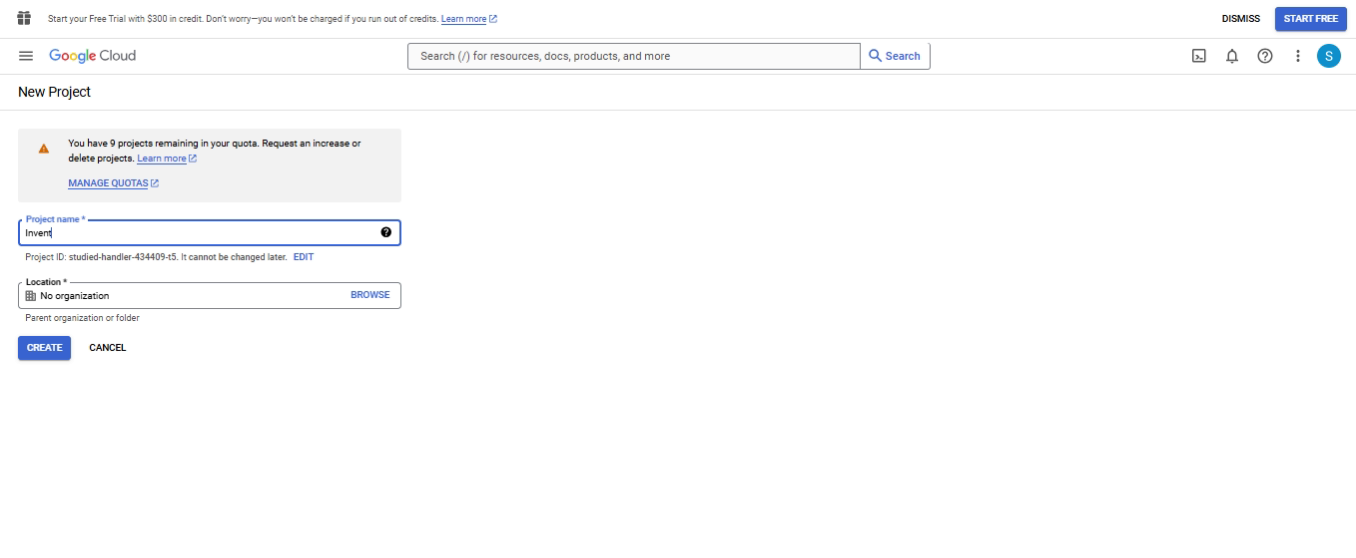
- When you are done, click Create
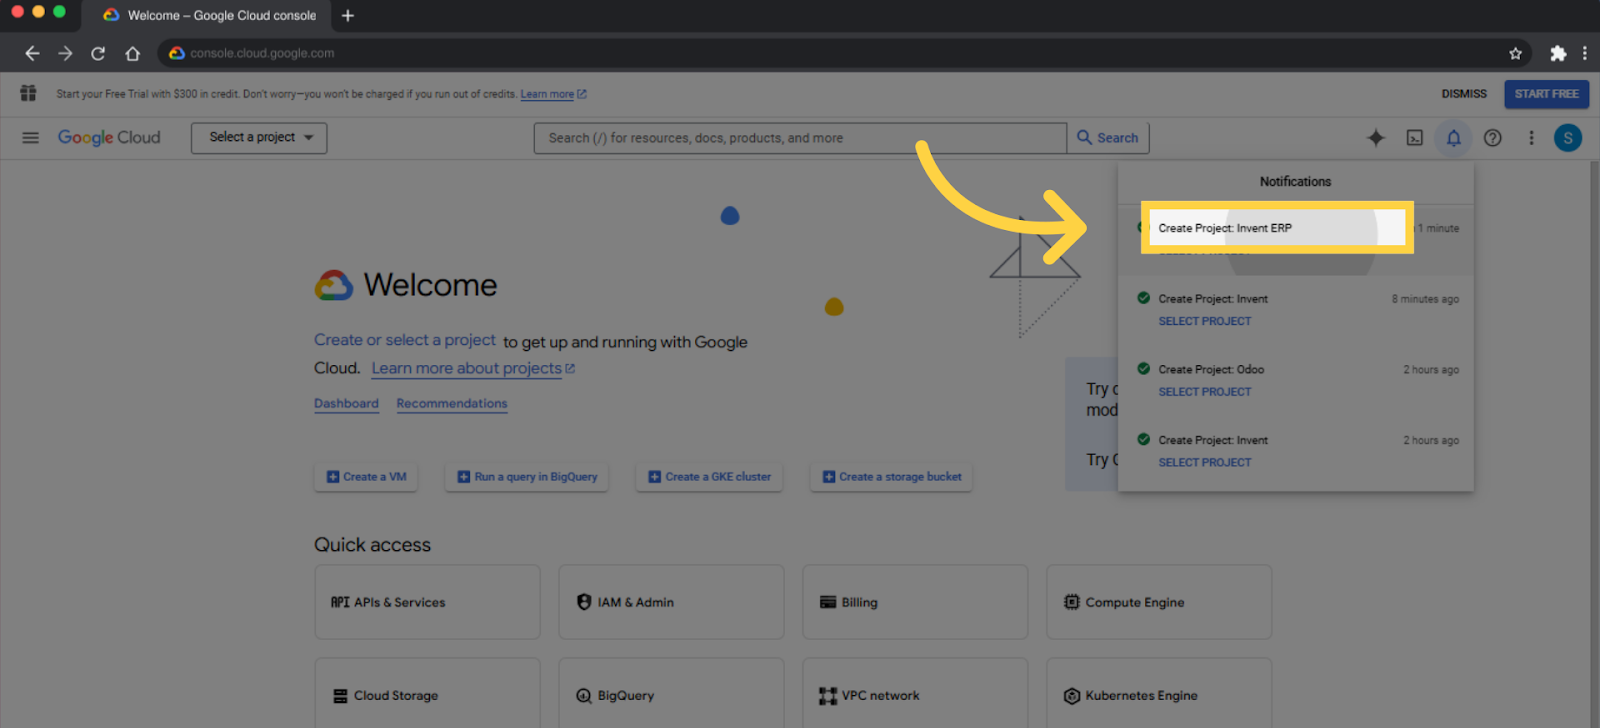
- In Notifications, click Create Project: Invent ERP
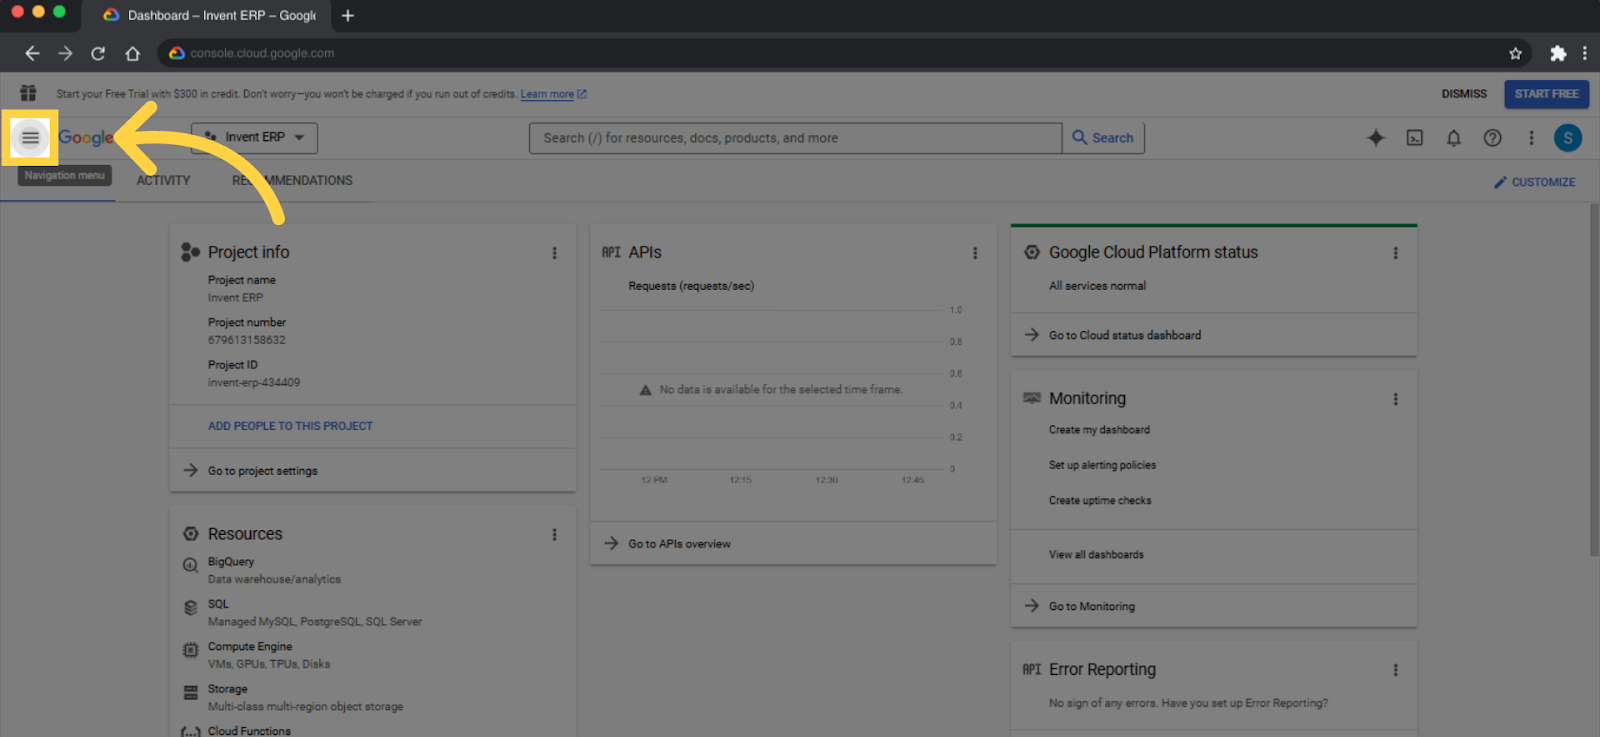
- Click on the Navigation menu (3 horizontal bars) in the top left corner
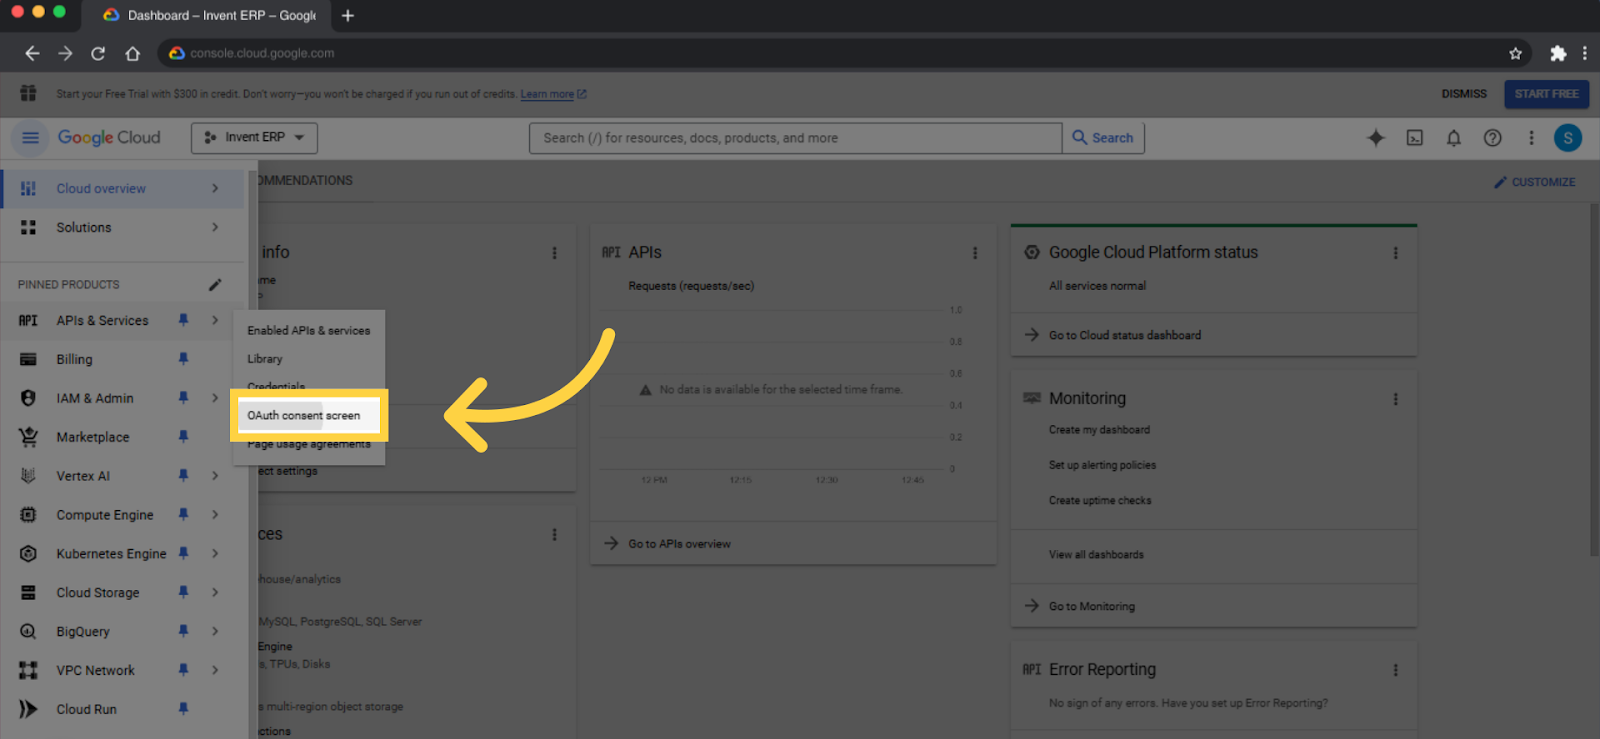
- Click APIs & Services then OAuth consent screen
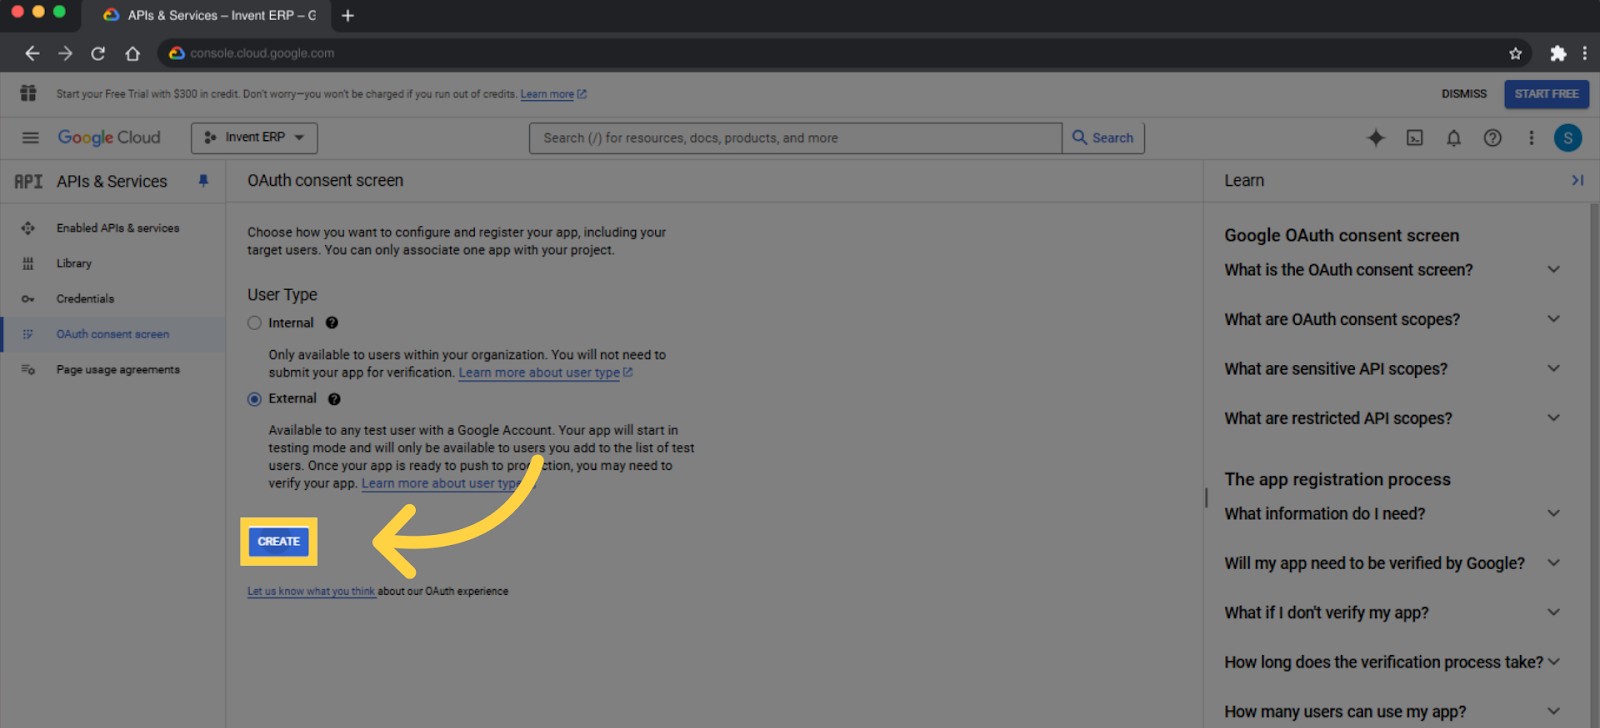
- Choose a User Type, Select Either Internal or External.
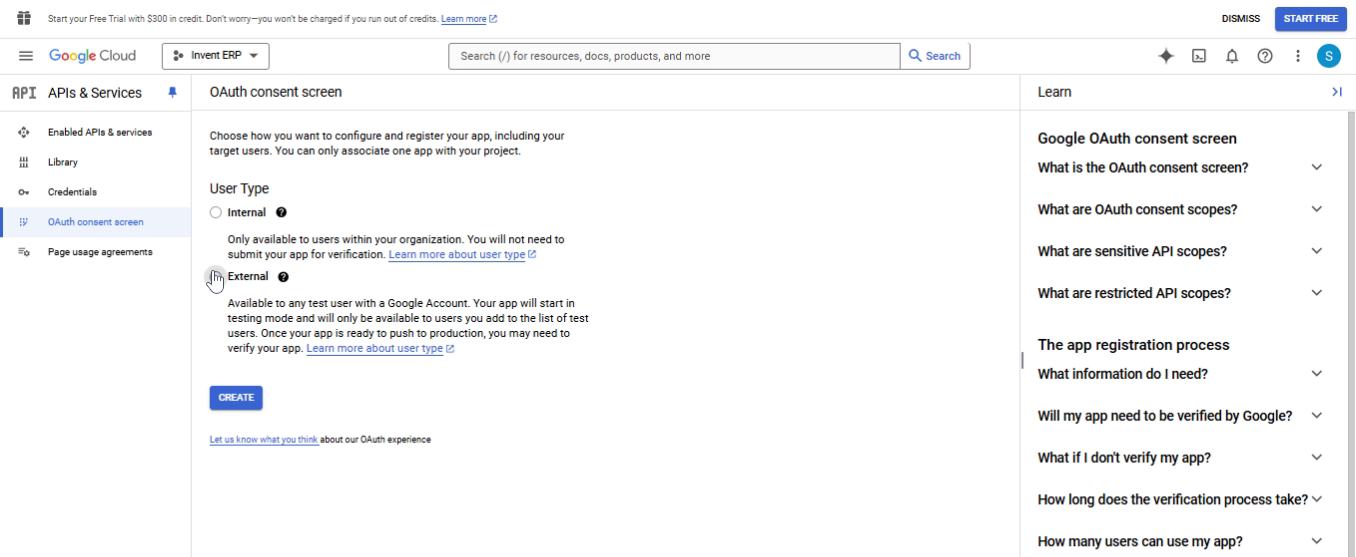
- After that, press Create
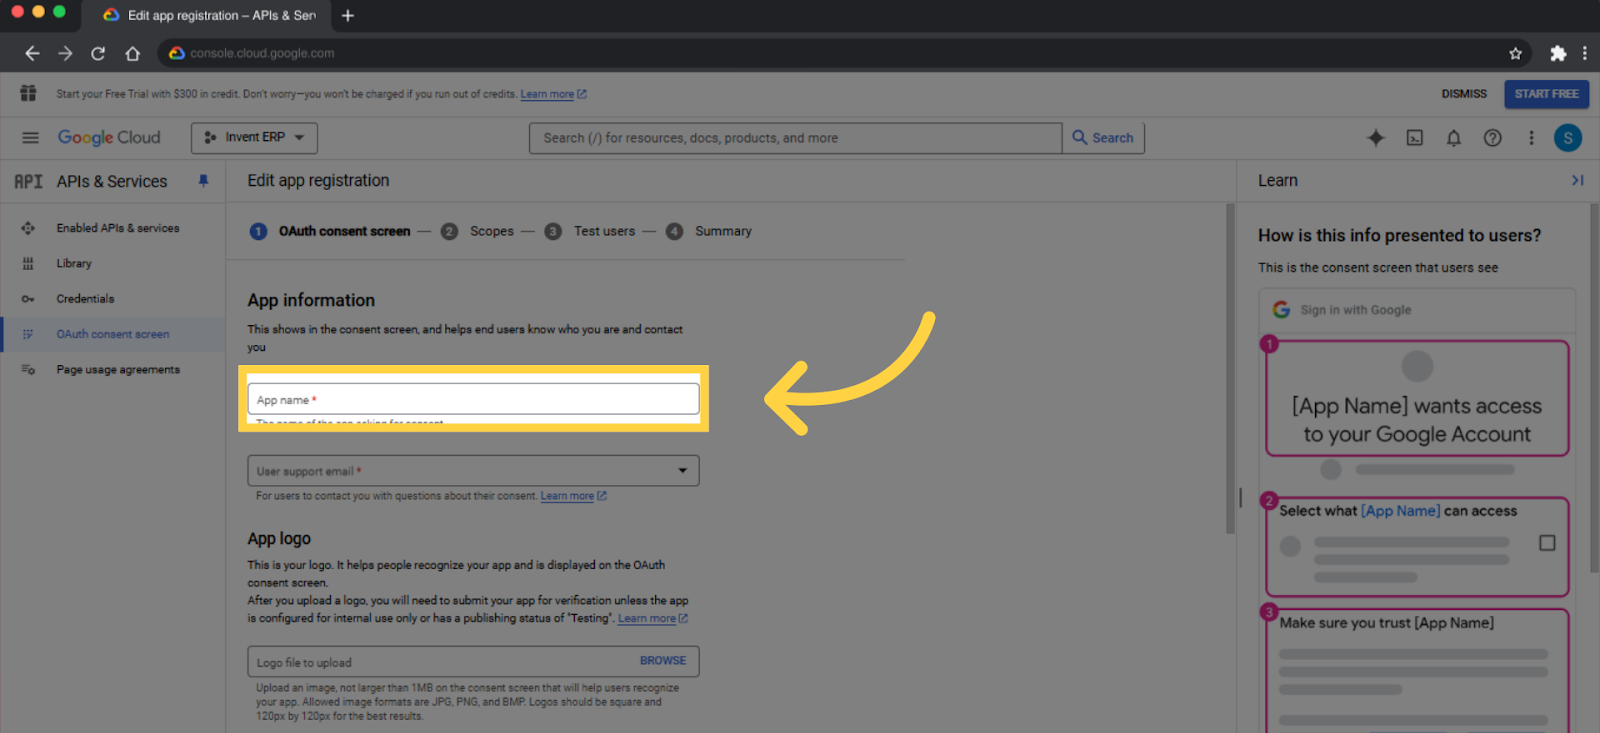
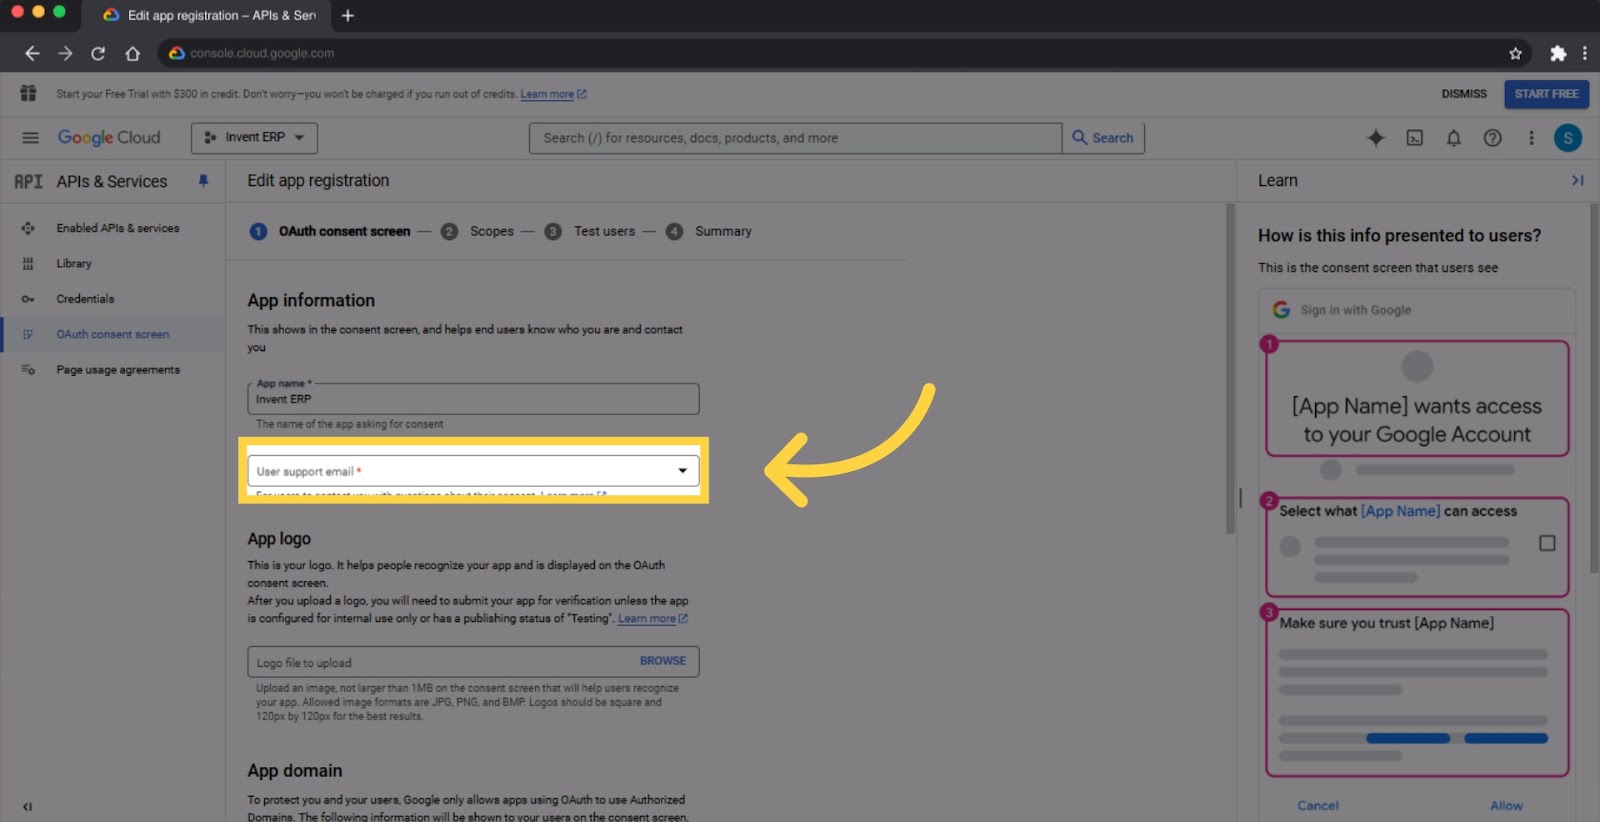
- Fill the App Name field under App Information
- Fill the User support email field under App Information
- Click Add Domain
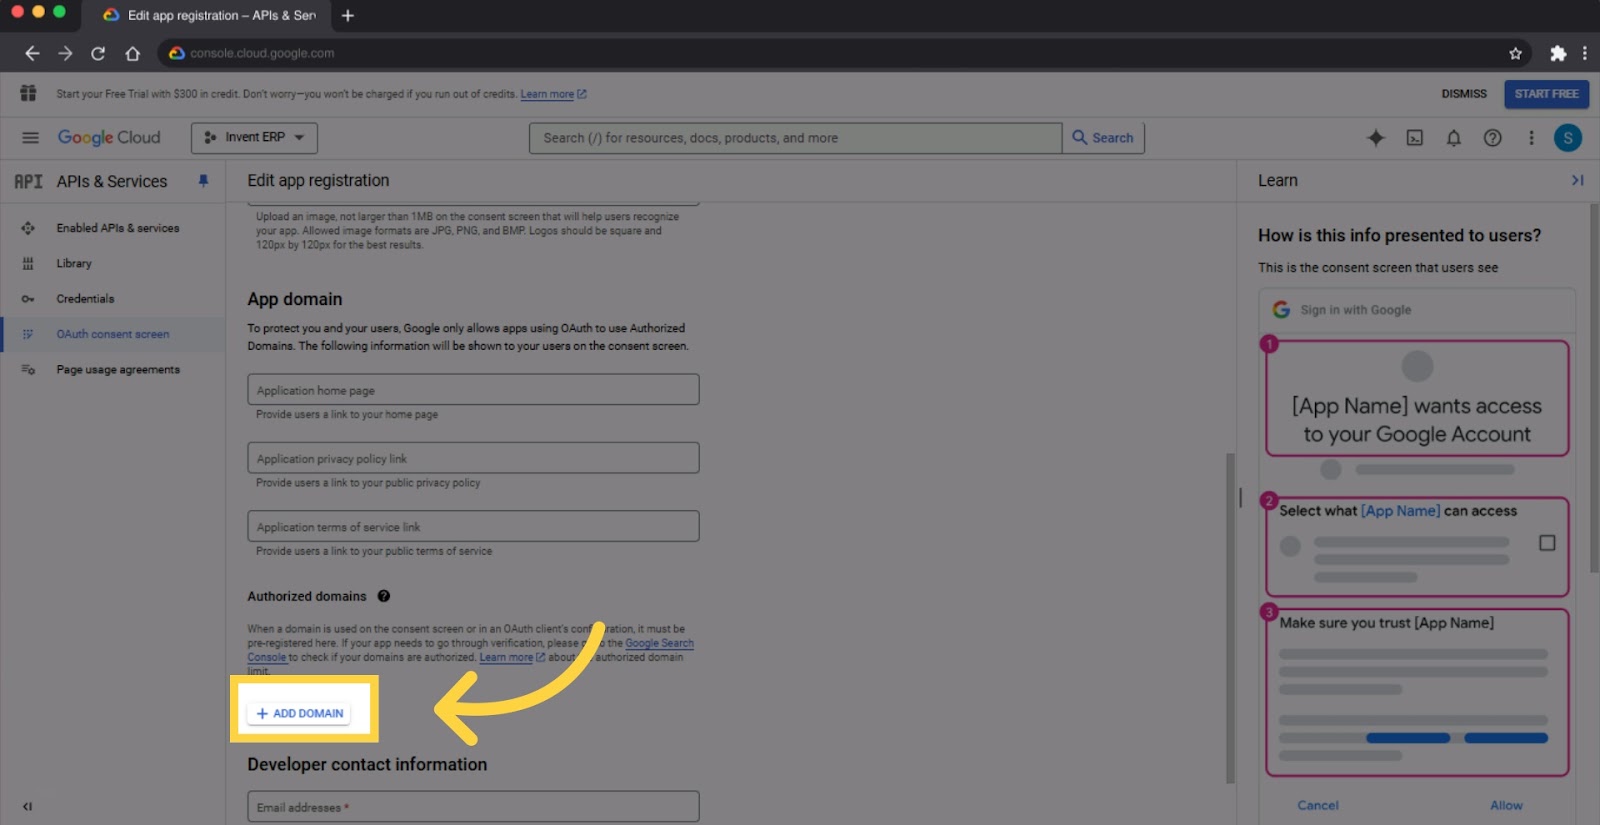
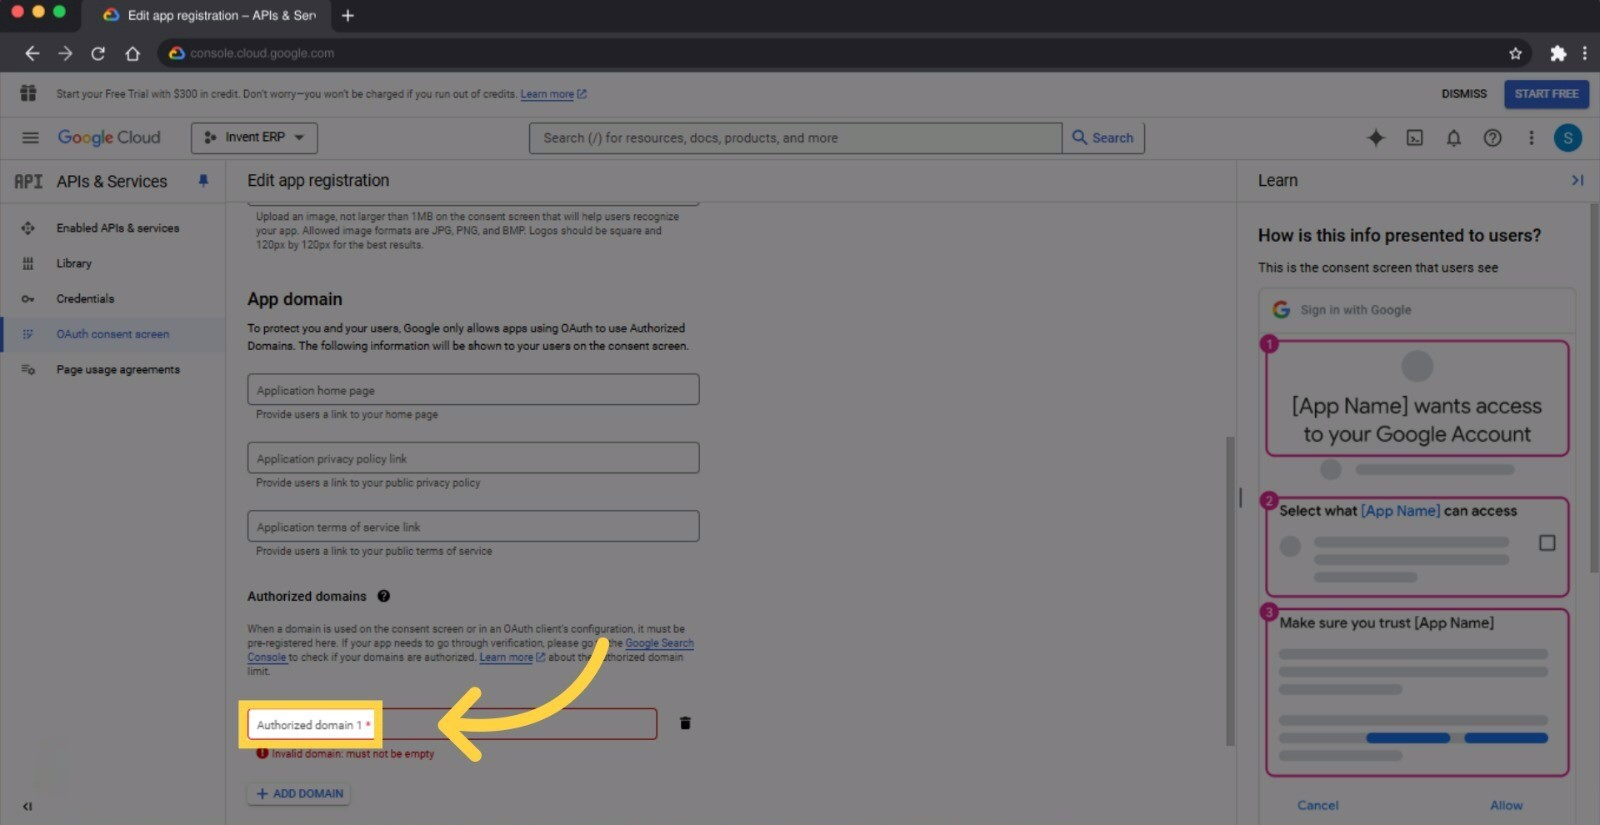
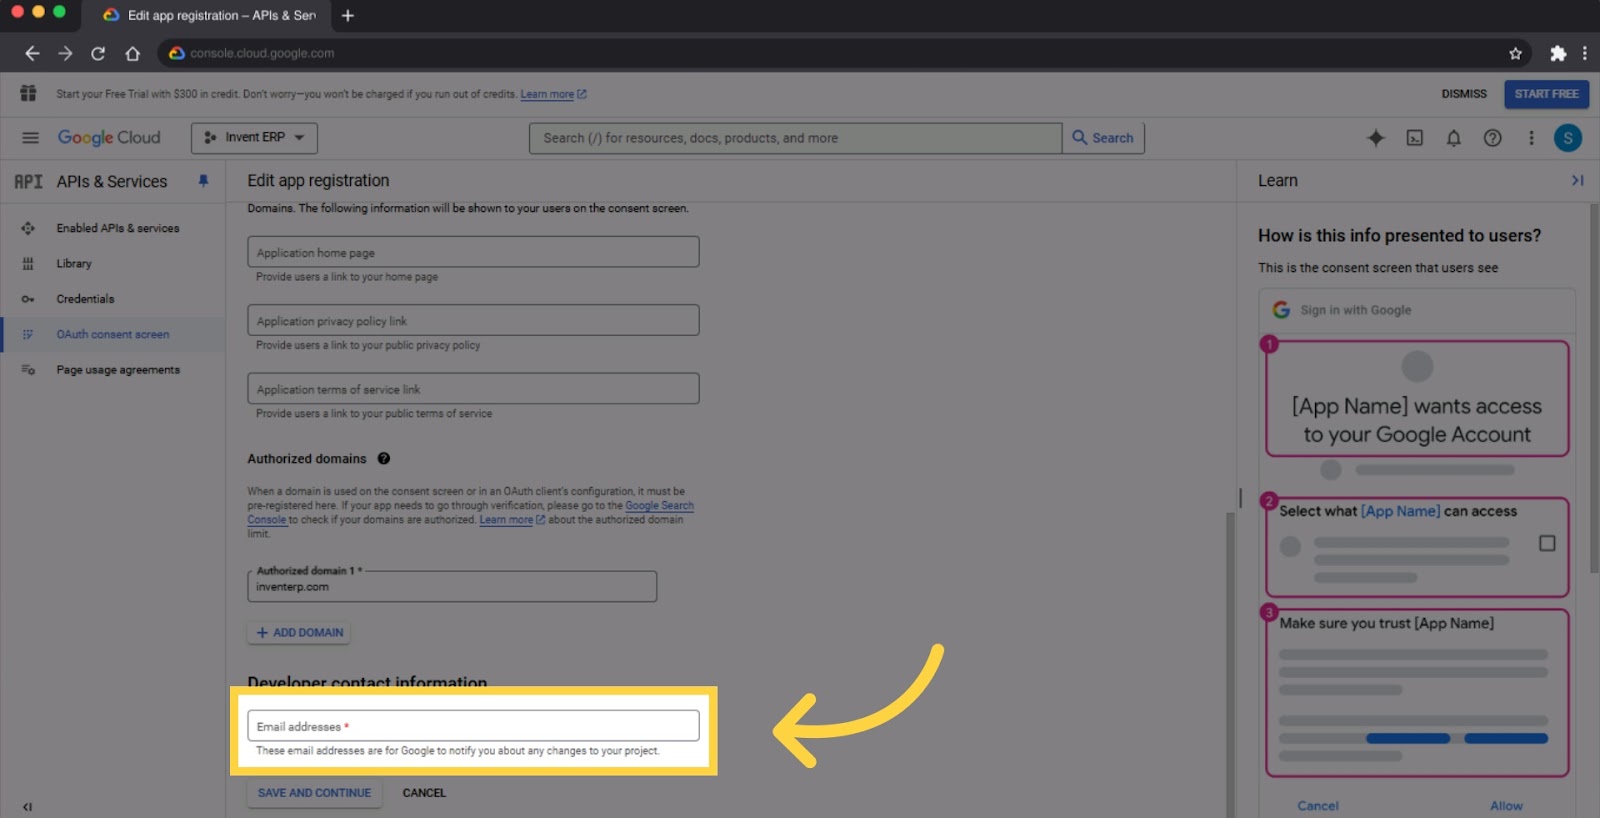
- Click Authorized domain 1 and enter a domain for example Invent ERP’s website
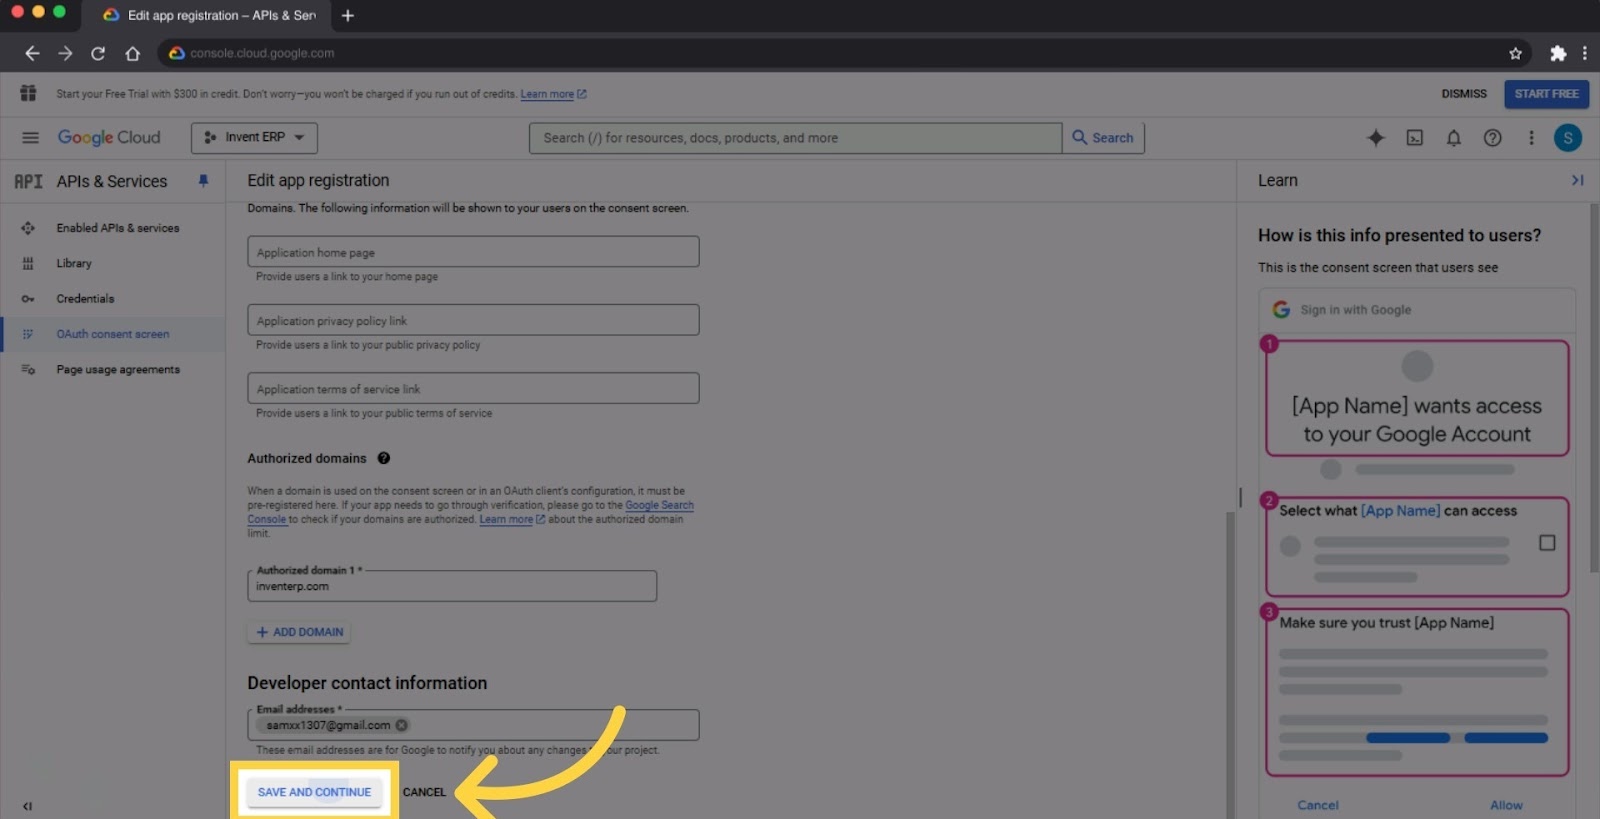
- Press on Email addresses
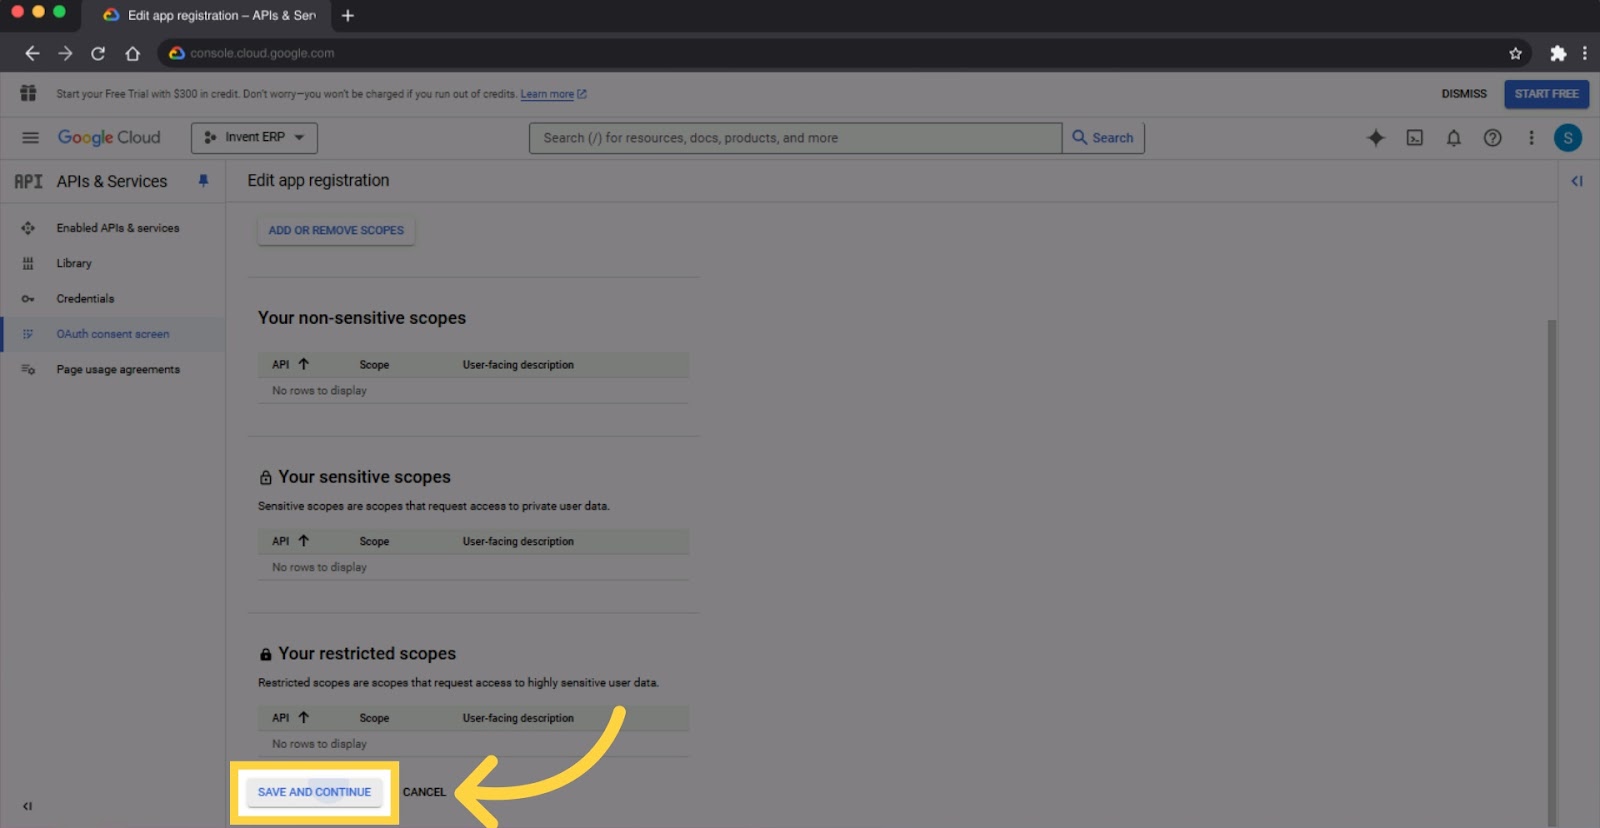
- After that, click on Save and Continue
- Press on Save and Continue again
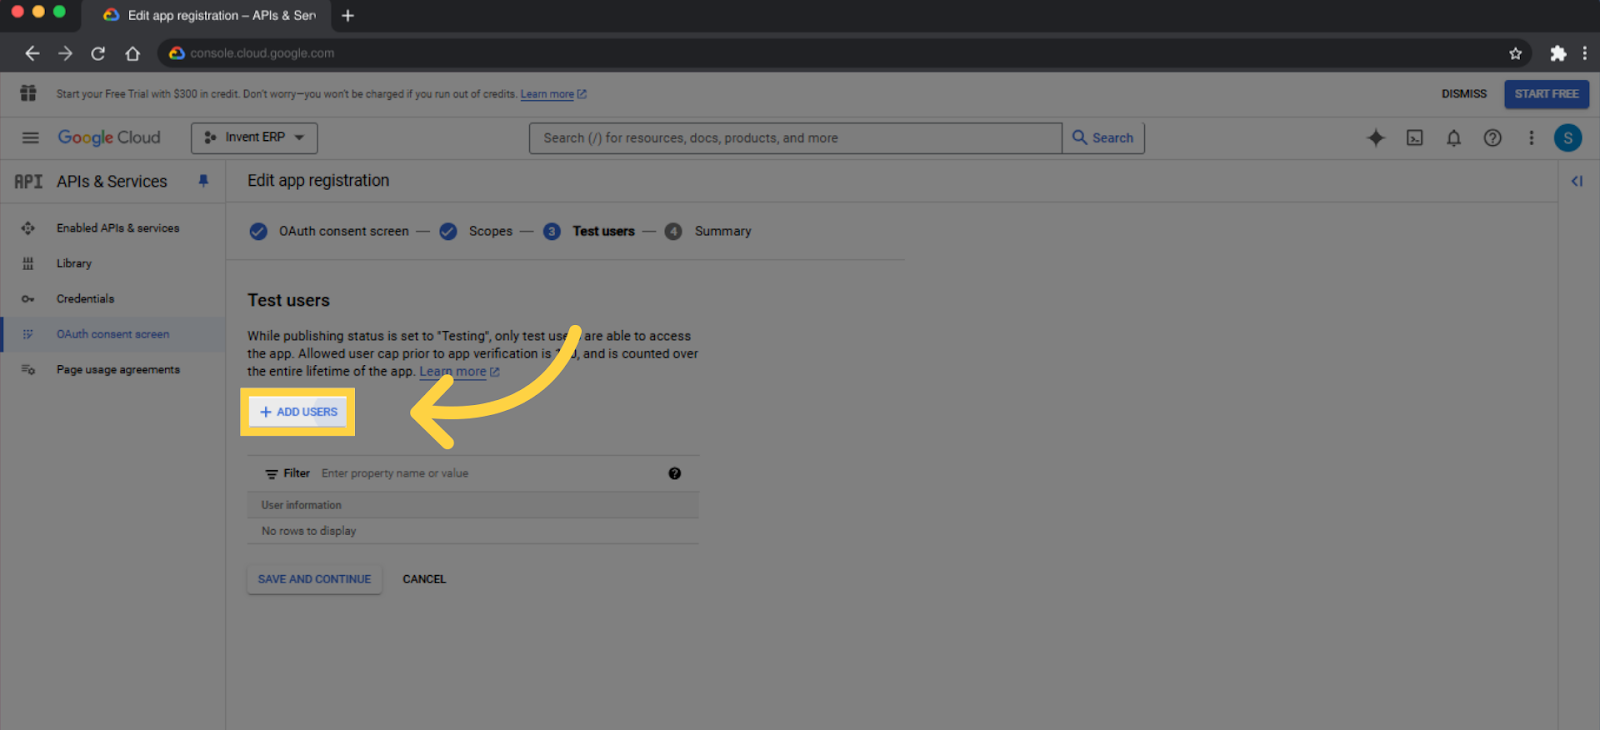
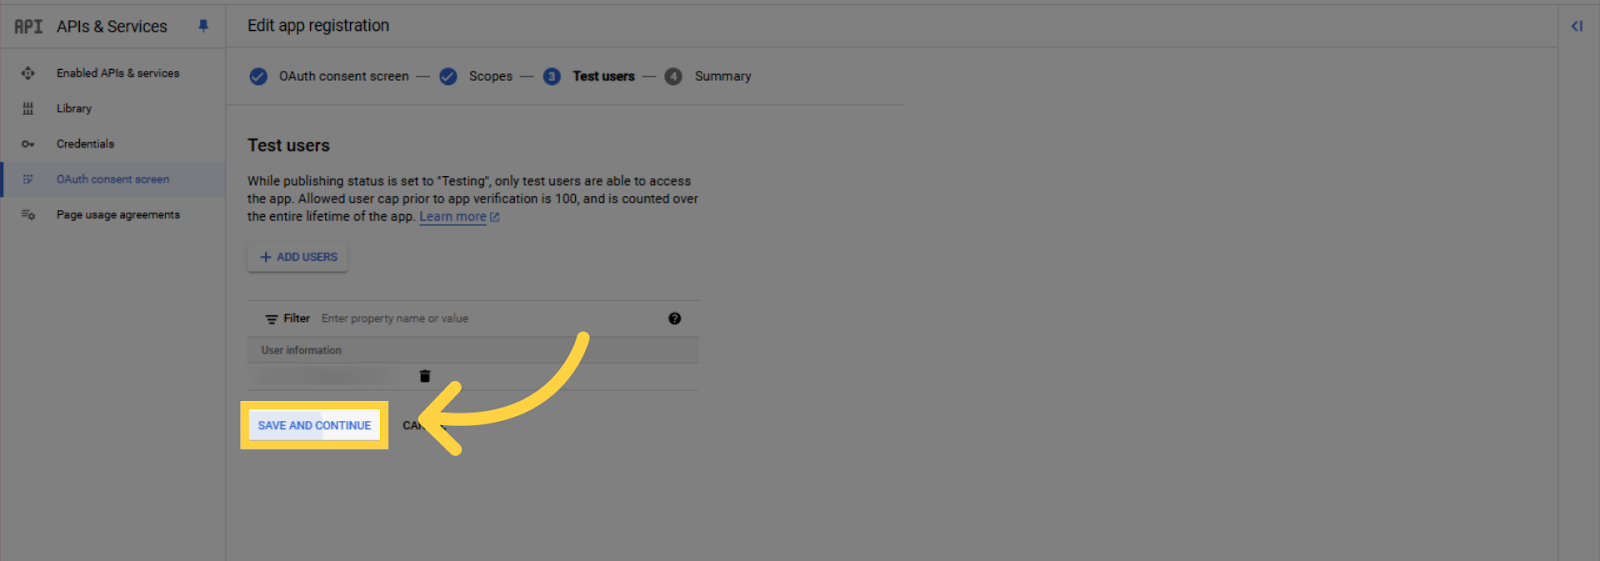
- If you chose the External under User Type then you will continue to Test Users. Click Add users
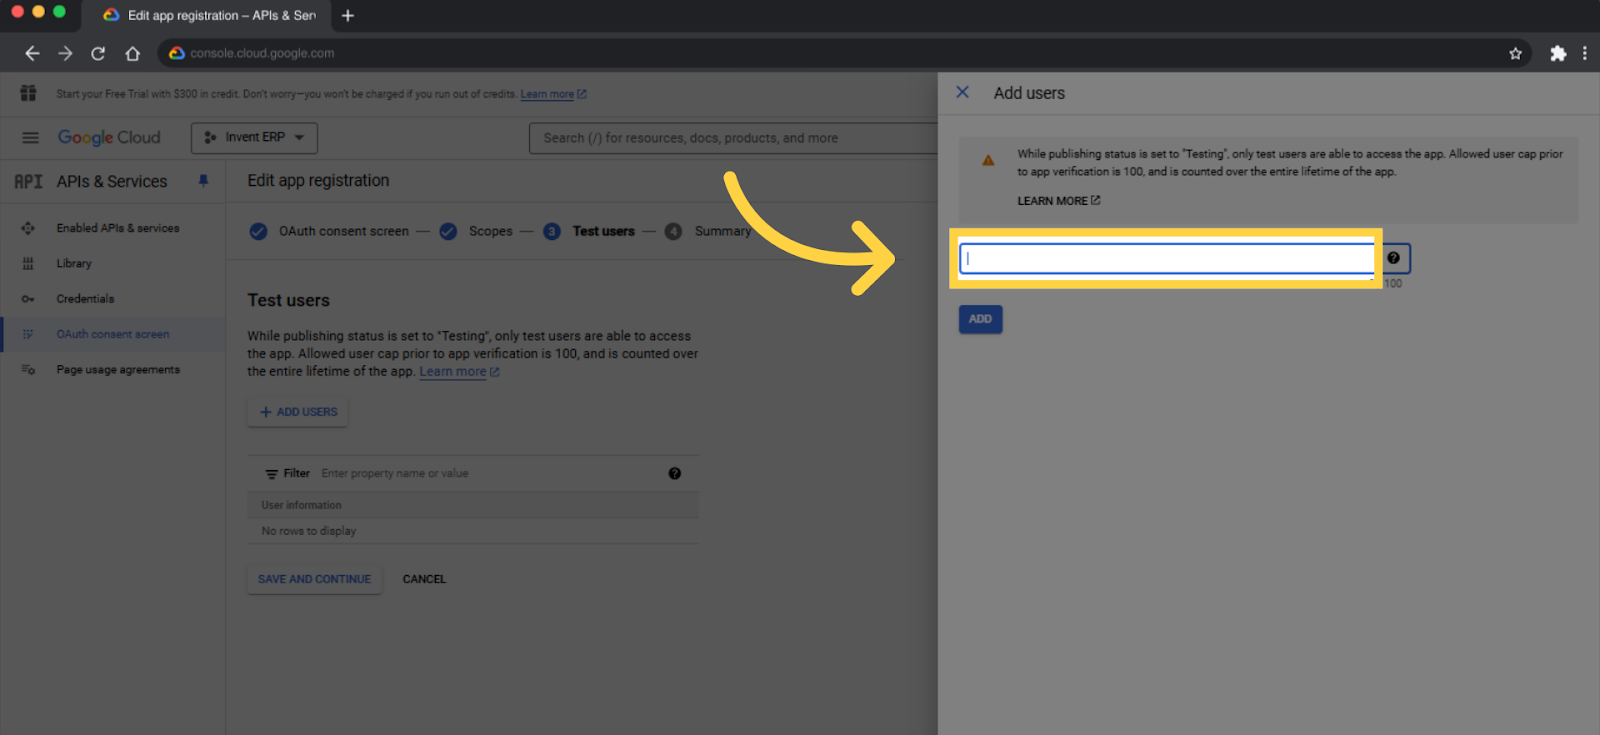
- Fill in the blank under Add Users
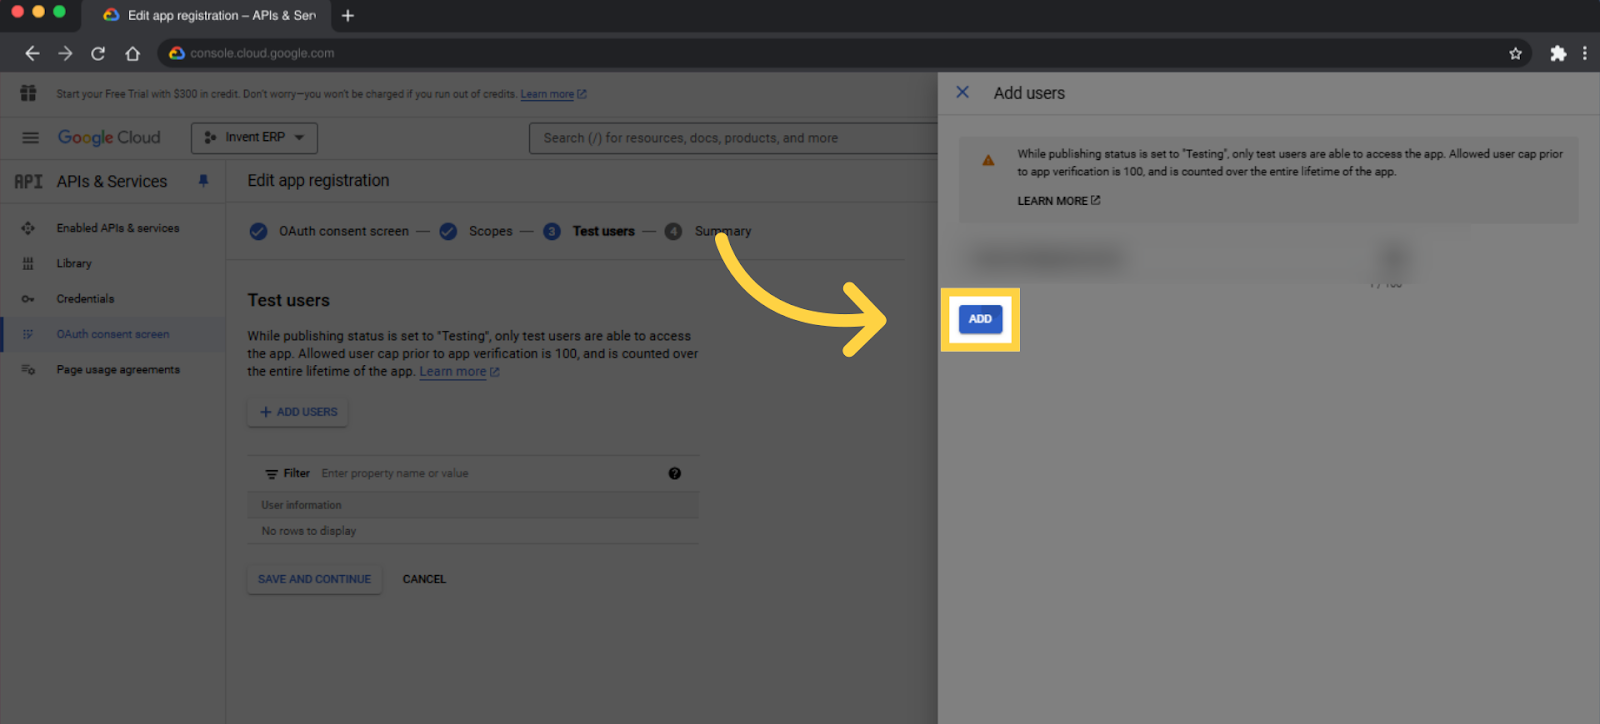
- Then click Add
- Click Save and continue
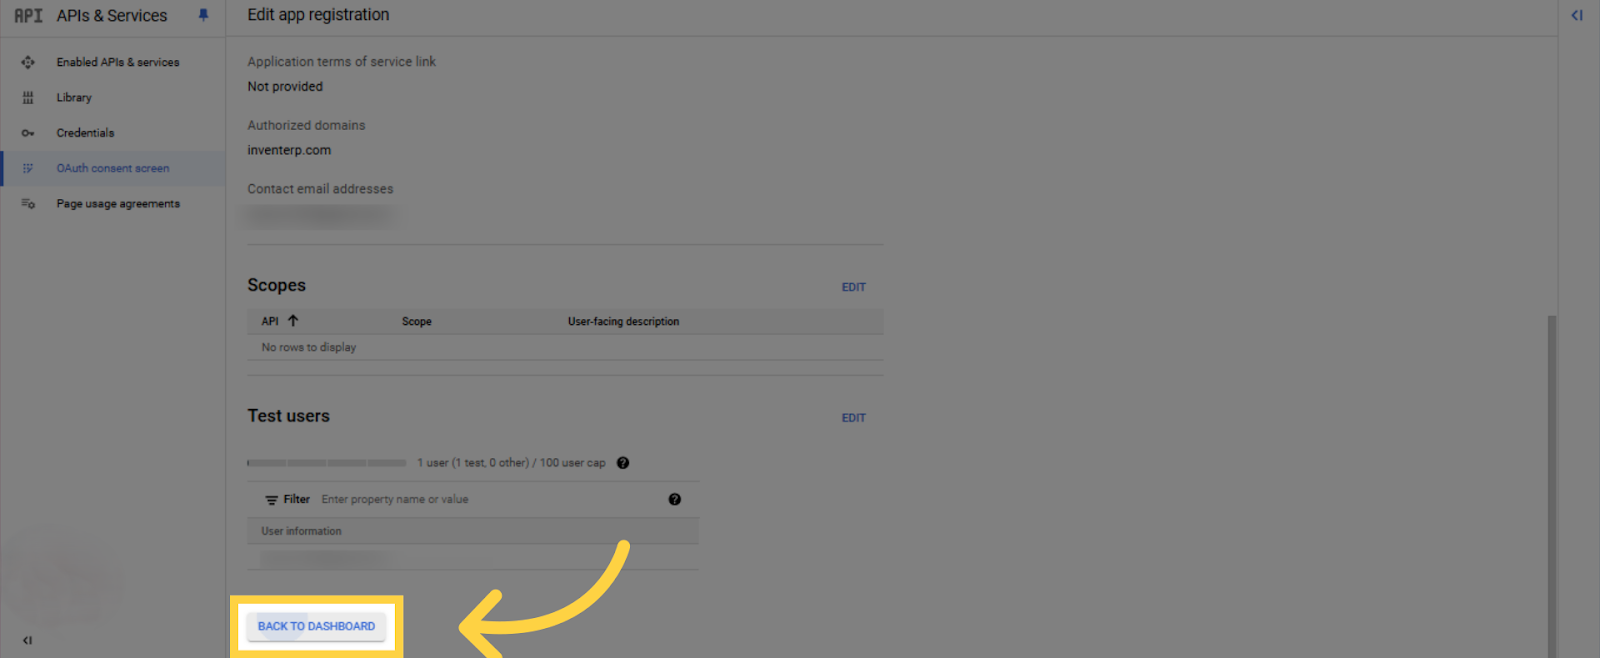
- Select Back to dashboard
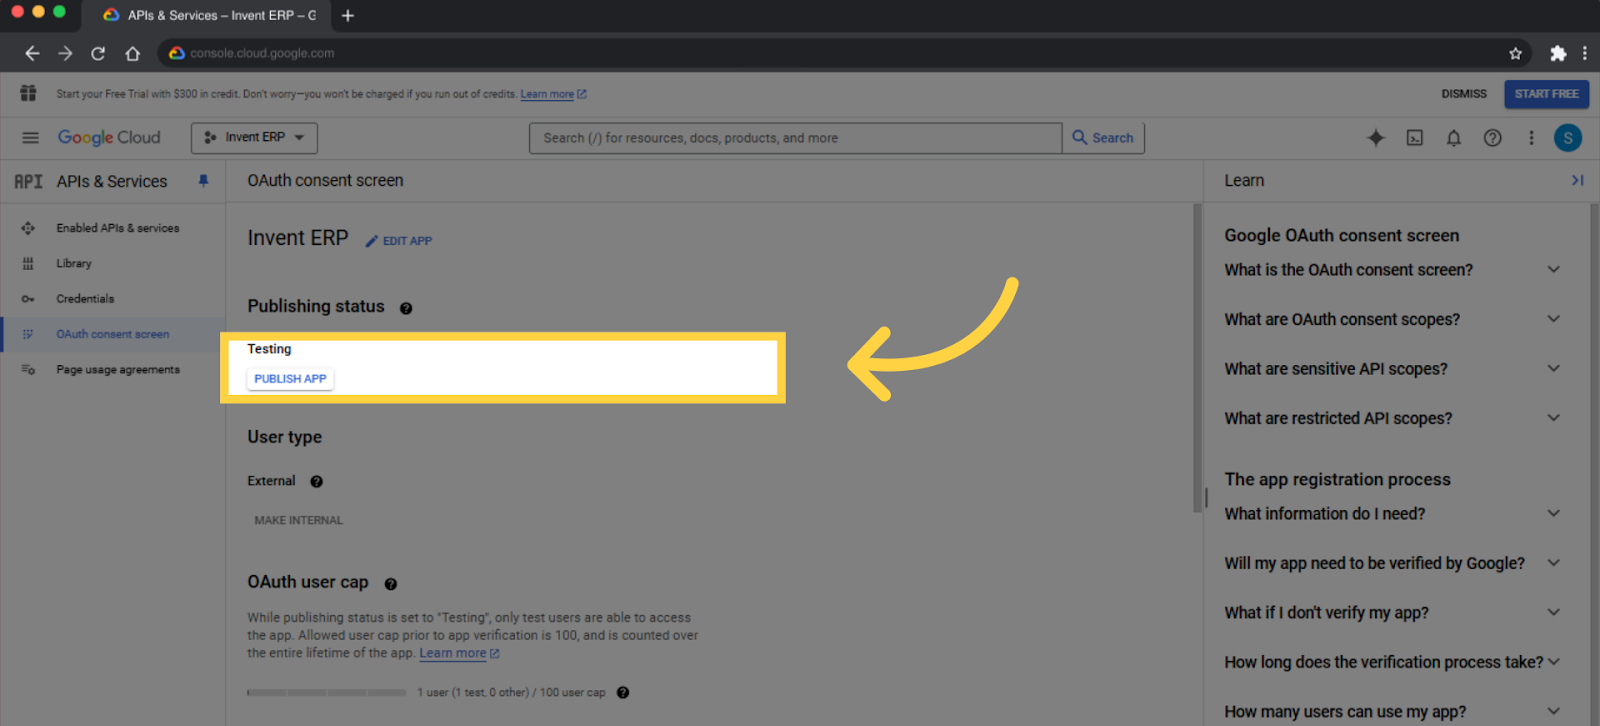
- When you are all done, simply press Publish App
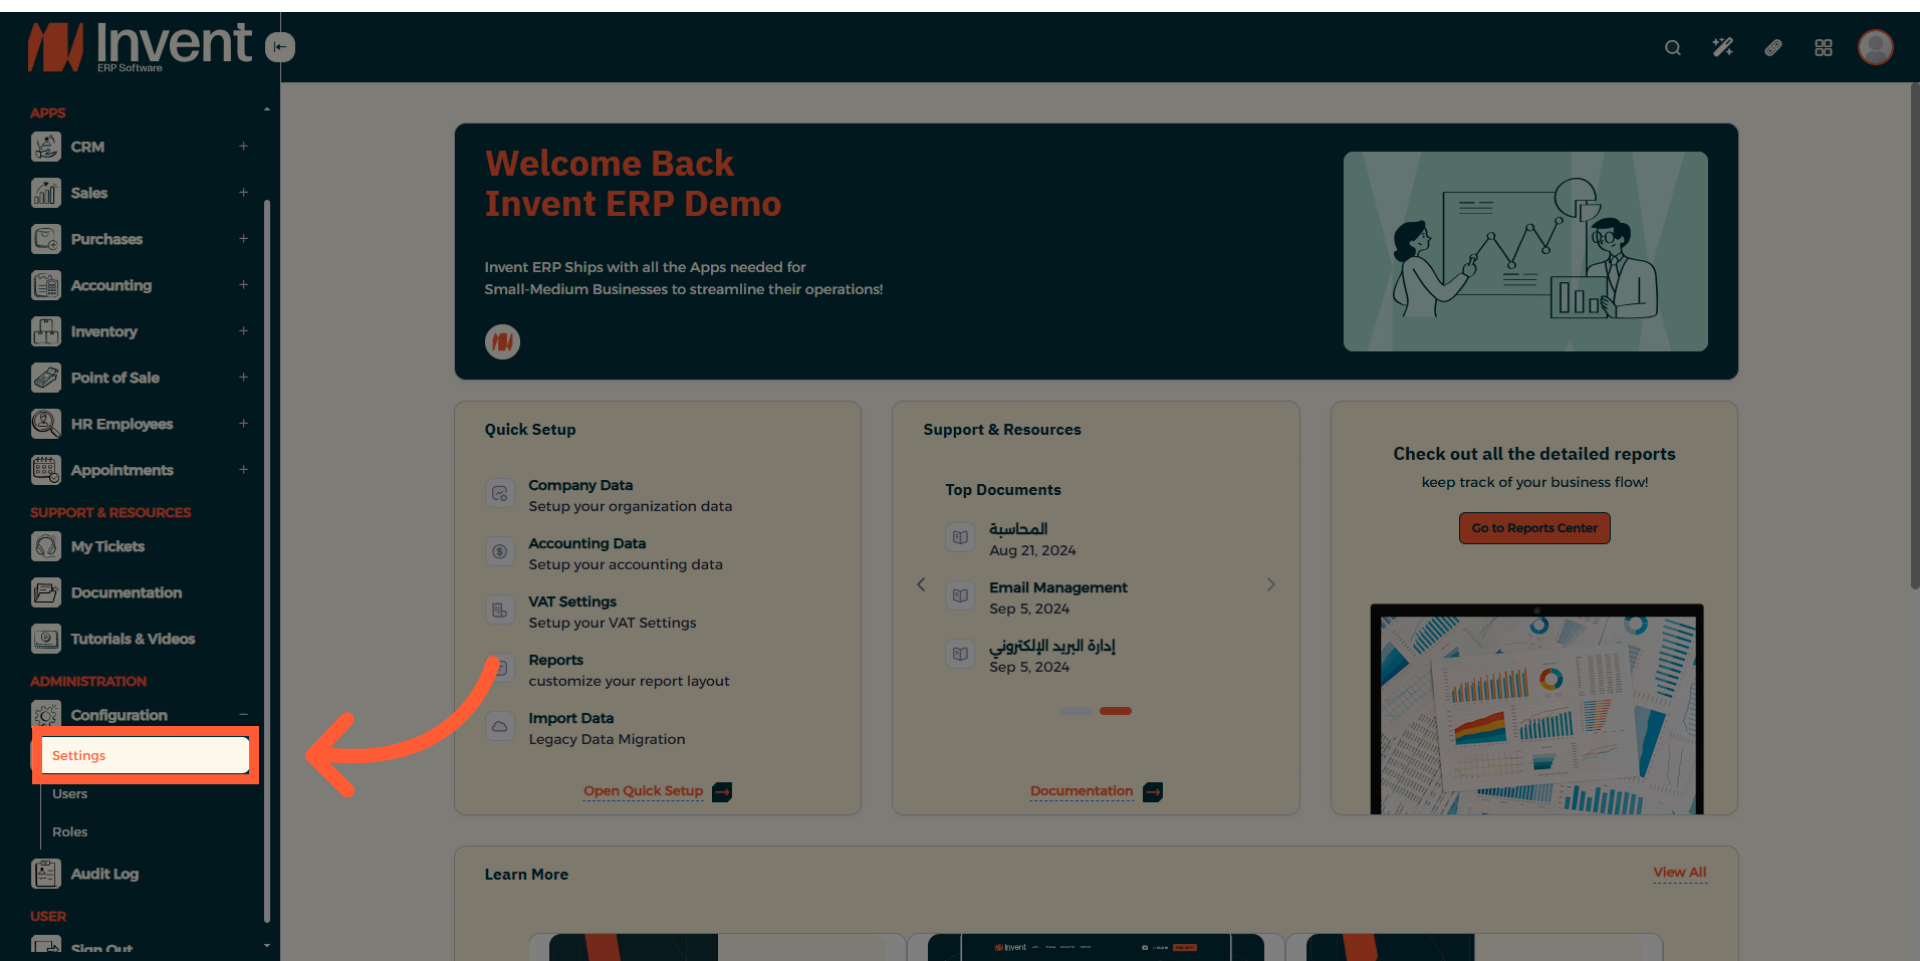
Navigate to Invent ERP
- Using the left sidebar menu, under Configuration select Settings
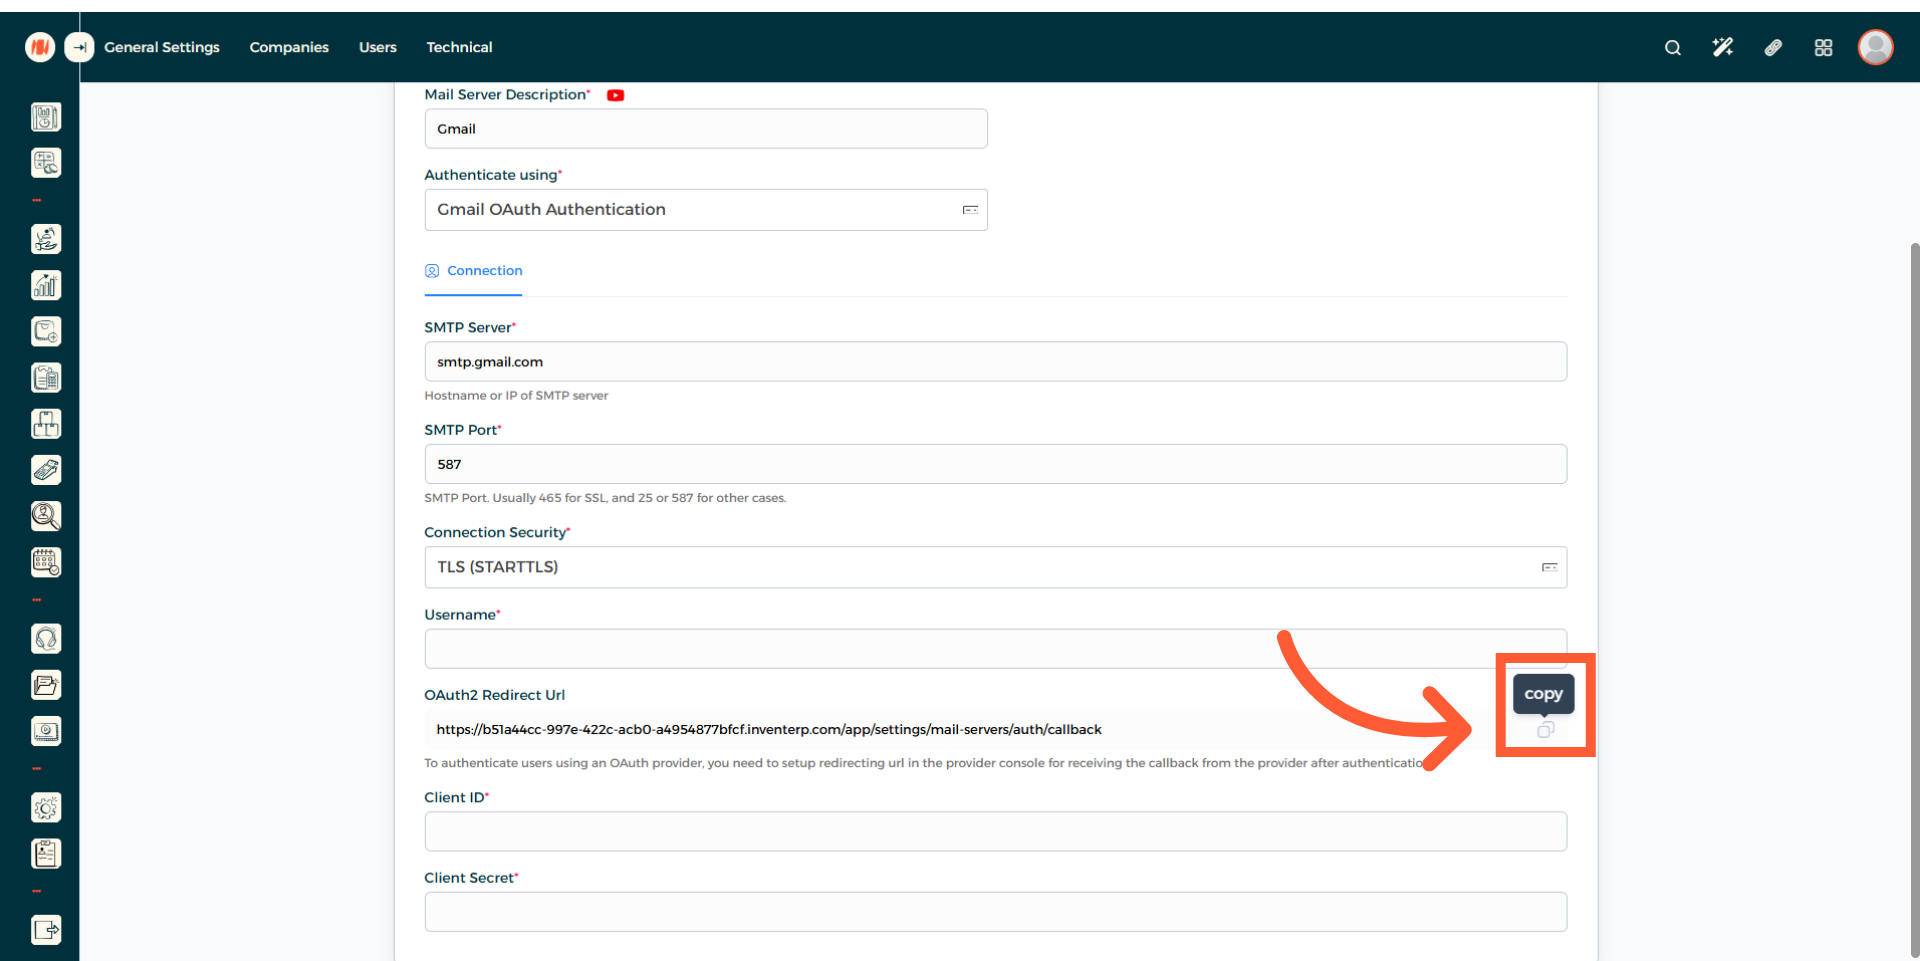
- Then click on Technical then choose Mail Server then Mail Servers.
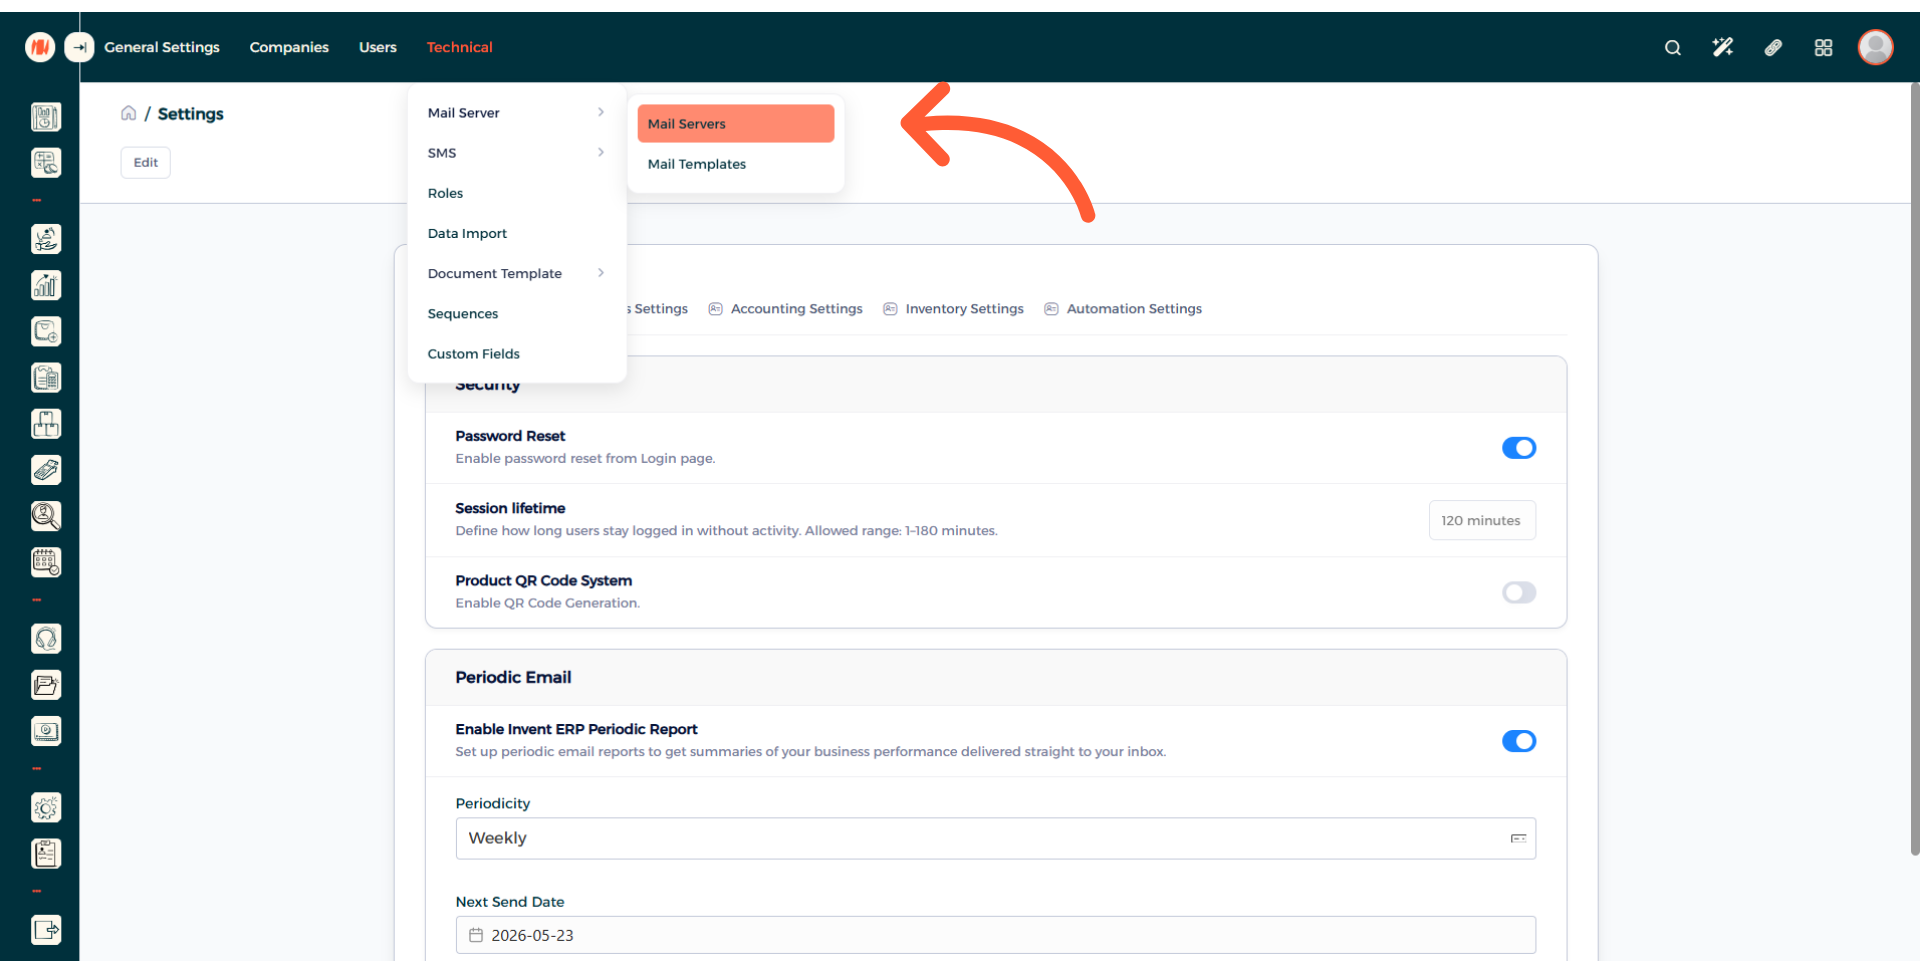
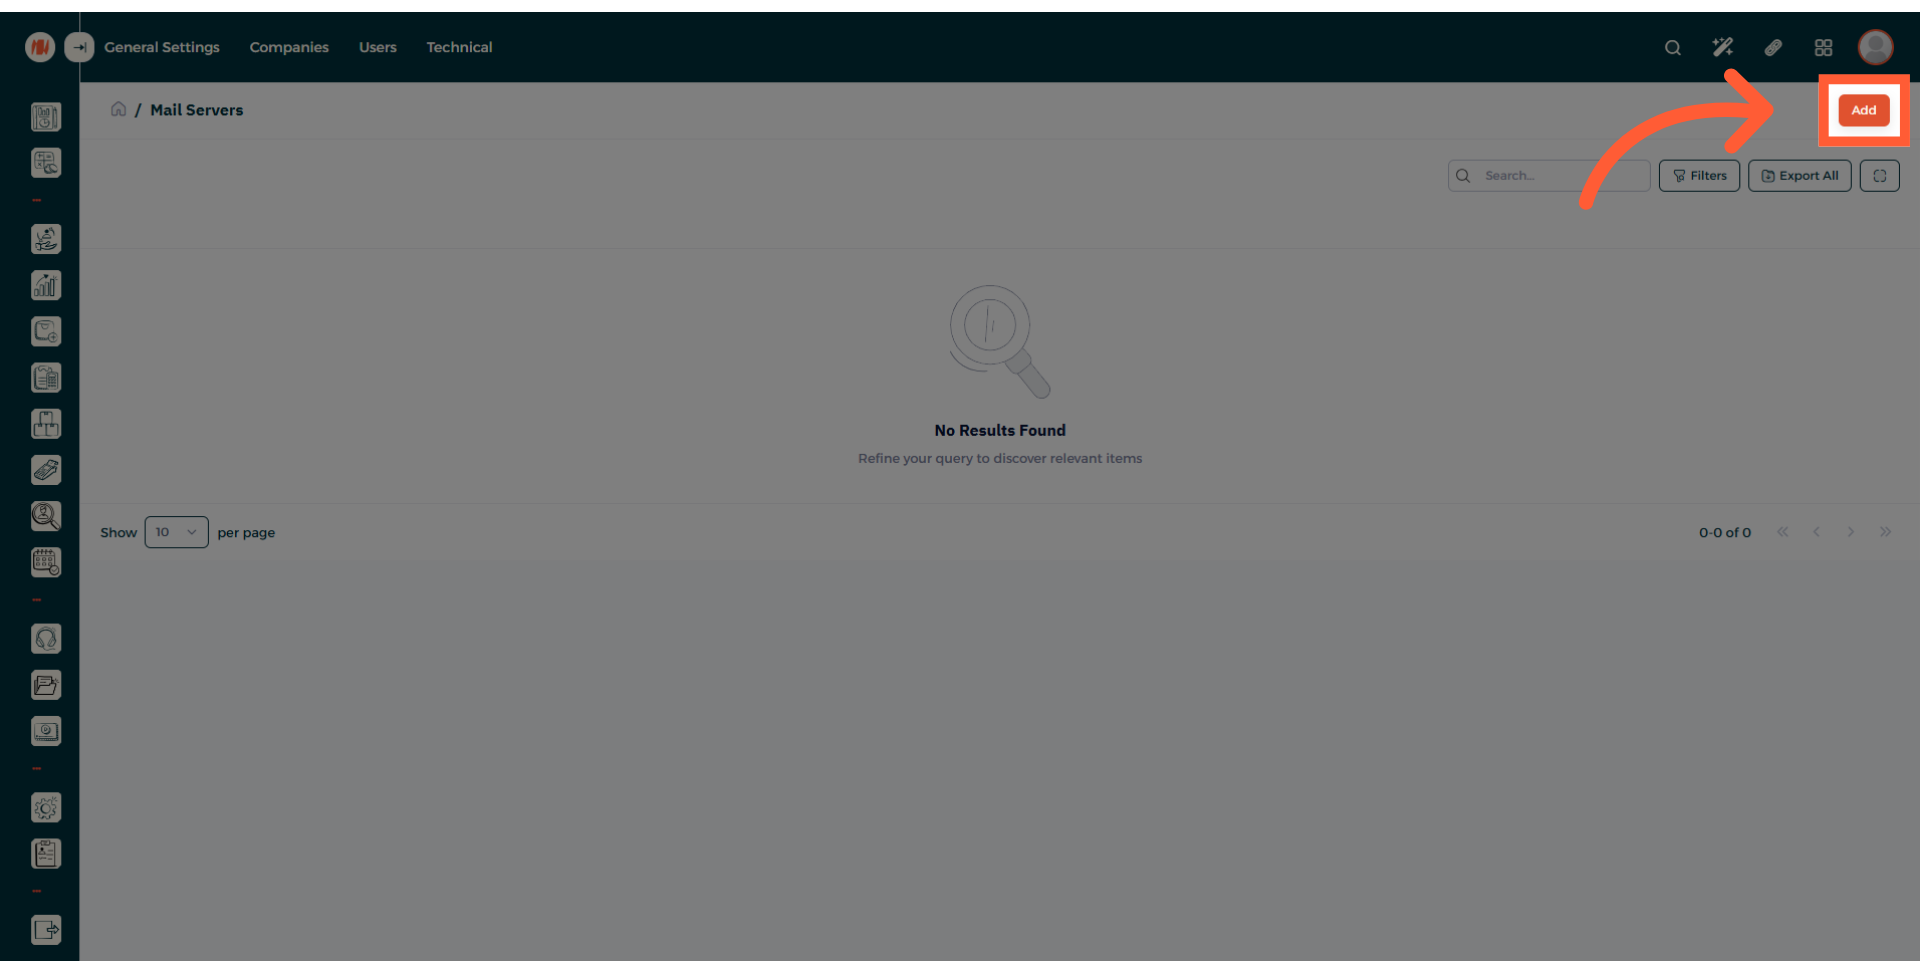
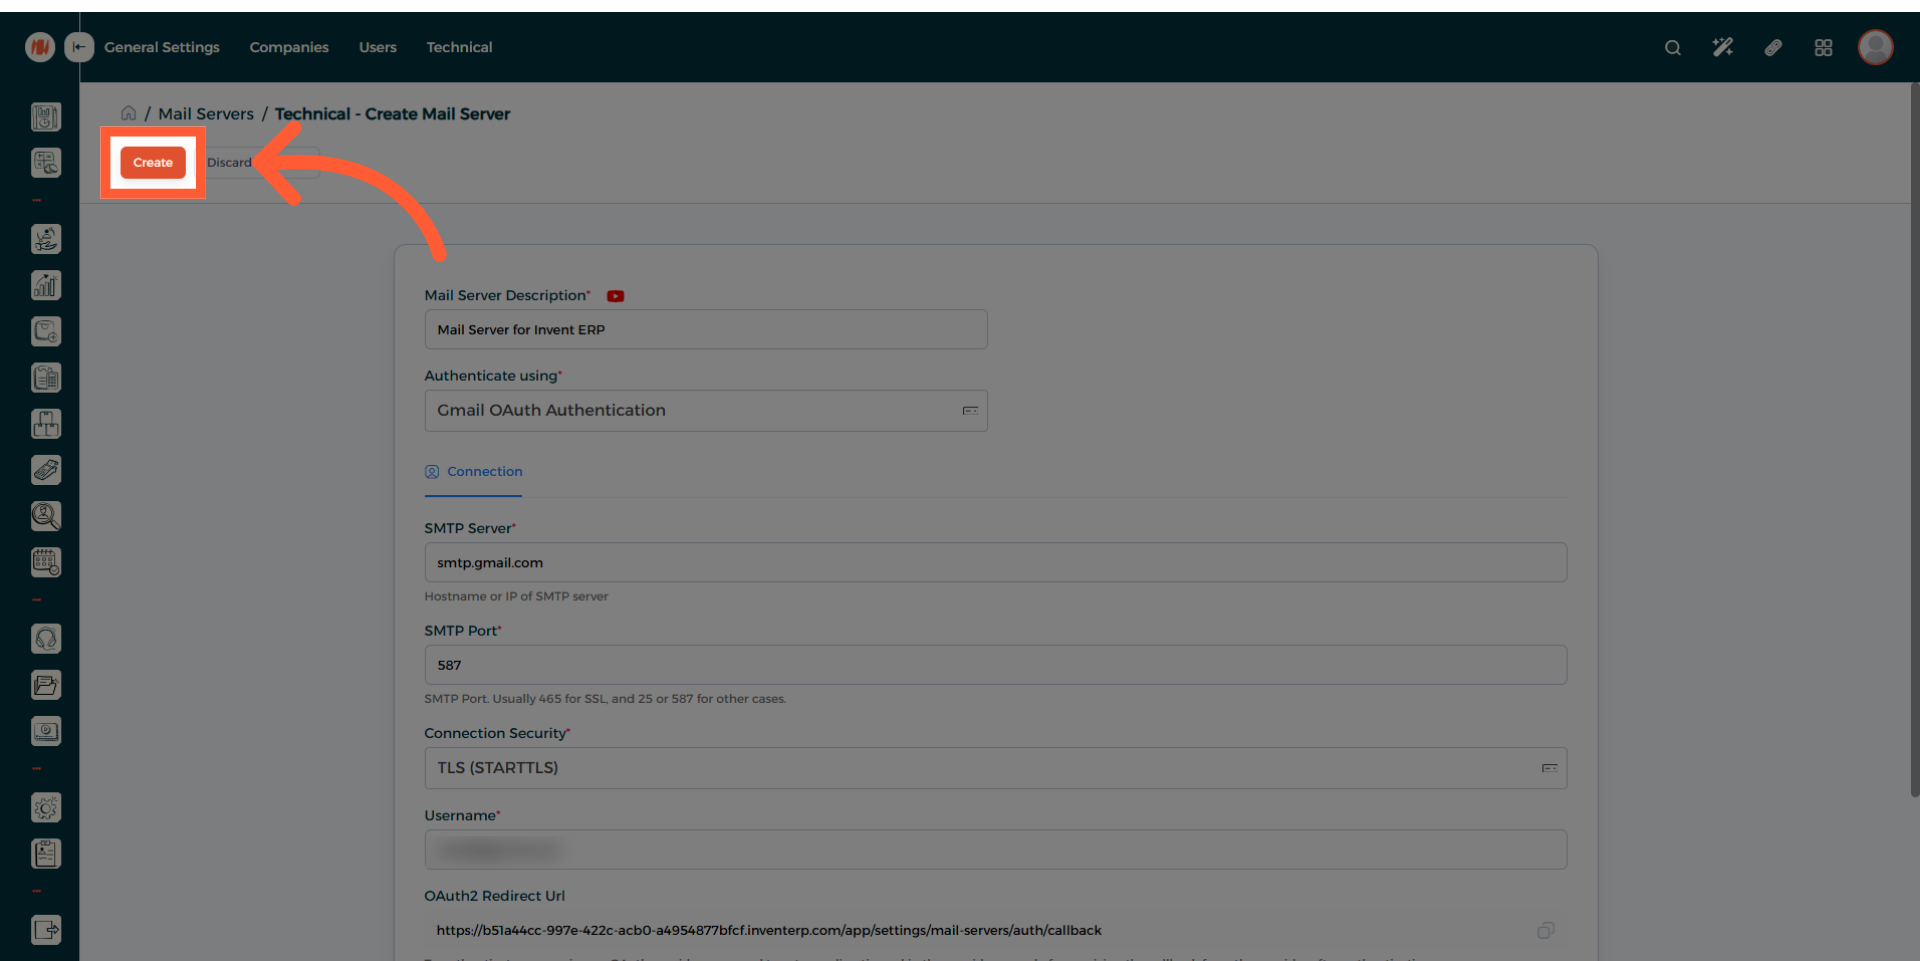
- Press Add in the top right corner
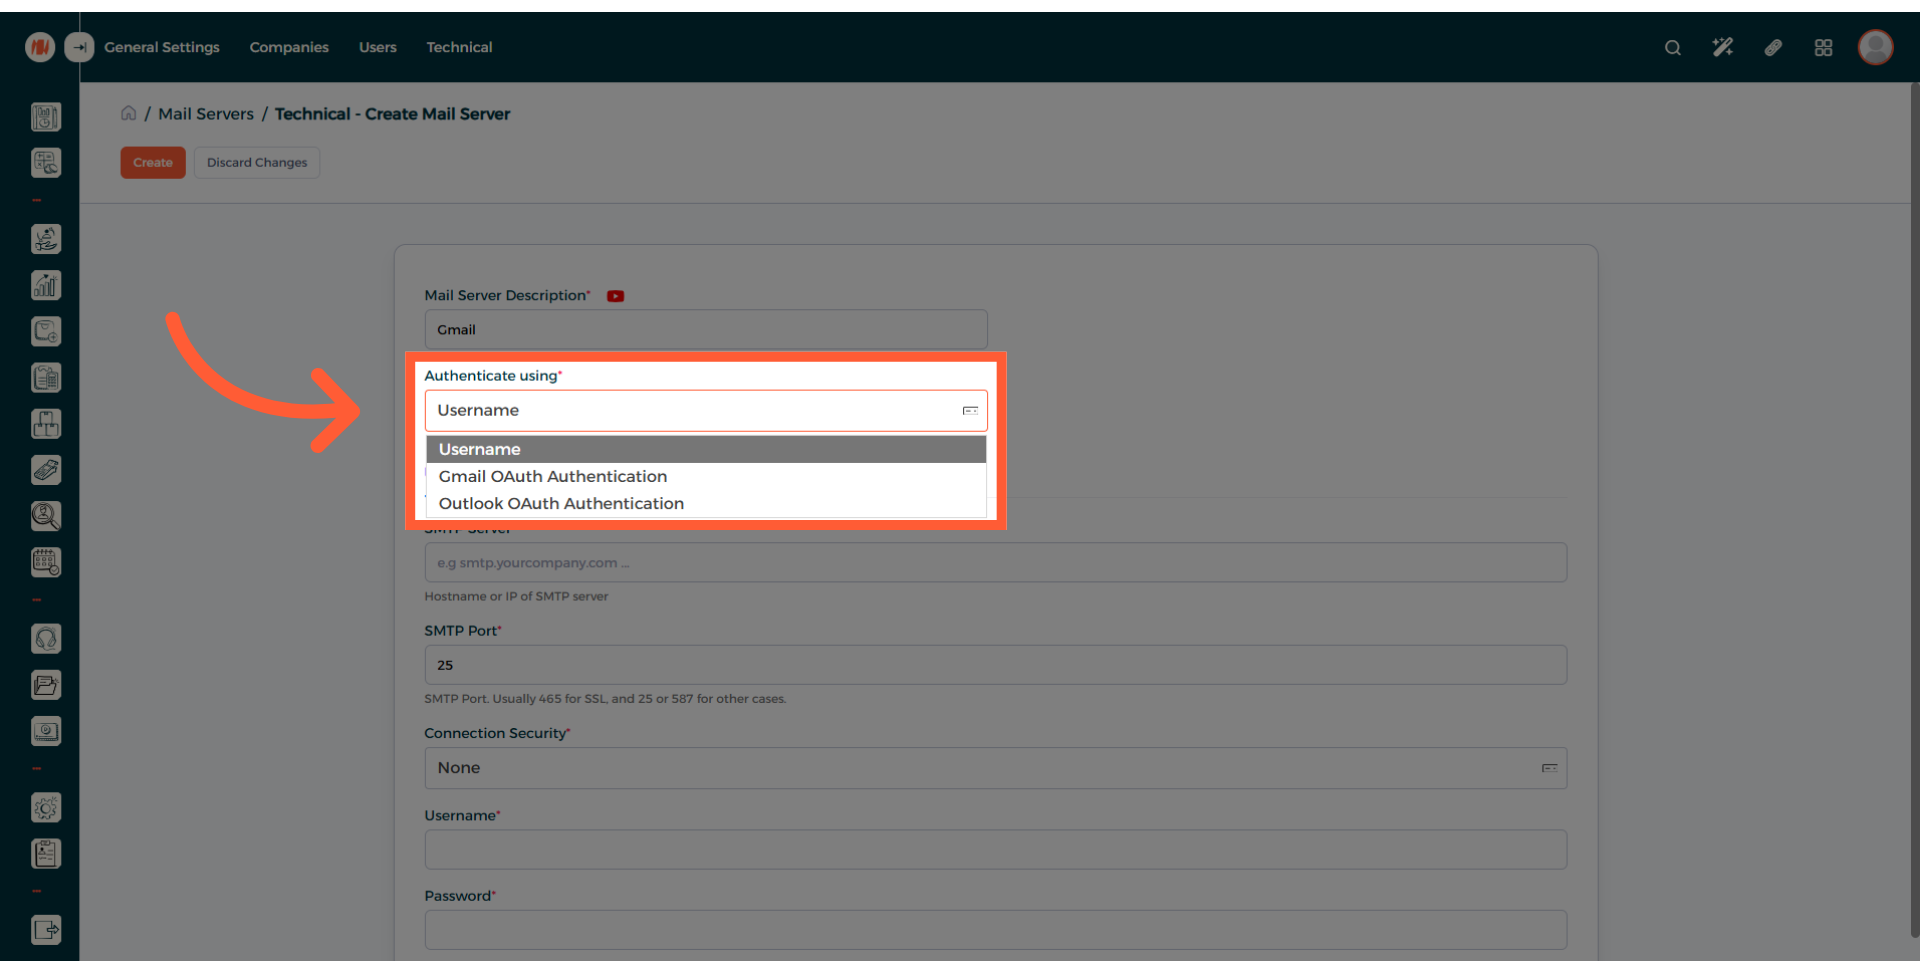
- Fill in the Mail Server Description field
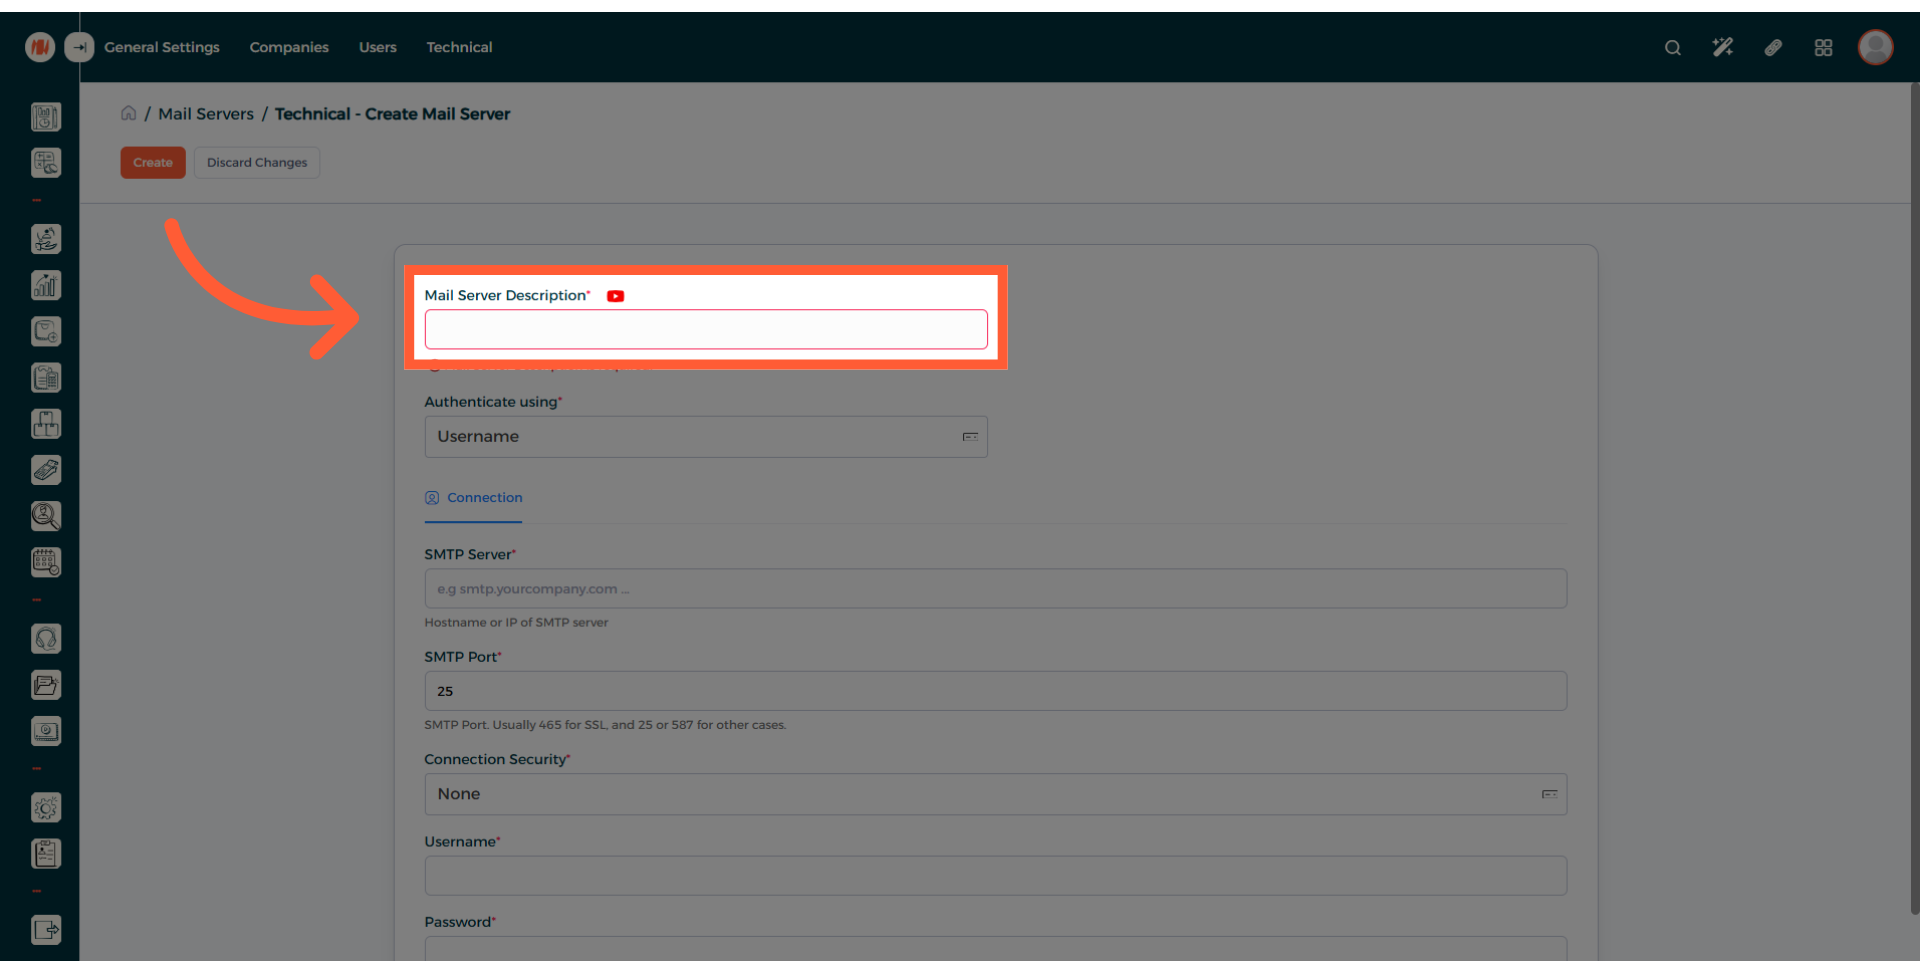
- Choose Gmail OAuth Authentication in the Authenticate Using drop-down menu
- Click on Copy
- Navigate to (console.cloud.google.com)
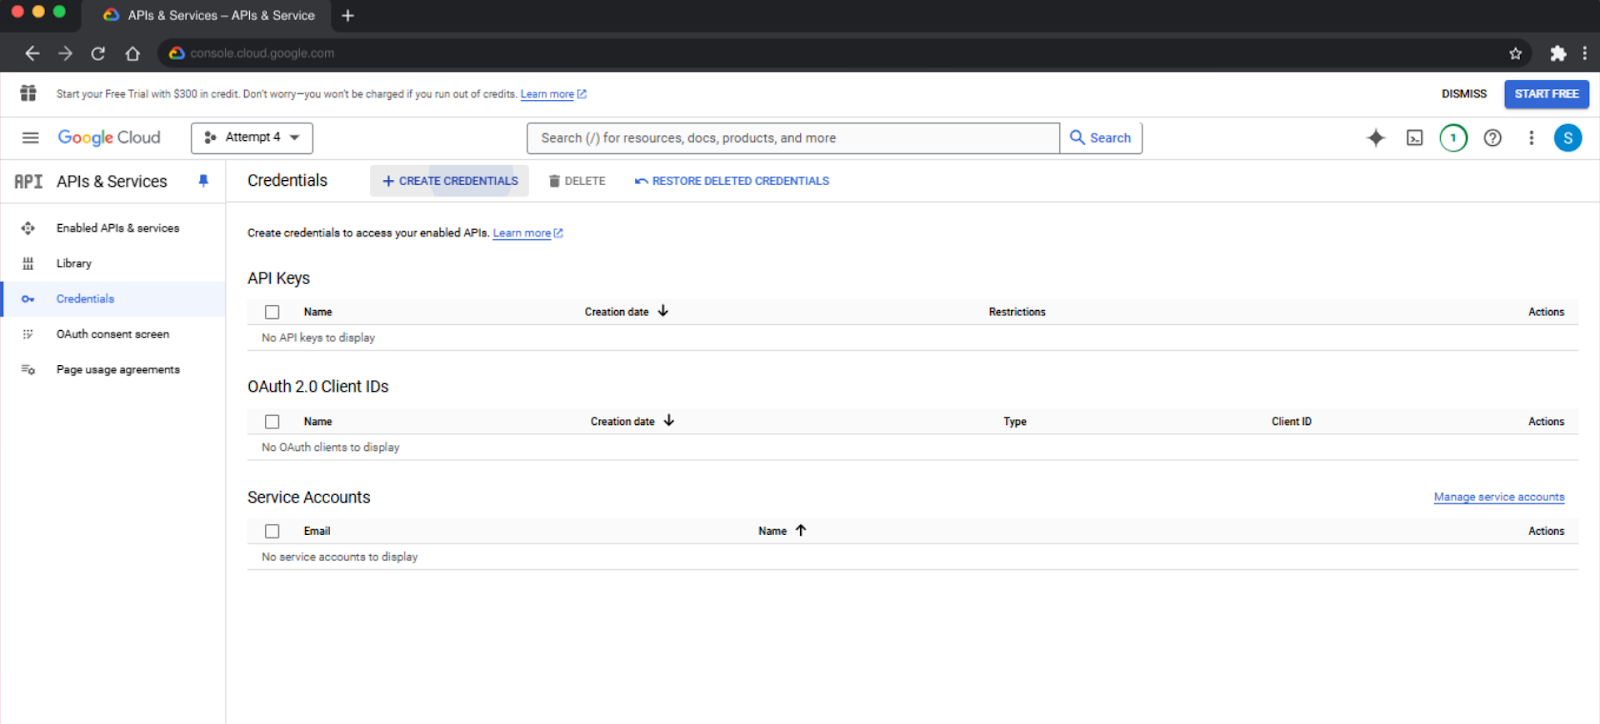
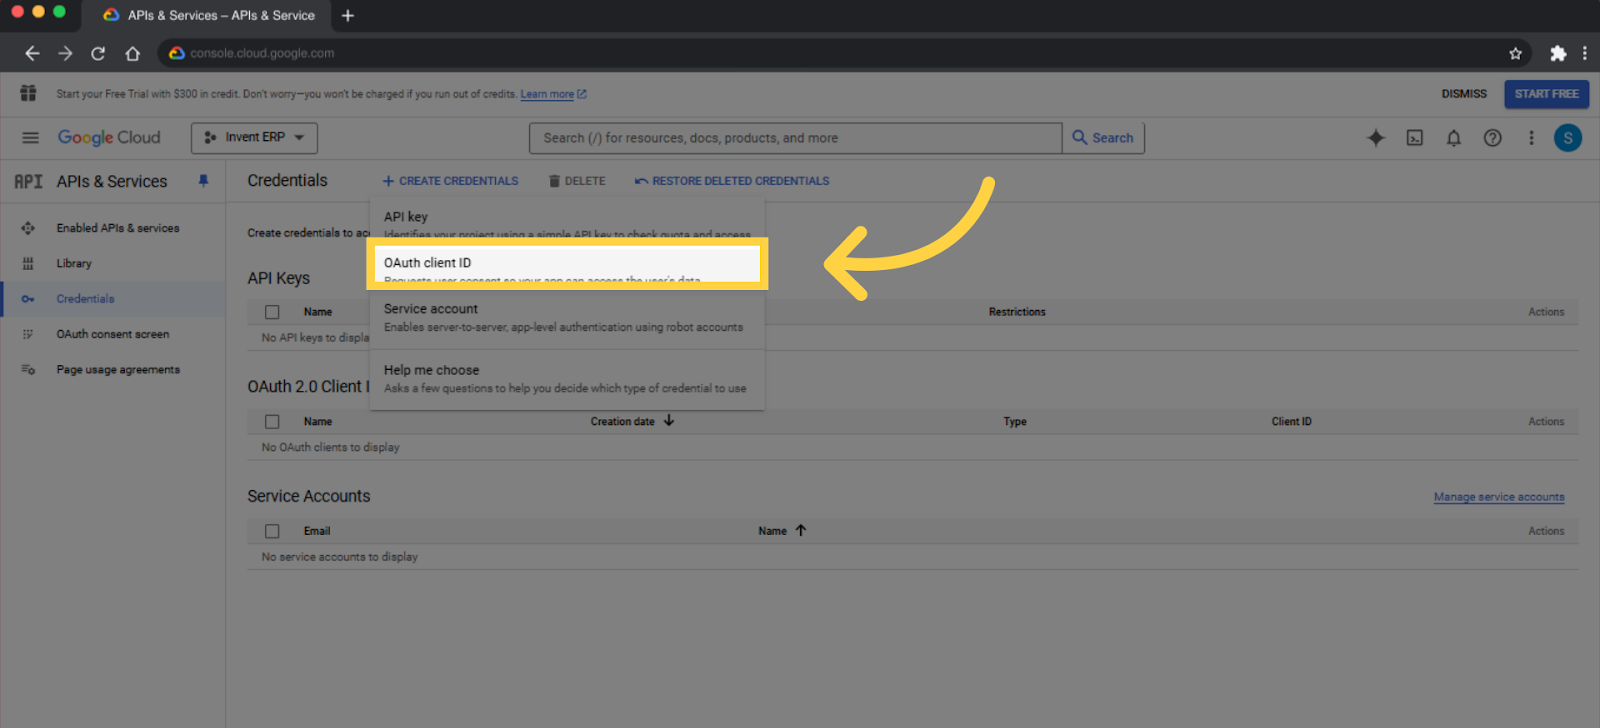
- Select Credentials
- Then Press Create Credentials
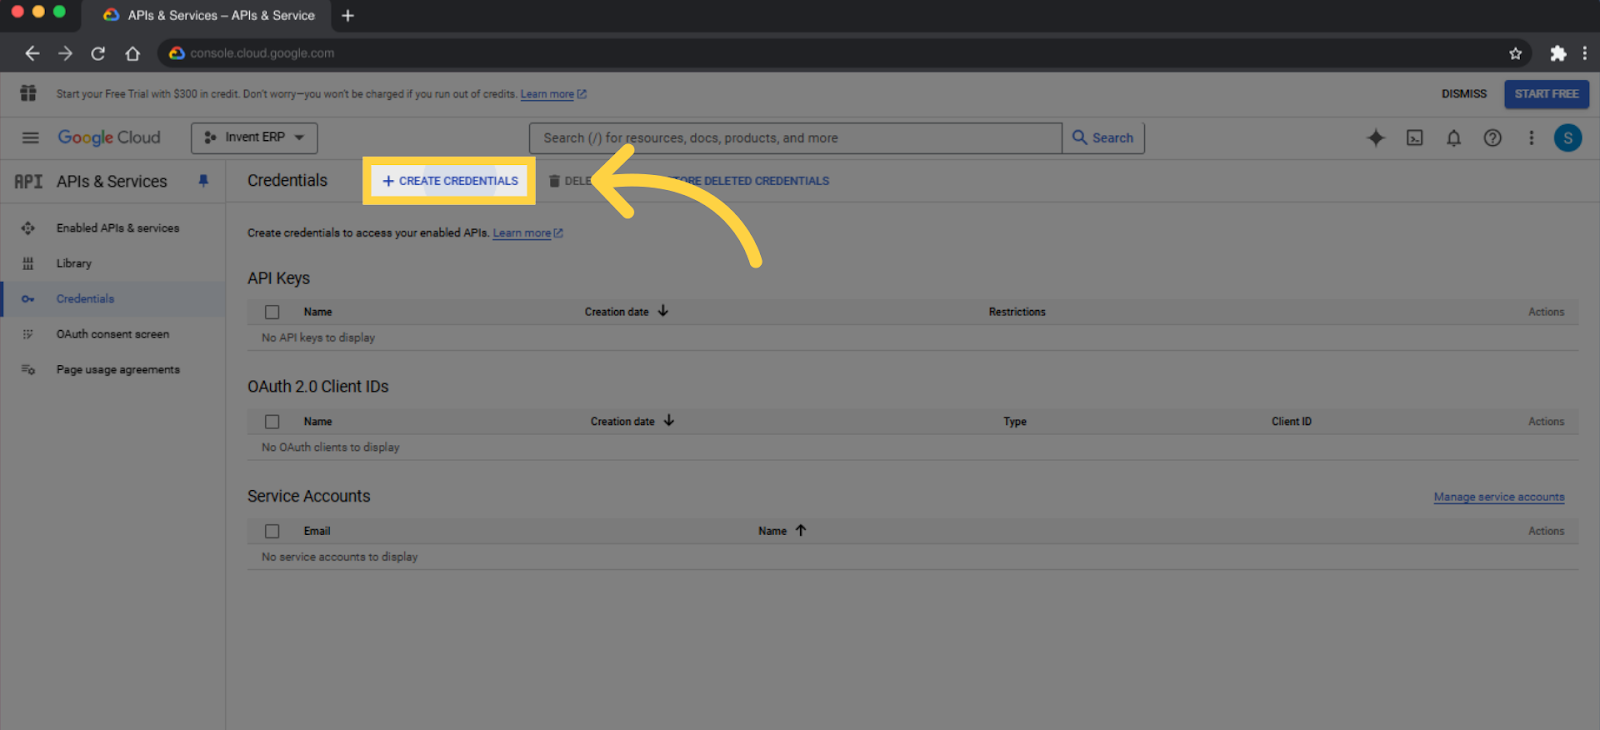
- Choose OAuth client ID
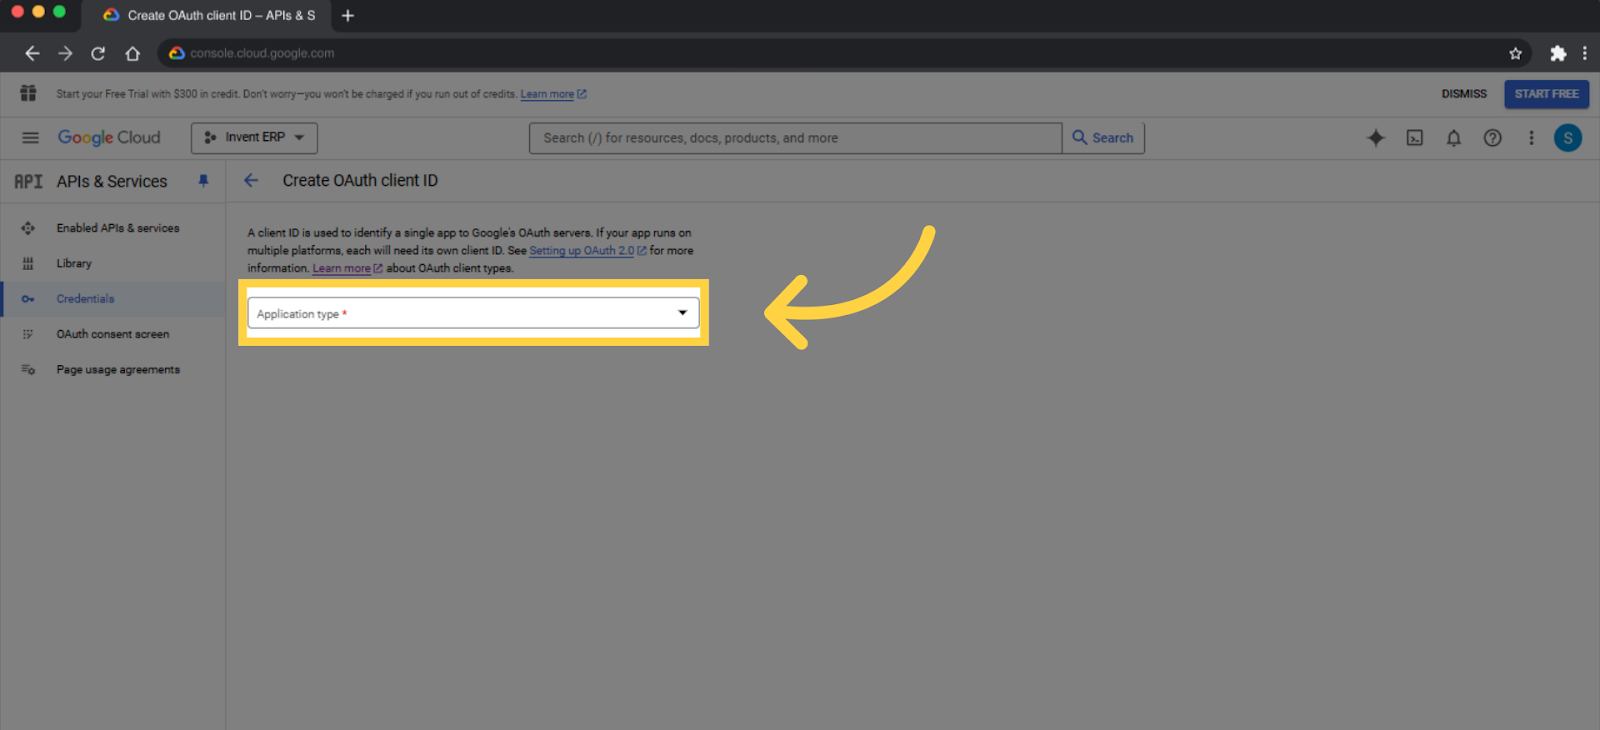
- Select Application Type
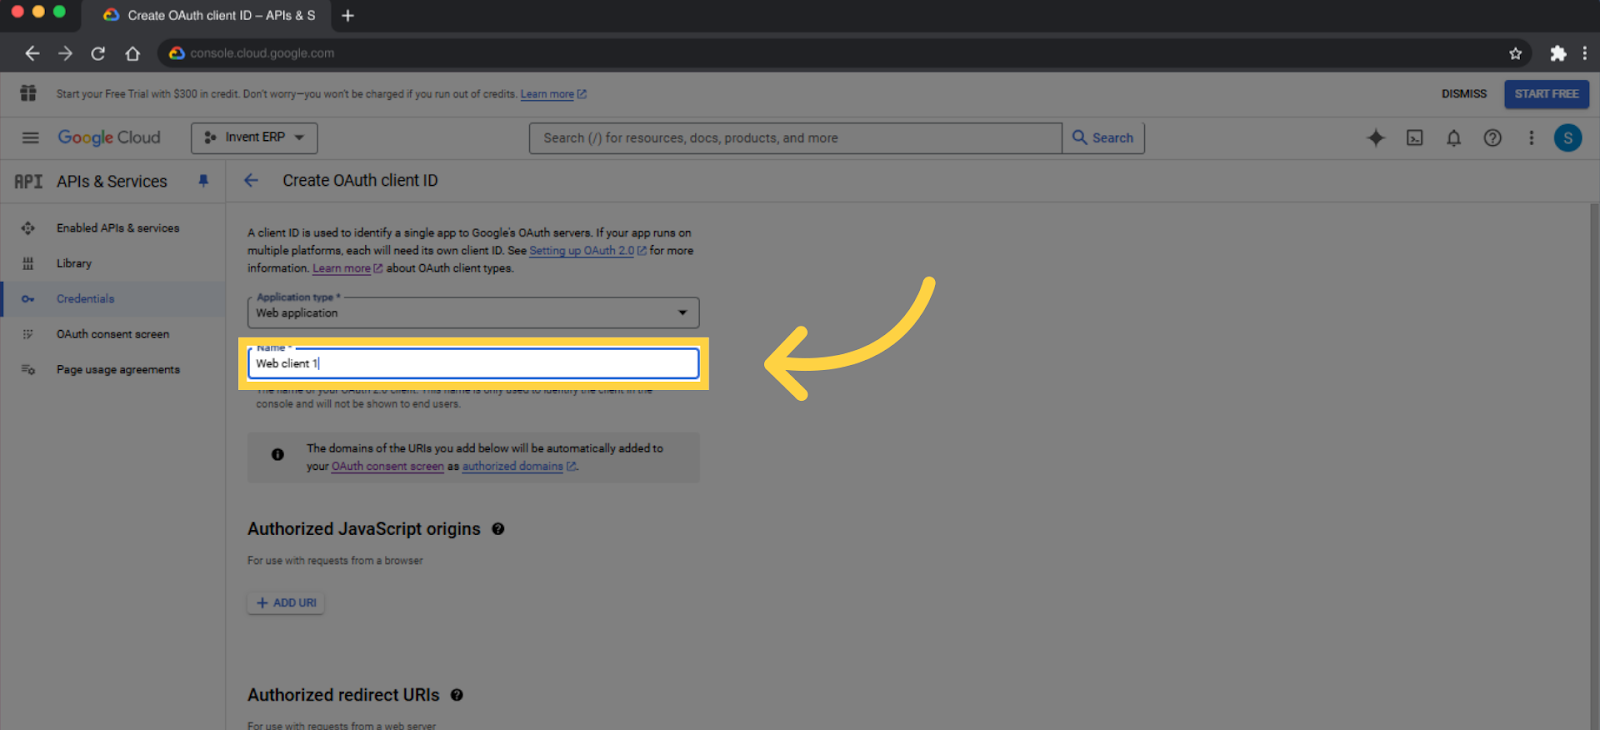
- In the Name field, enter Invent
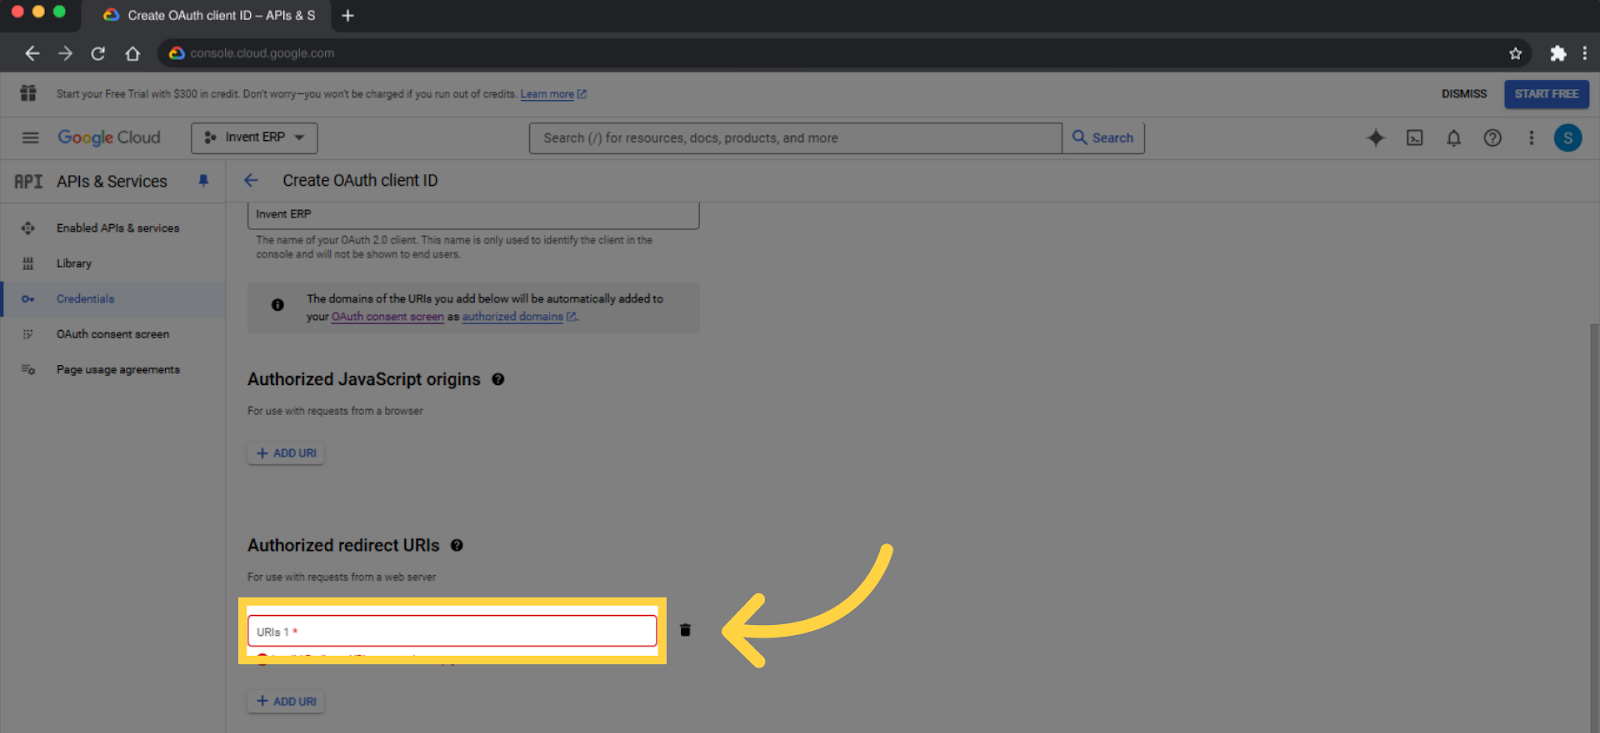
- Click on Add URL
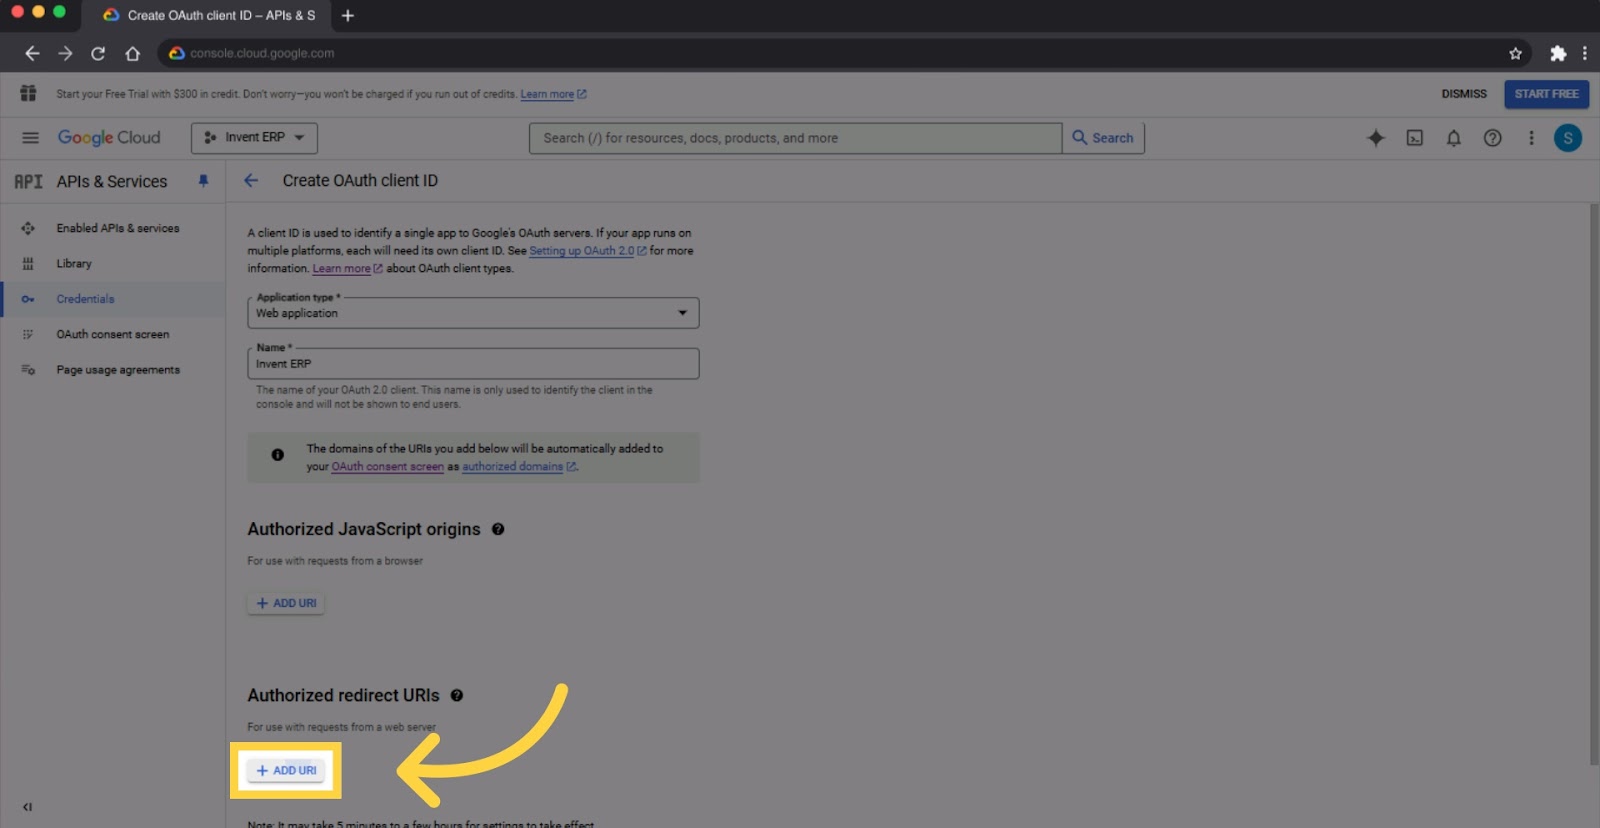
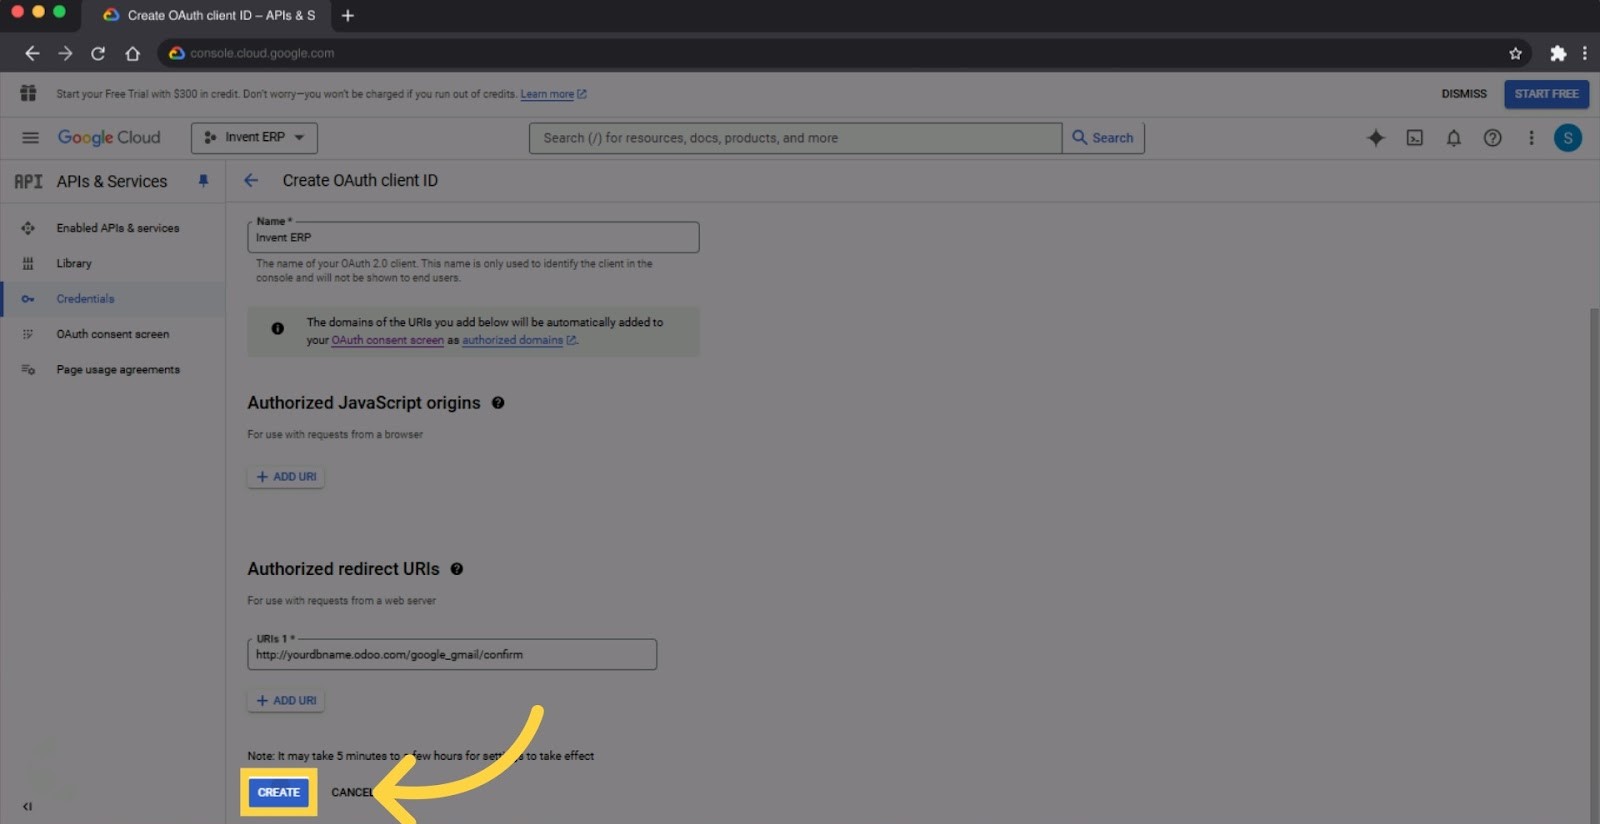
- Paste the URL you copied earlier from Invent ERP
- Then Press Create
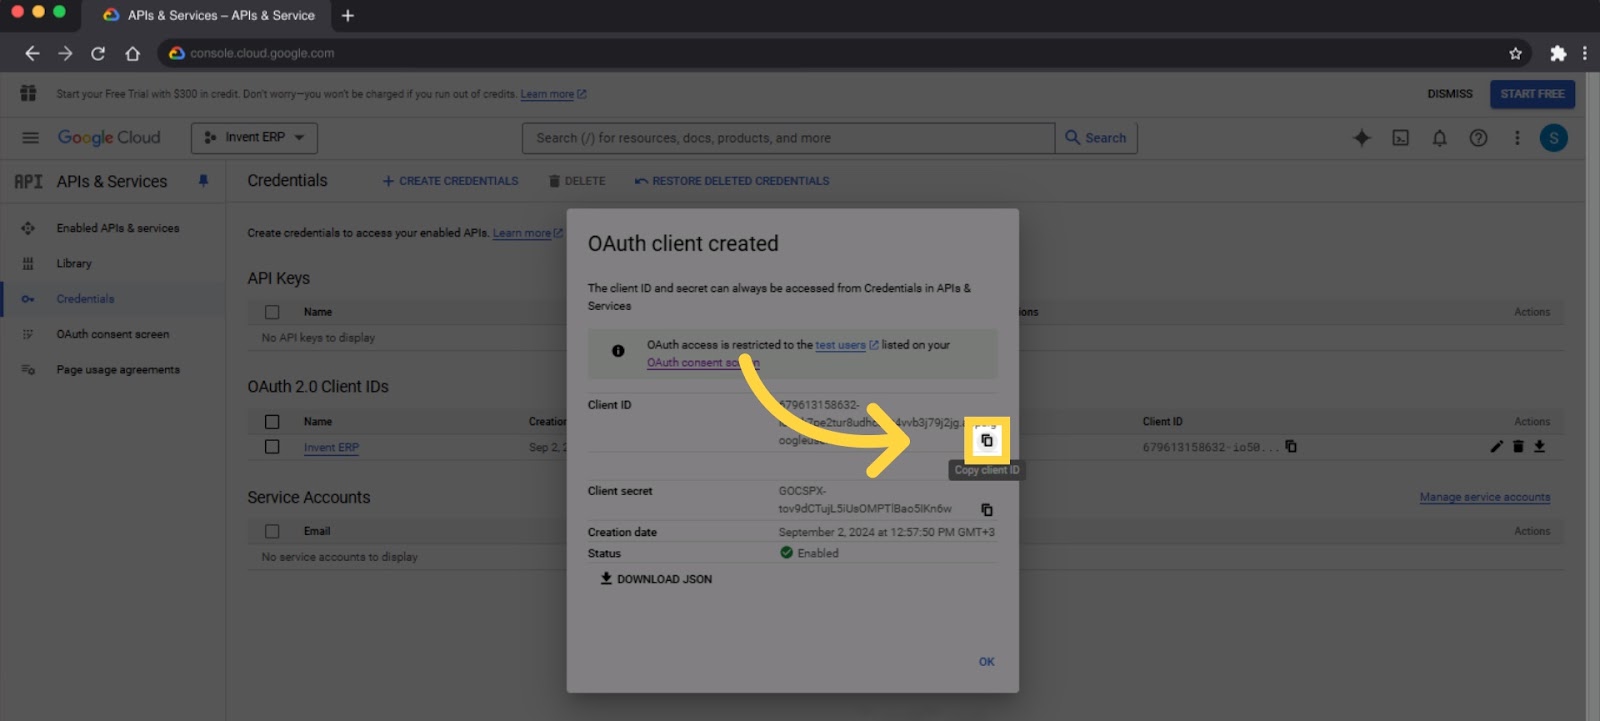
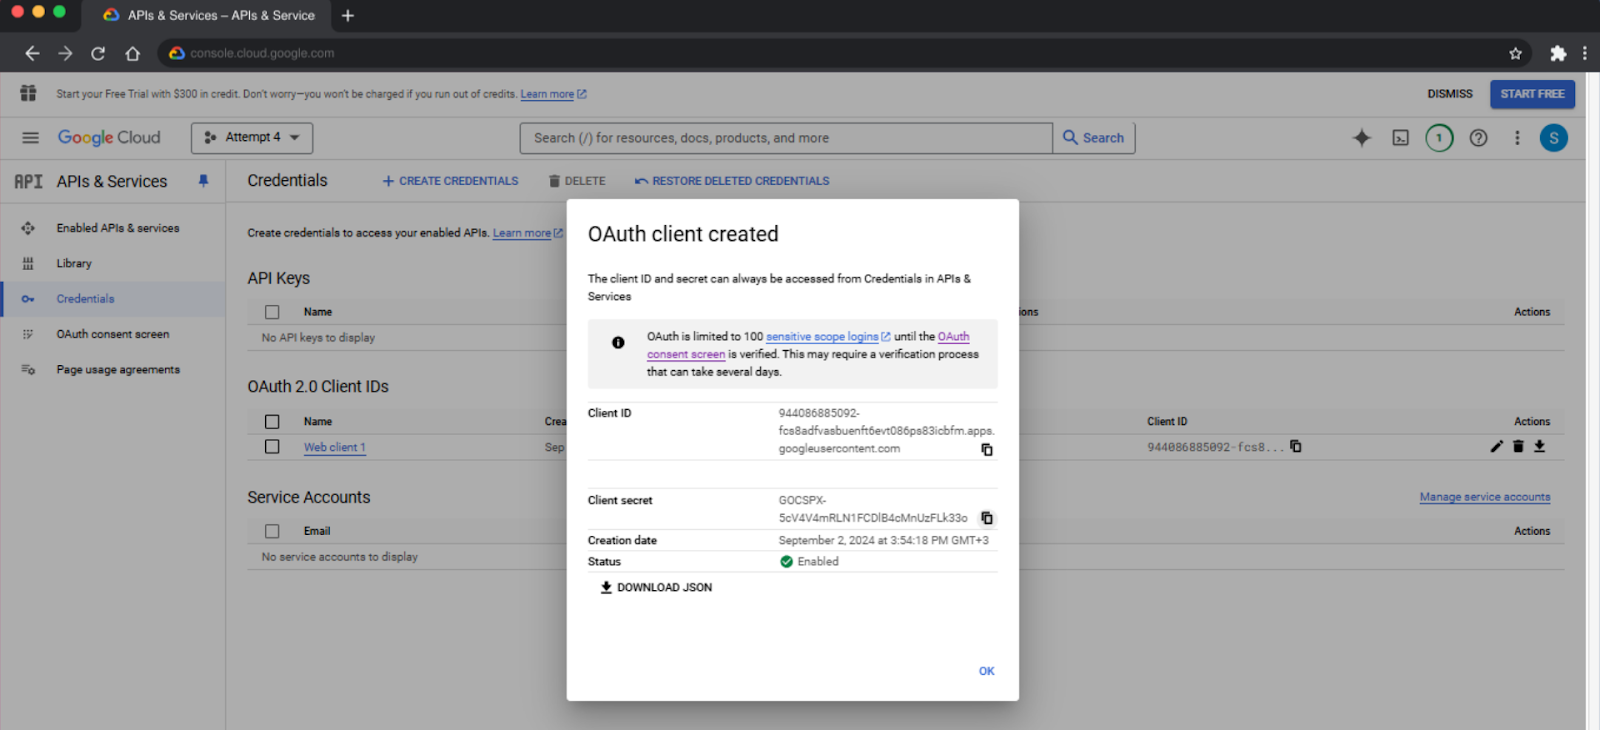
- The next step is to click Copy Client ID
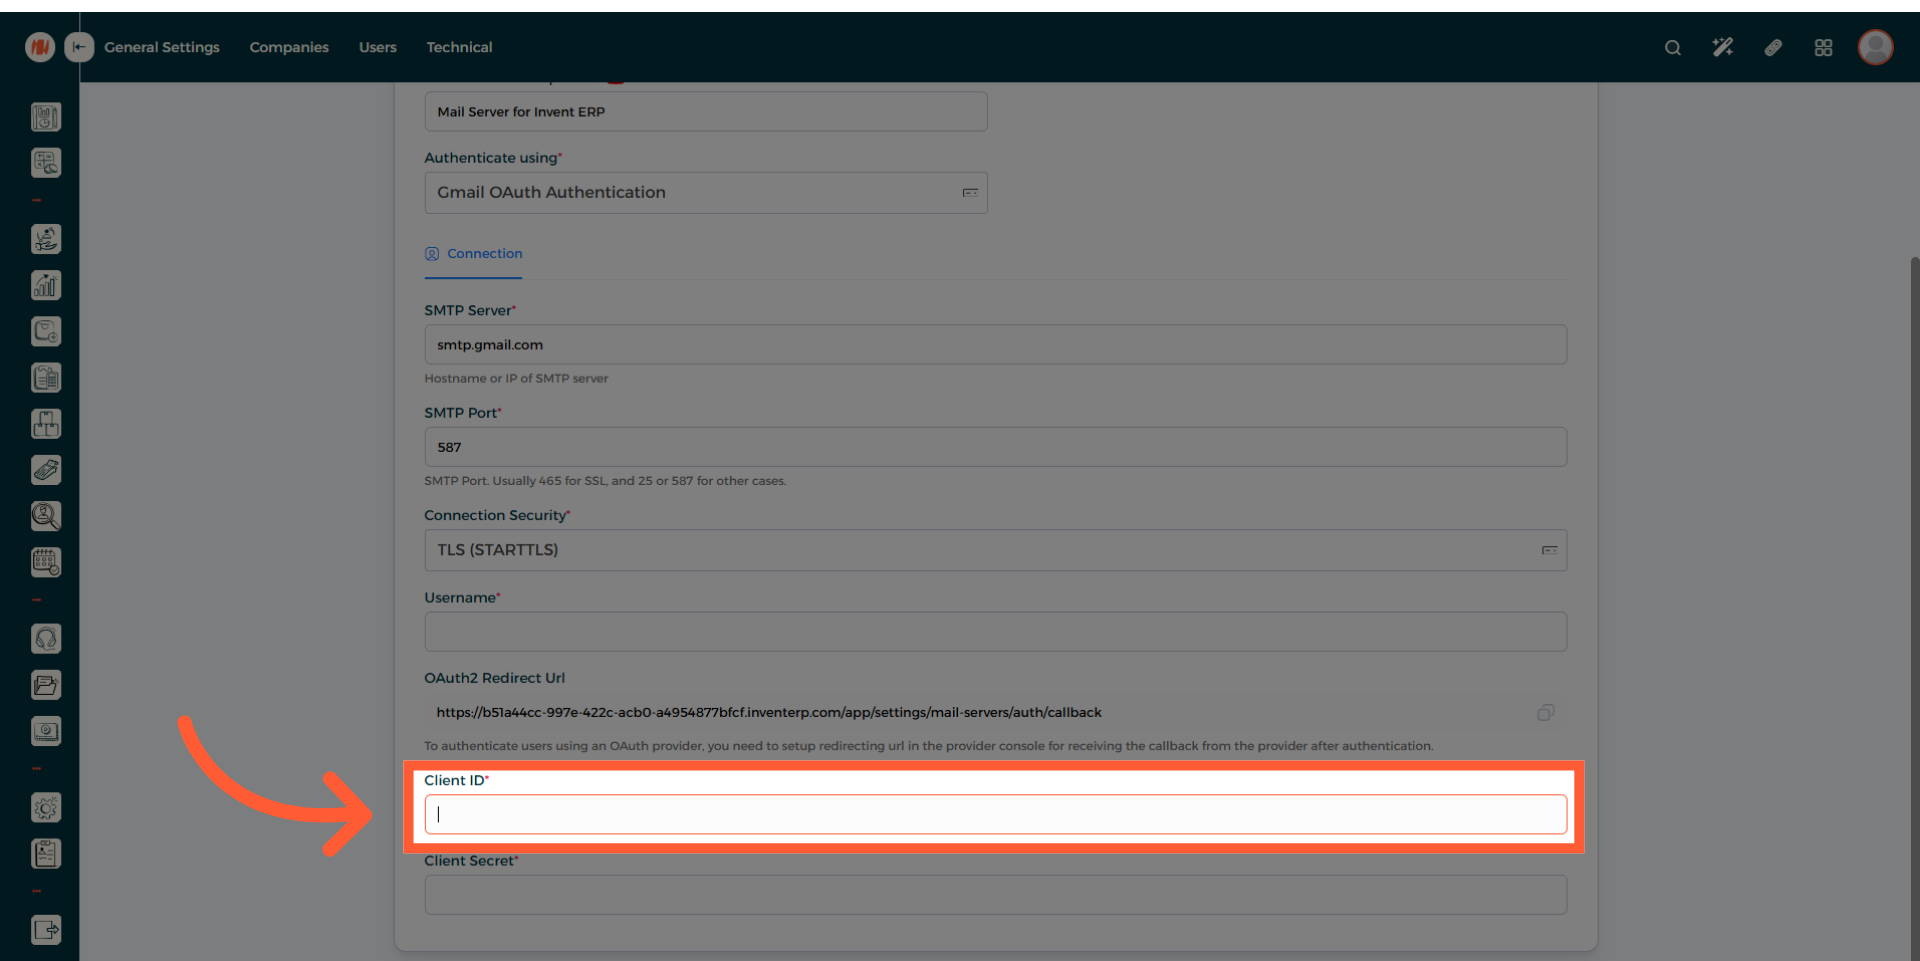
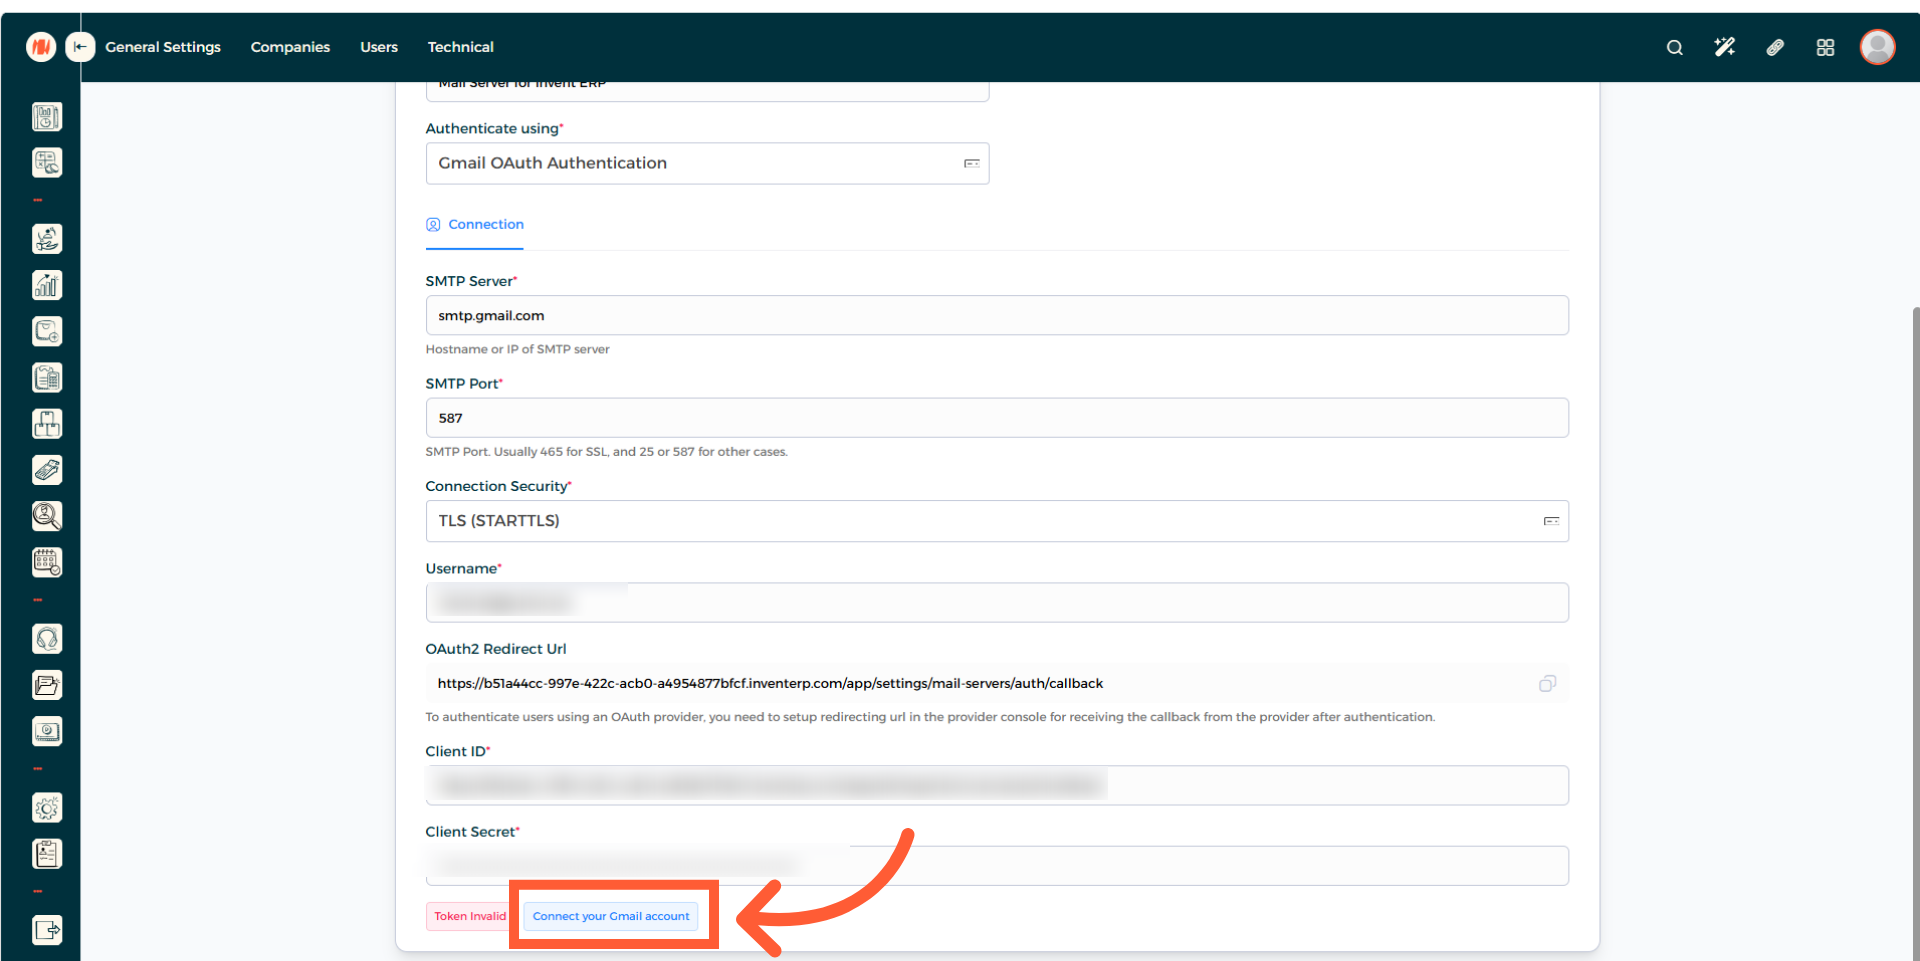
- Navigate back to the Invent ERP Mail Server page as shown previously.
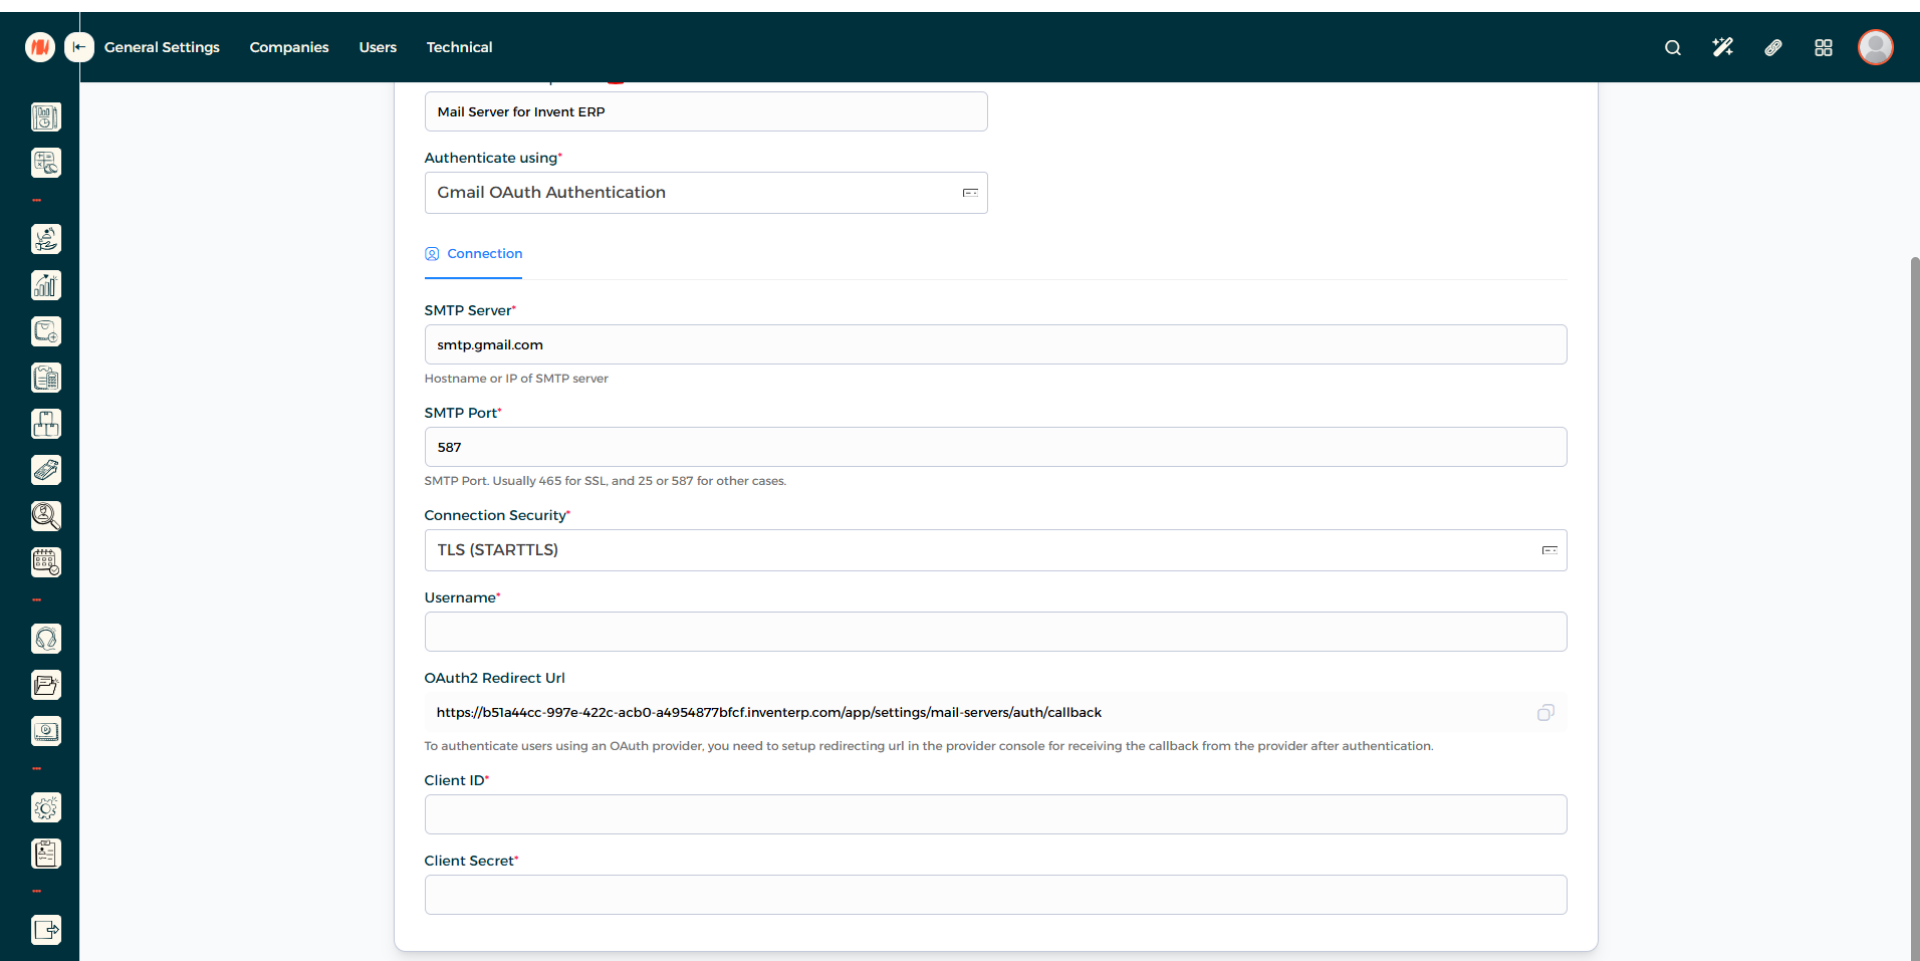
- Paste the Client ID that you copied previously.
- Navigate back to (console.cloud.google.com)
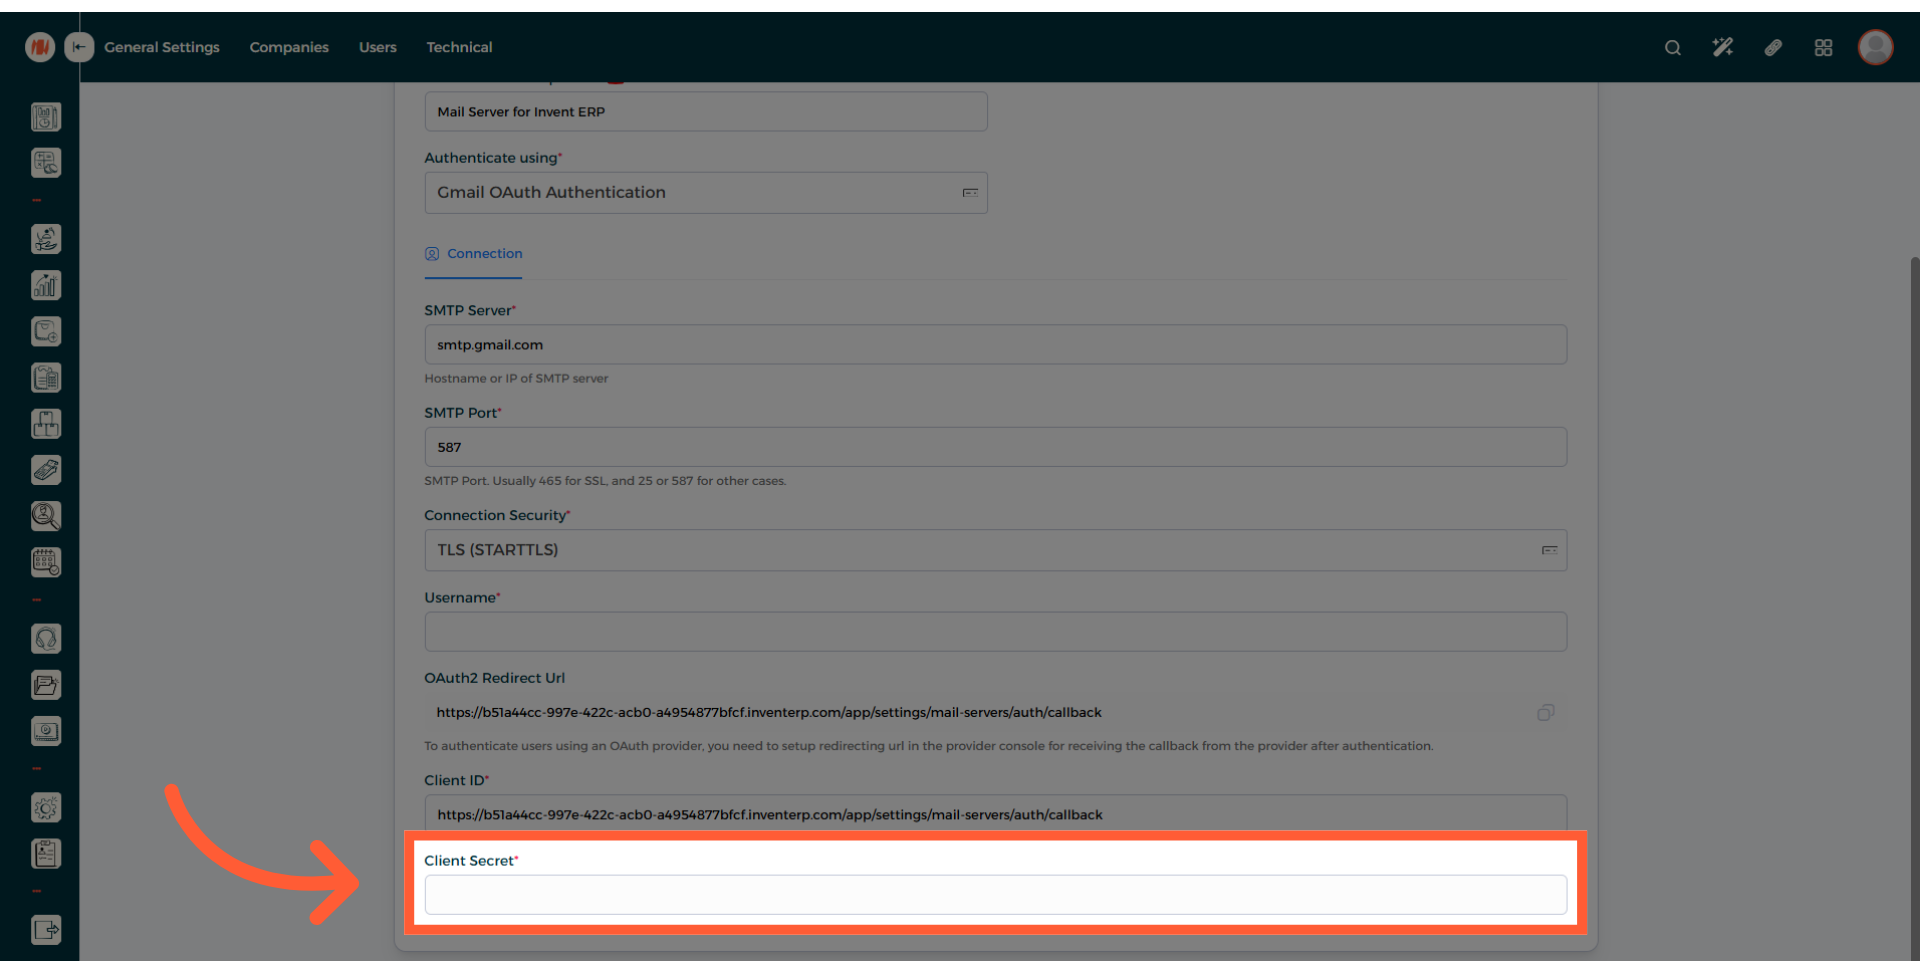
- Then click Copy client secret

- Now head back to the Invent ERP Mail Server page, and paste the Client Secret
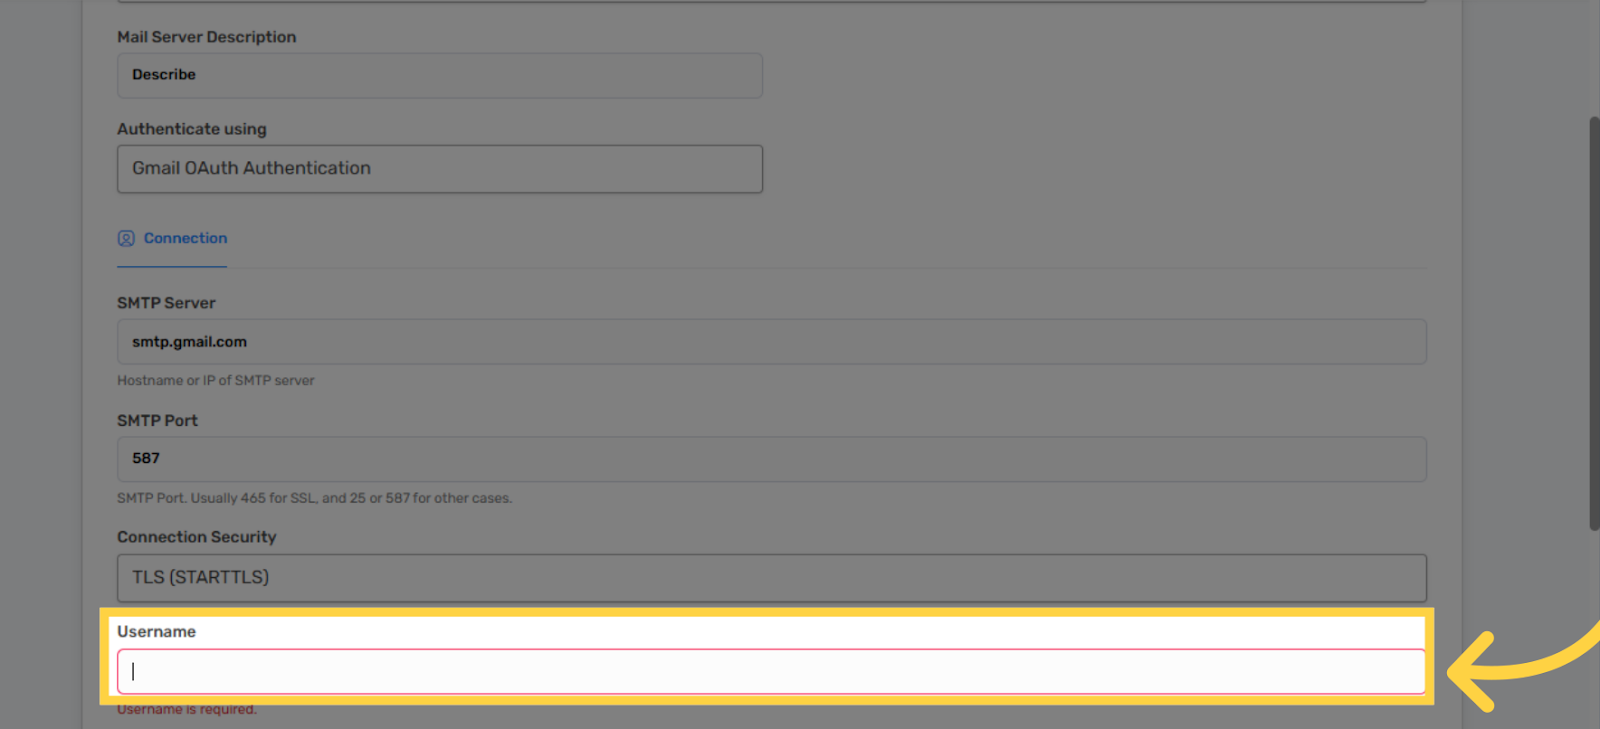
- Now Fill in the Username field with the email address you used on your Google Cloud
- Press Create
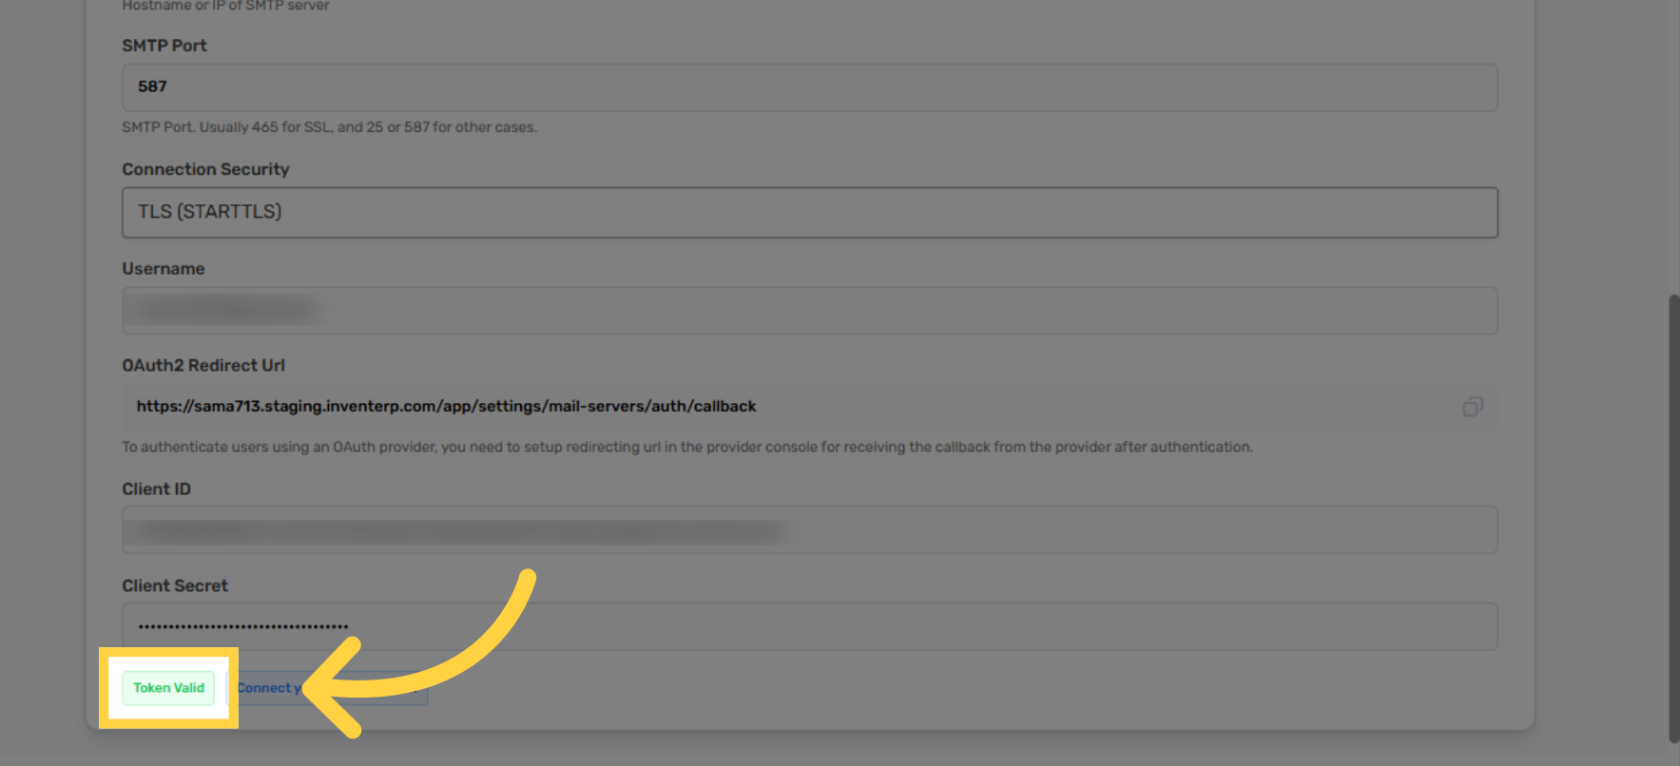
- After creating it, scroll down and press on Connect your Gmail account
-
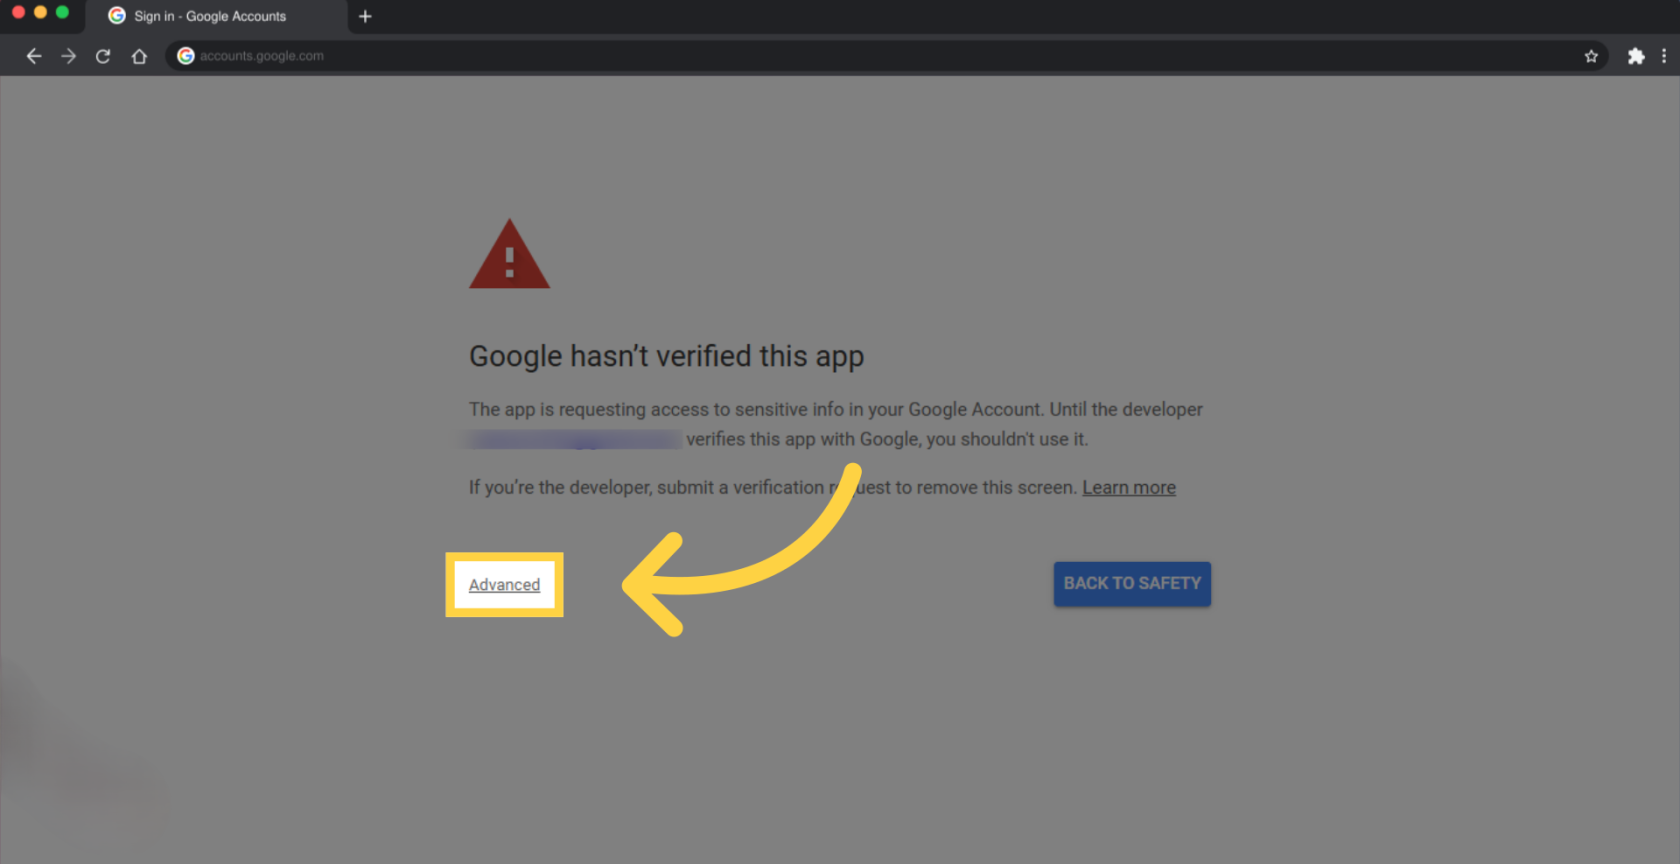
The next step is to switch to (accounts.google.com) and log in to your gmail account. Ensure that it is the same email you have used to log in into Google Cloud
-
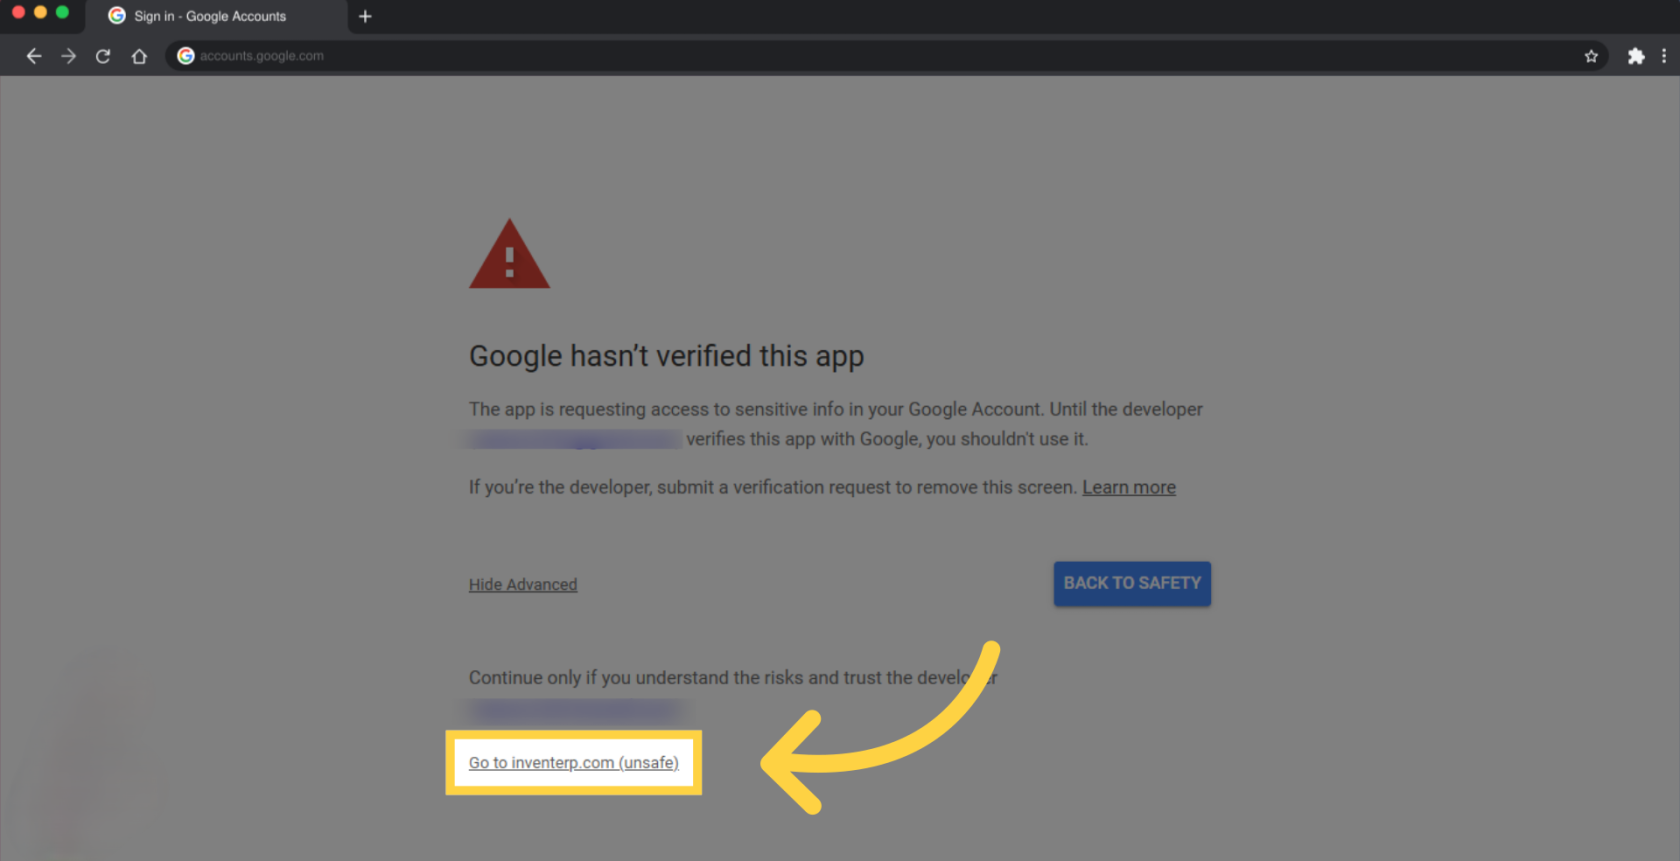
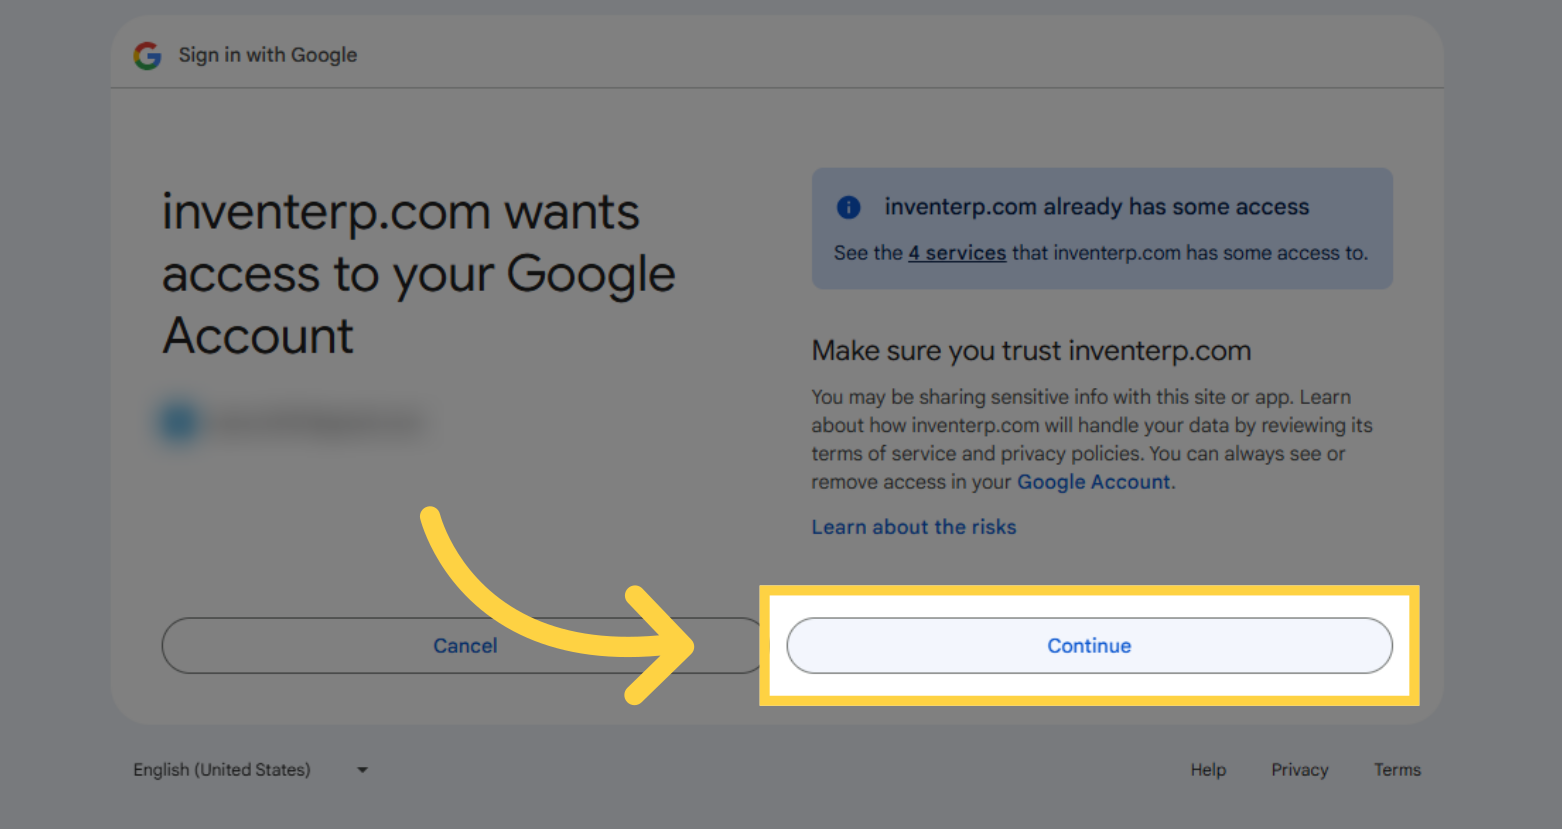
If you get the message Google hasn’t verified this app, click on Advanced
- Click Go to inventerp.com (unsafe)
- Click Continue

- Click Continue
- It will automatically switch to Invent ERP’s website. Ensure that Token Valid is displayed on your screen. Scroll up and click Test Connection then you should see the popup message success and you are all done.