How to Schedule and Manage Patient Appointments in Invent Medical
Learn how to navigate calendar views, search and select patients, book quick or detailed appointments, reschedule visits, create time blocks, and utilize room filters and configuration options in the Appointments module.
Module Overview & Layout
The Appointments module is the primary scheduling hub for front desk and clinical teams — all within Invent Medical. Whether booking a walk-in, scheduling a complex procedure, or reserving room time for maintenance, this module keeps your operational calendar structured and accessible.
Key layout elements include:
- View Selector — Toggle between Day, Week, and Grid calendar layouts.
- Room & Resource Columns — Filter the calendar by specific treatment rooms or display all facilities.
- Patient Panel — Search, select, or create patient records directly alongside the calendar.
- Interactive Appointment Cards — Drag, resize, pin, or right-click cards for instant status updates and actions.
Every schedule region is interactive — manage visits directly on the grid without losing context.
Step-by-Step Guide
Calendar Navigation & Views
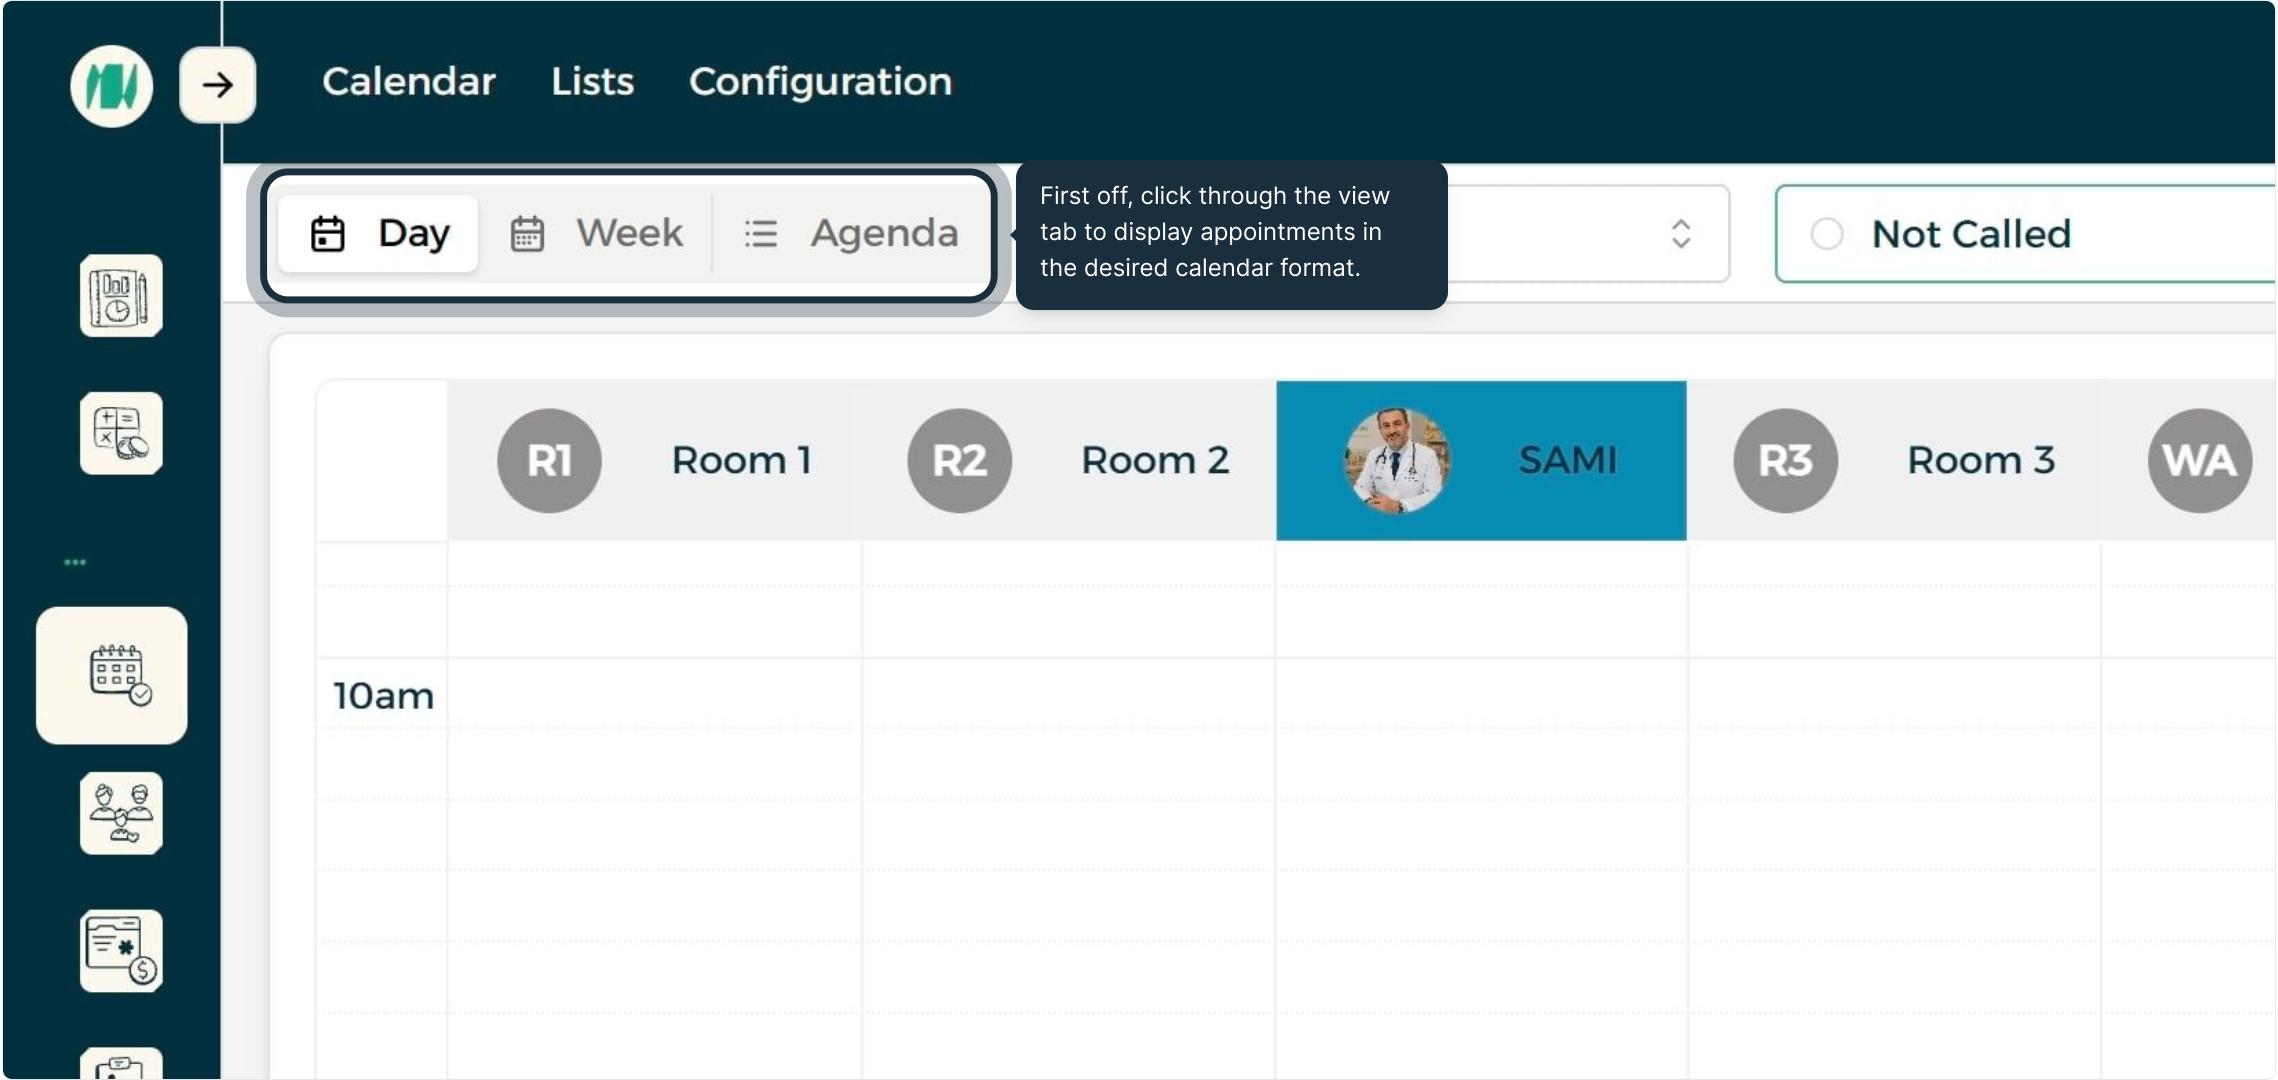
Calendar View Switcher
Open the View tab to switch between daily, weekly, or grid calendar representations.
Patient Selection & Management
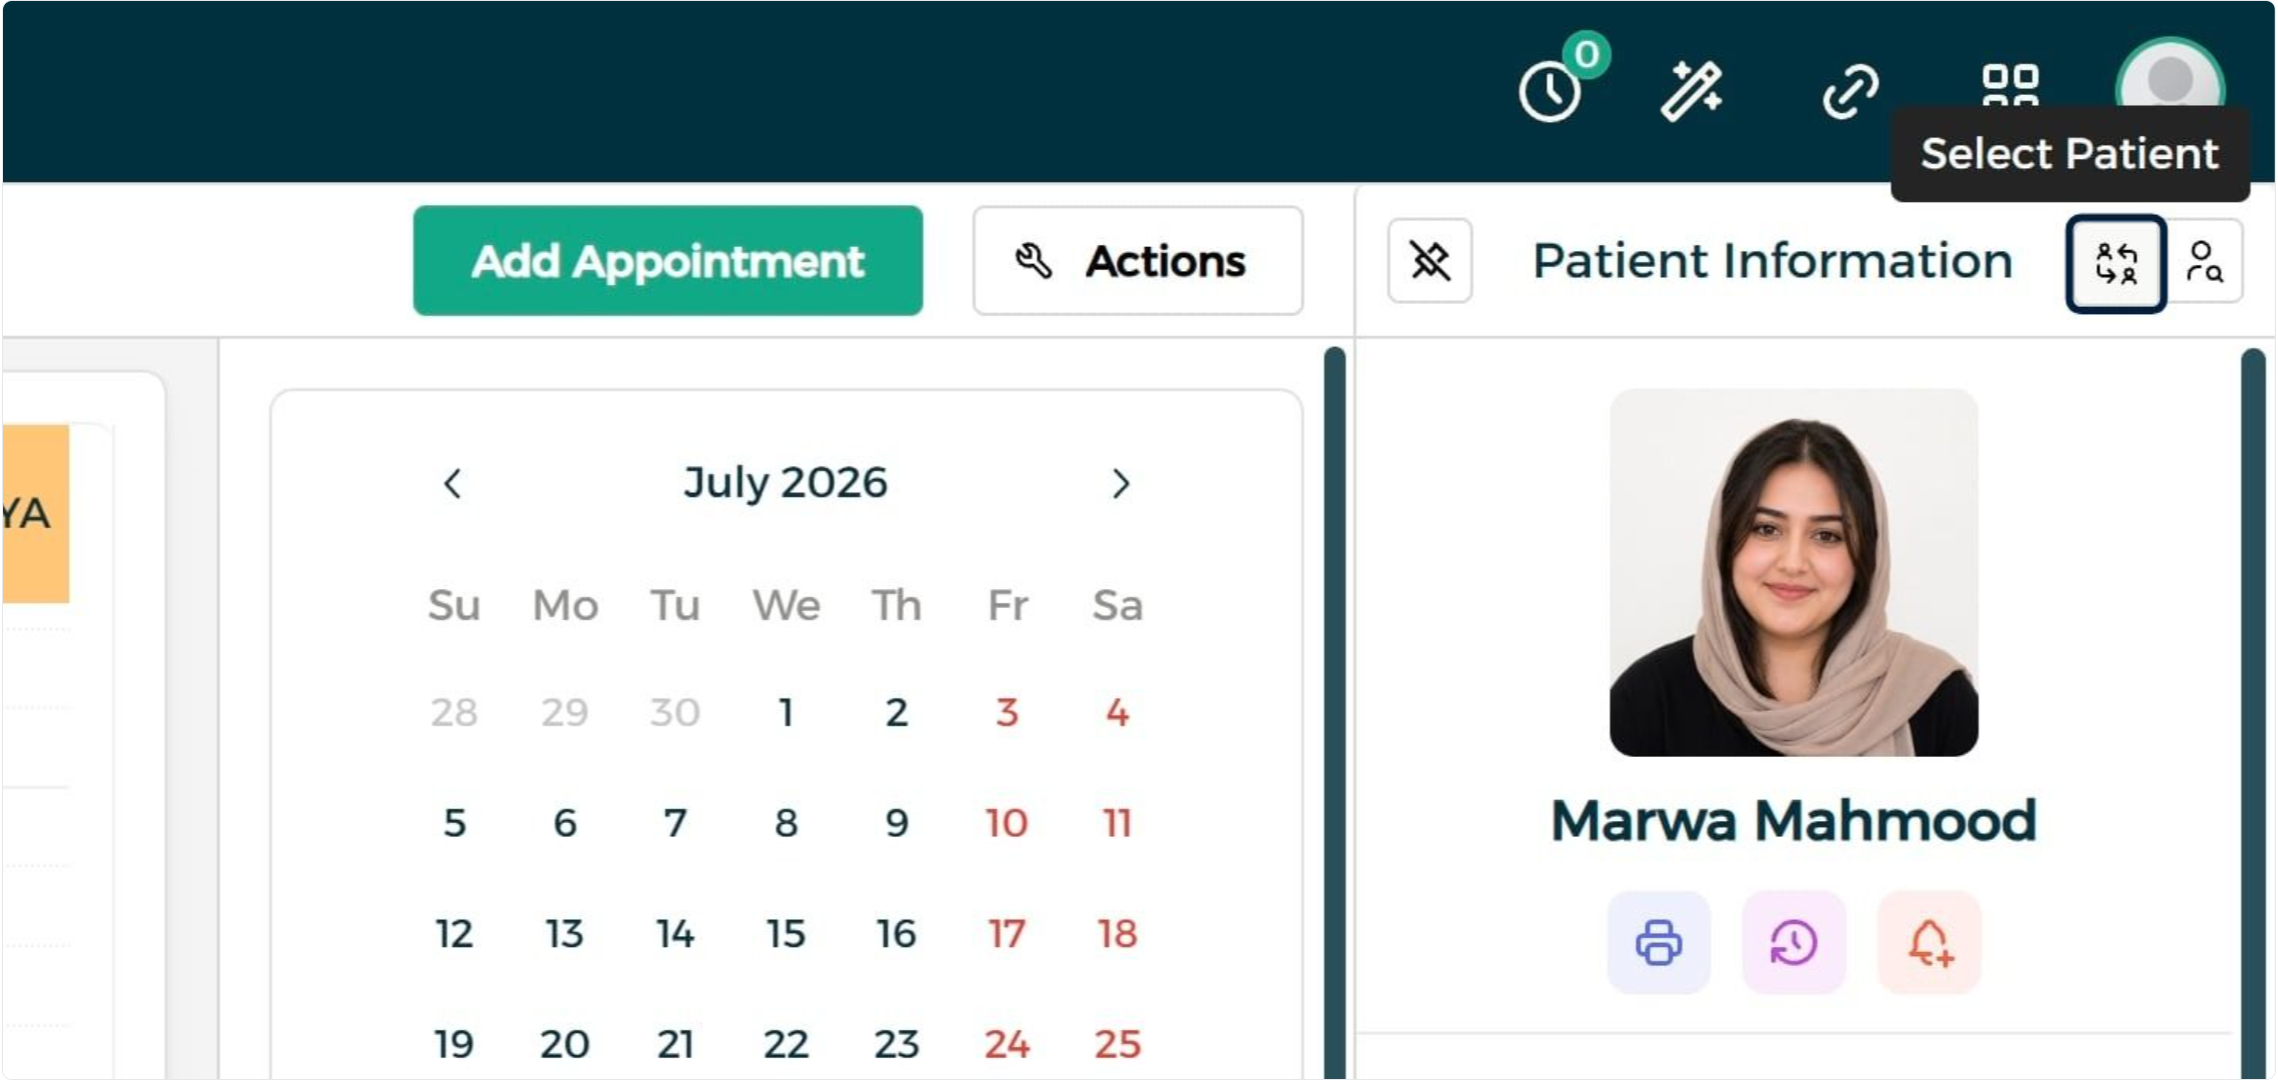
Step 1: Patient Selection Menu
Open the patient selector to designate a patient for the upcoming booking.
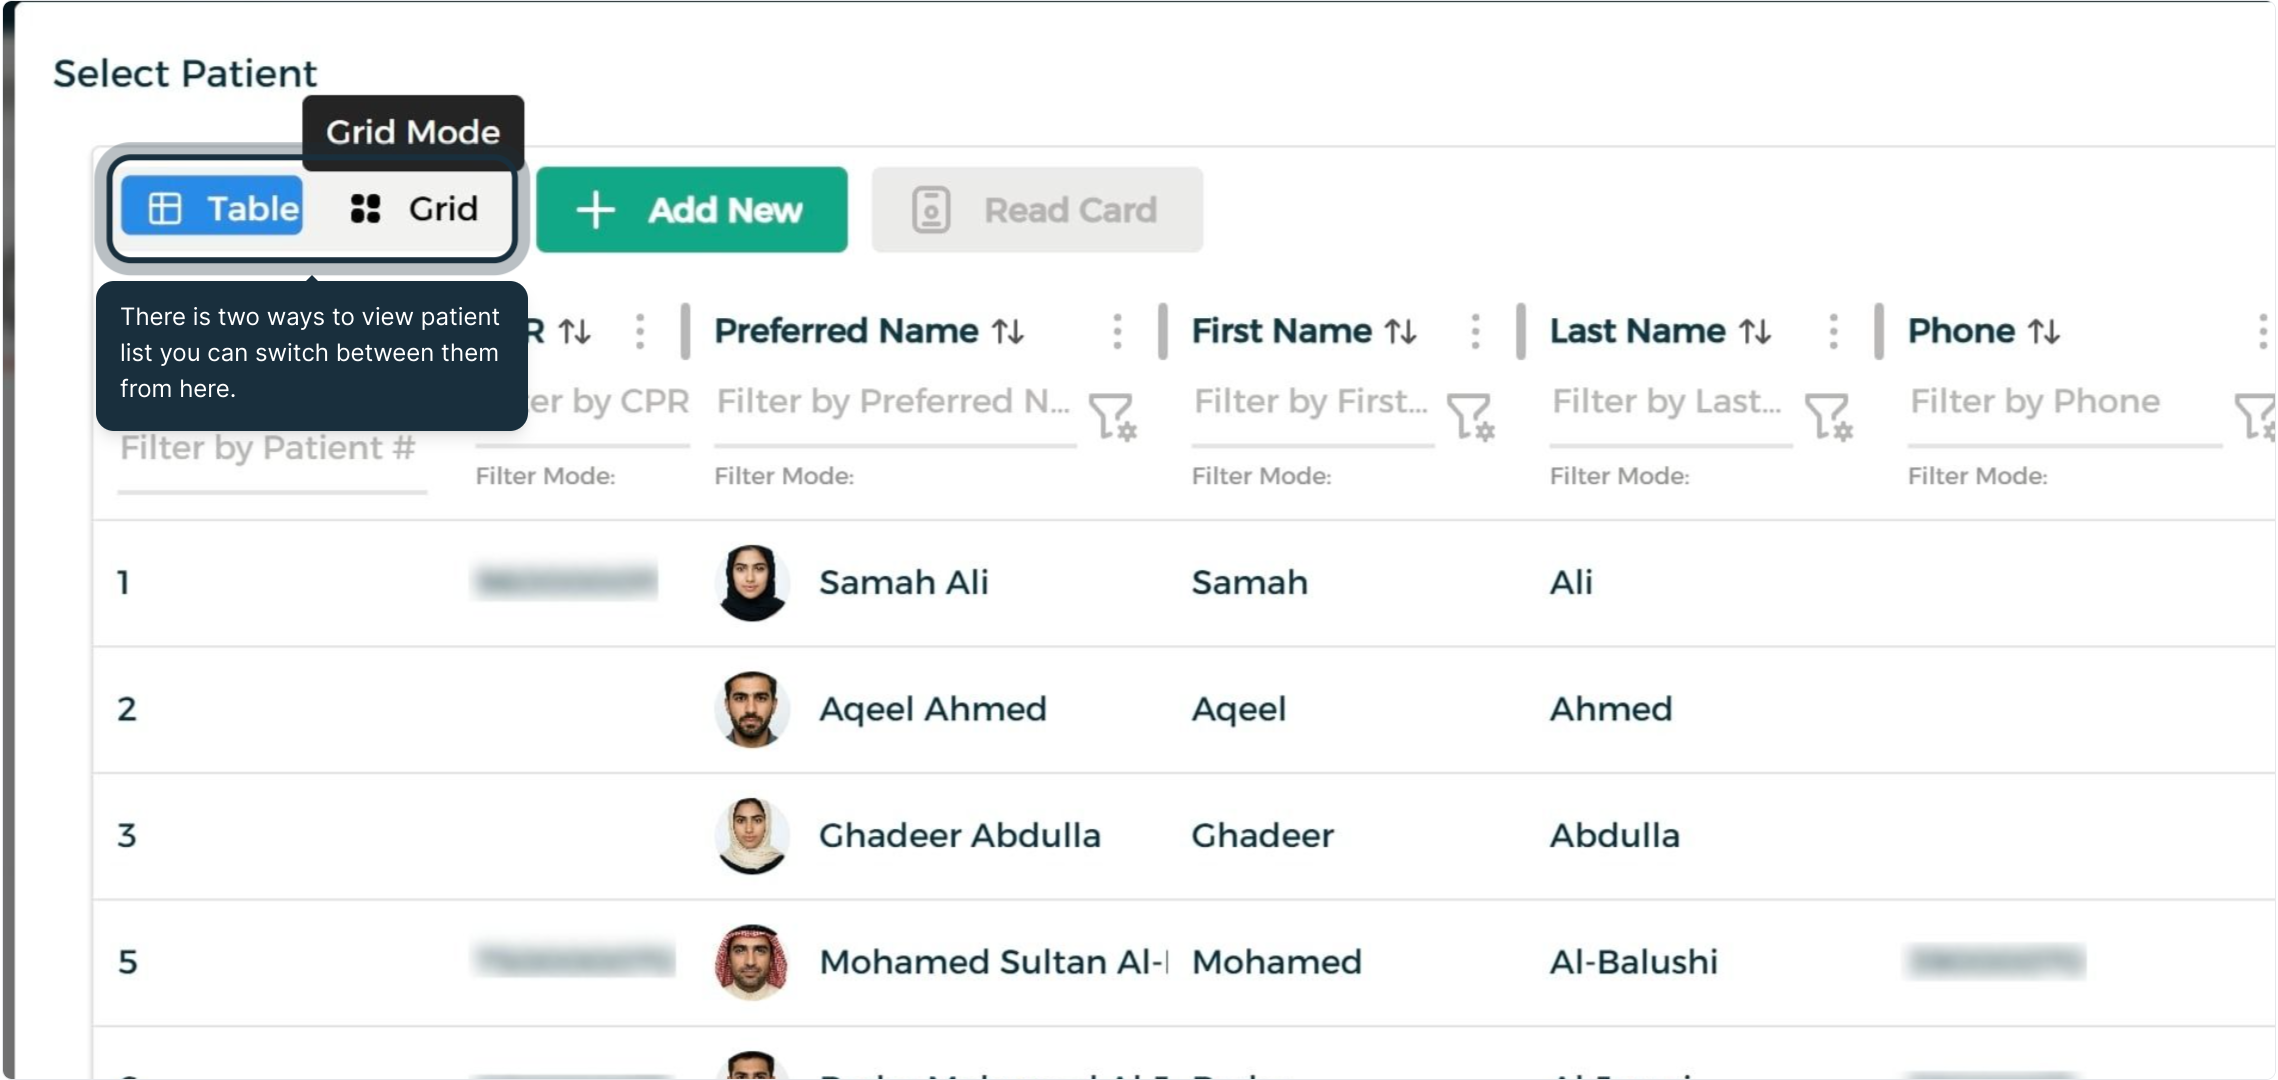
Step 2: Patient List Format Toggle
Use the toolbar control to switch between available patient list viewing modes.
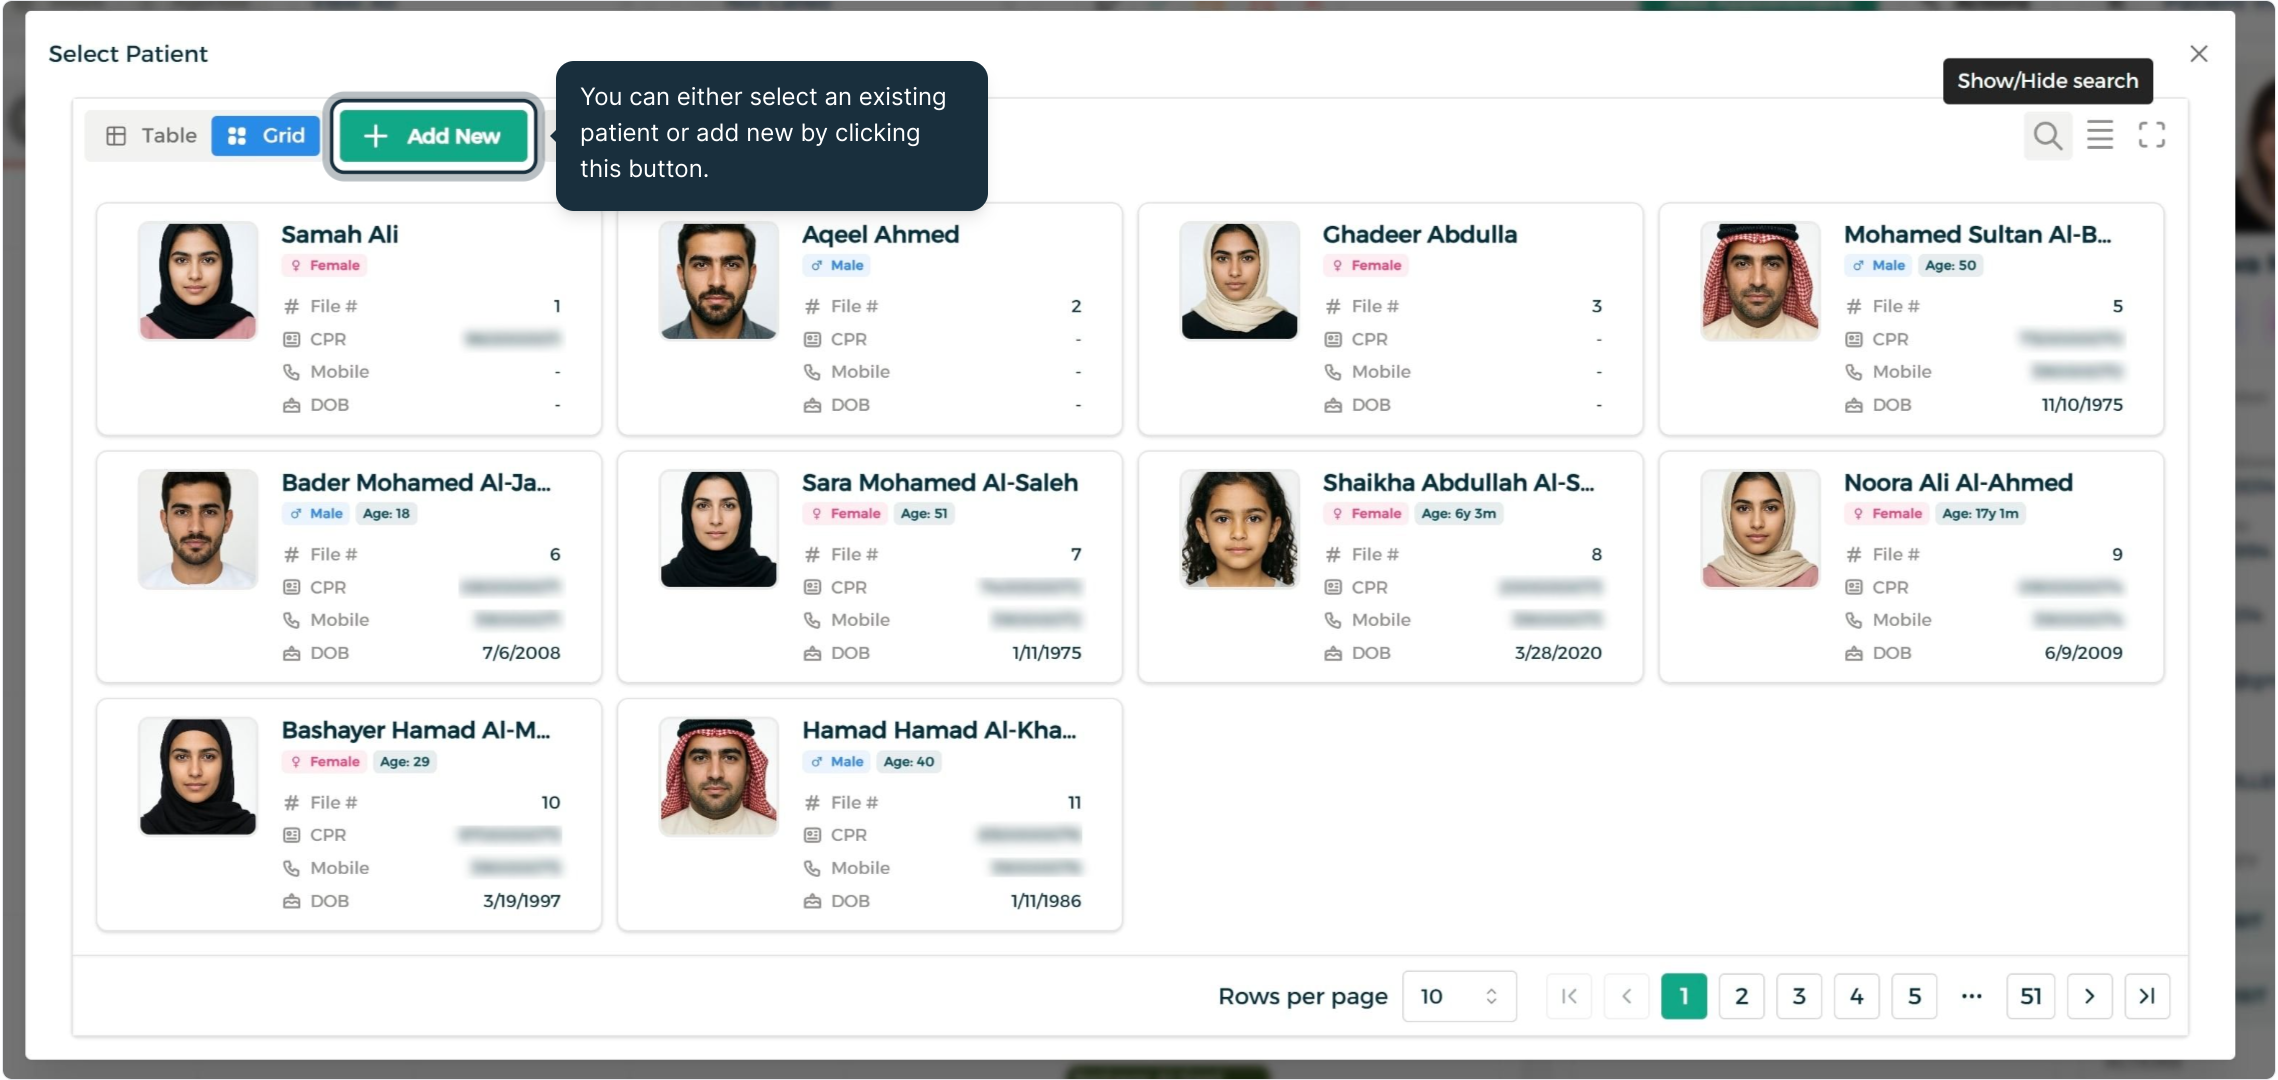
Step 3: Patient Registration
Use the registration button to create a new patient record directly from the scheduling screen.
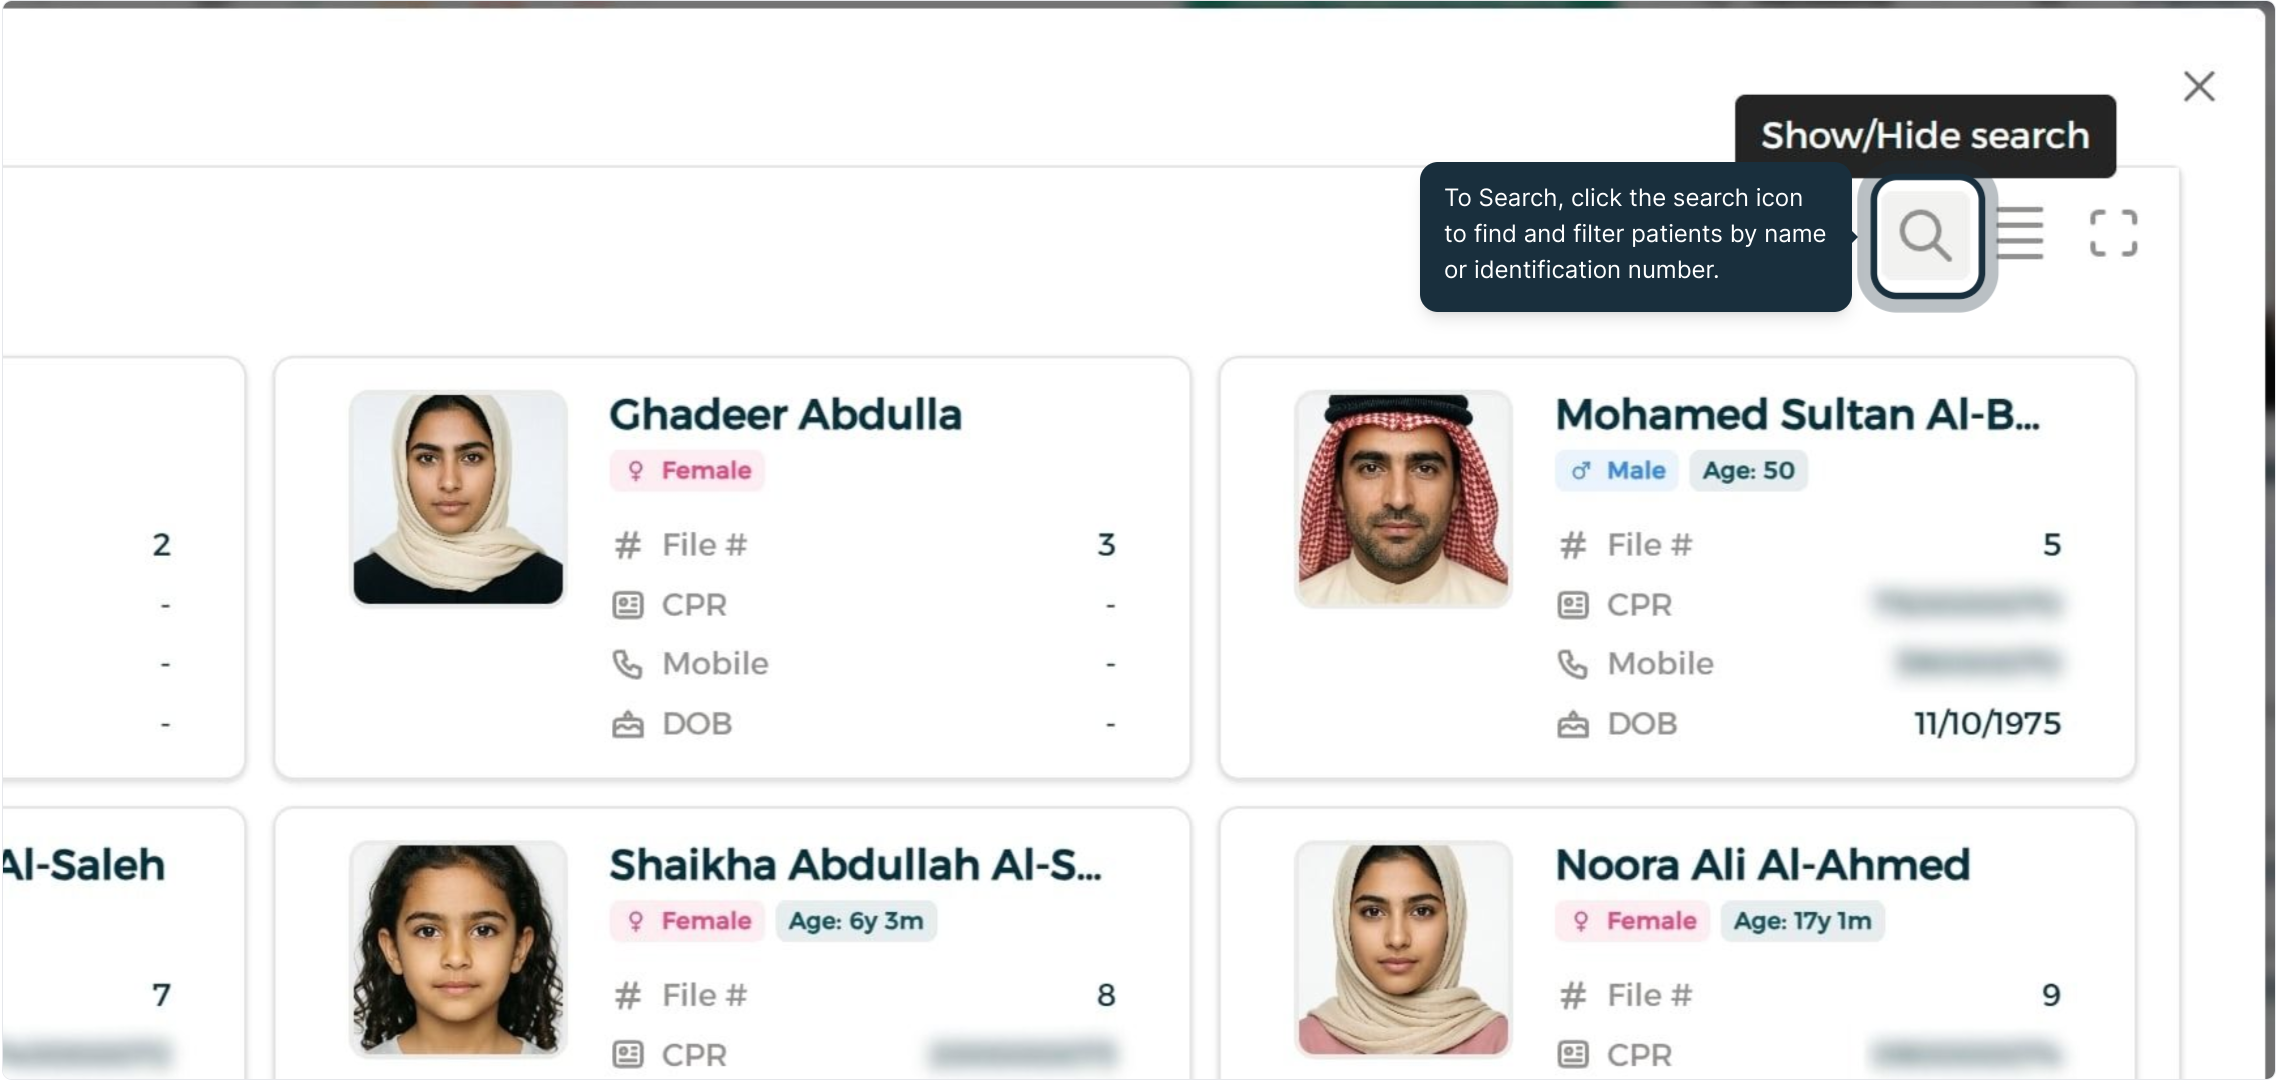
Step 4: Patient Search & Filter
Use the search bar to locate patients by name or identification number.
Booking Appointments
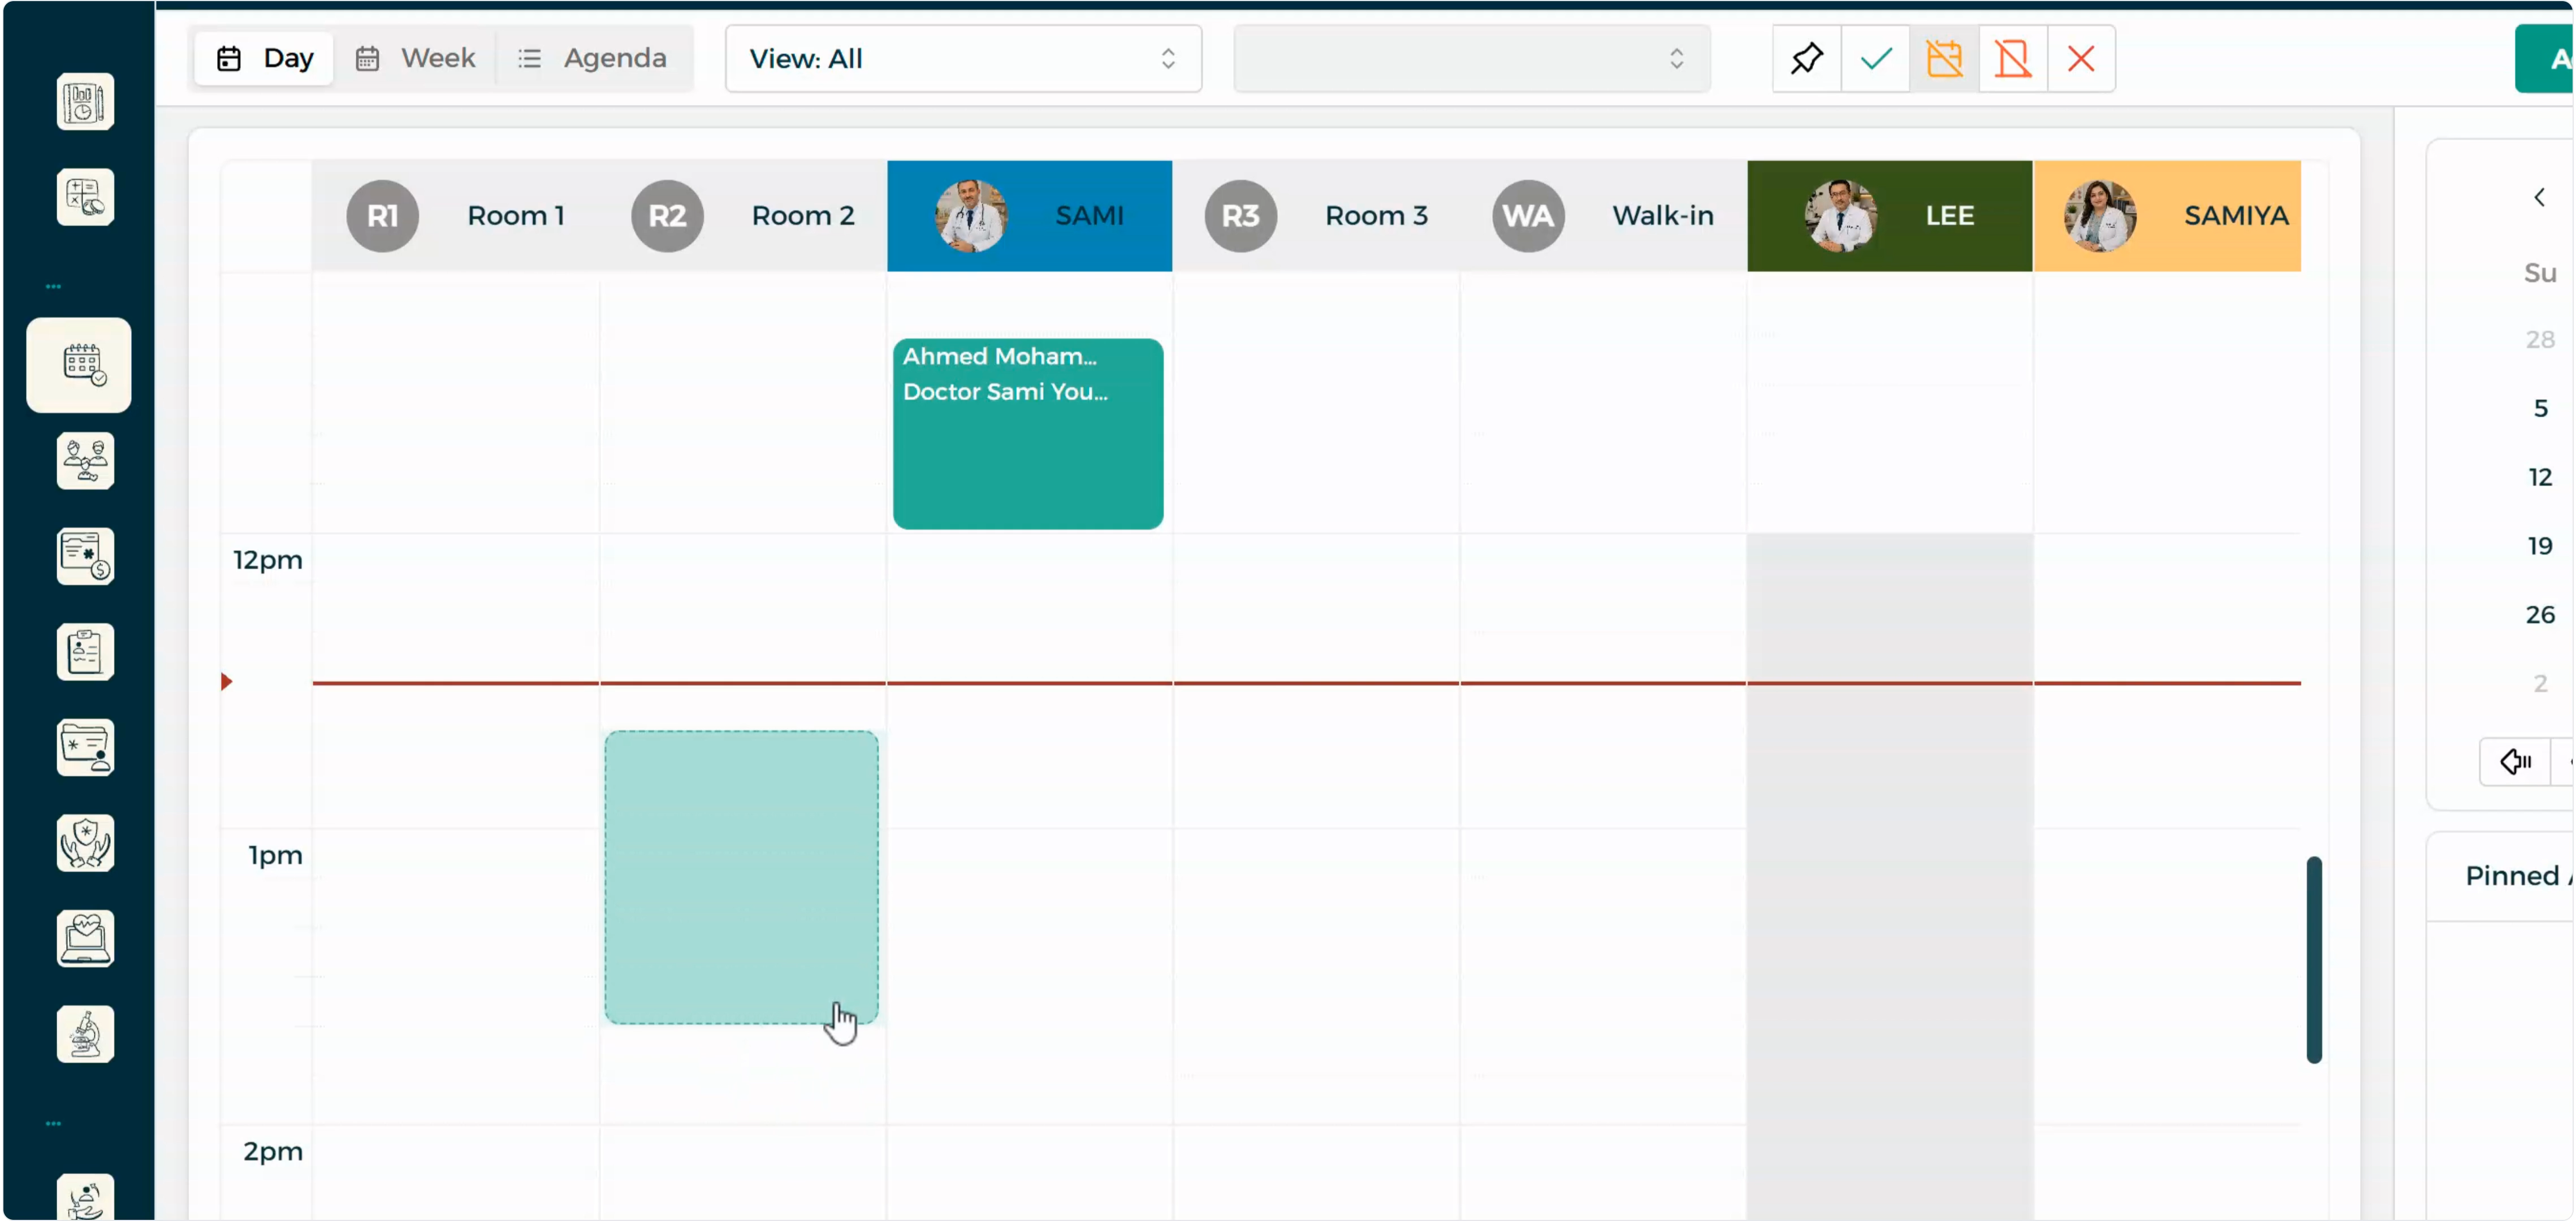
Step 1: Drag-and-Drop Quick Booking
Drag across the desired time range under the designated room column to initiate a fast appointment booking.
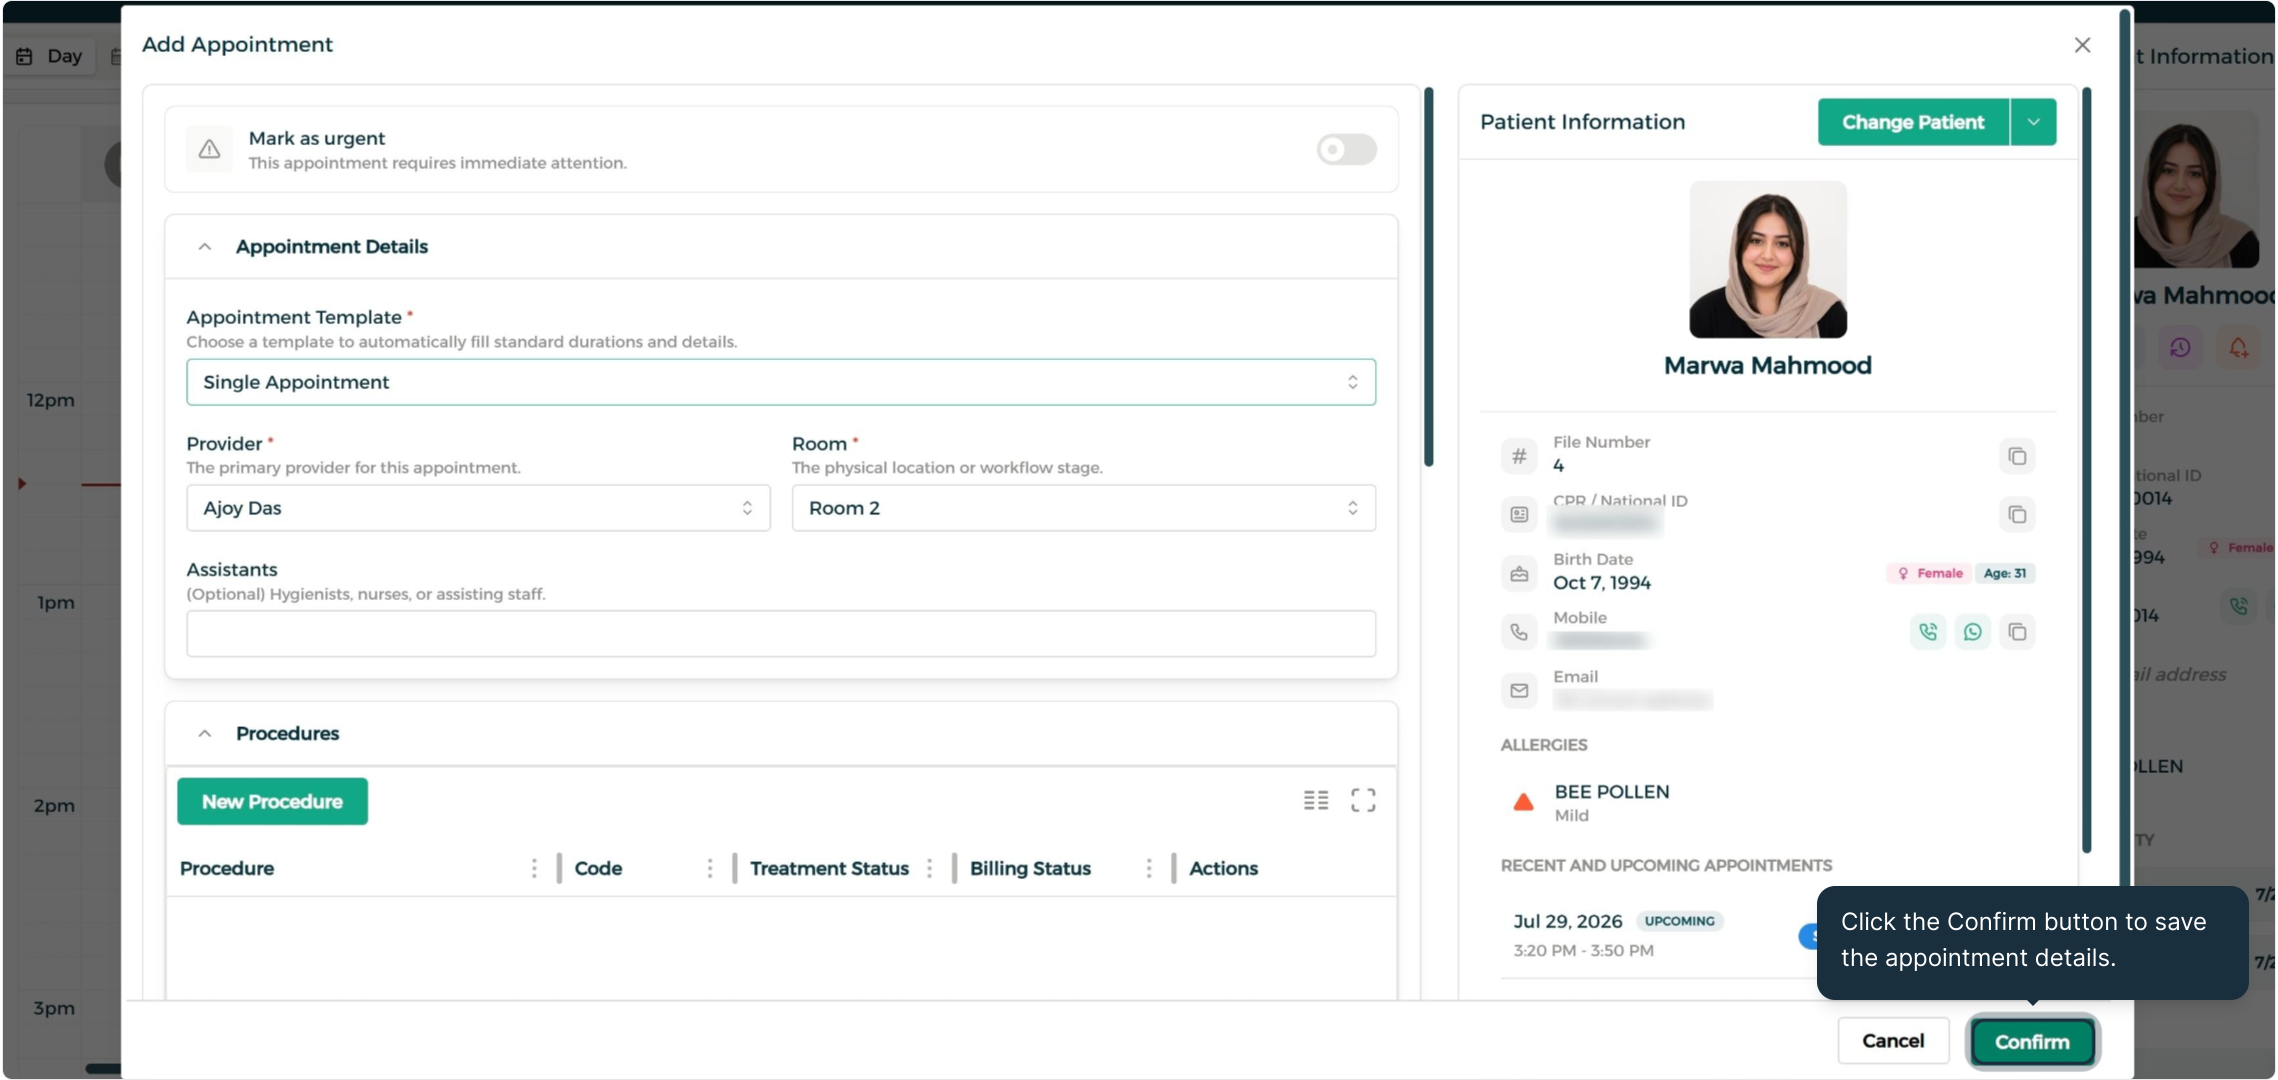
Step 2: Quick Booking Confirmation
Review the booking details in the prompt and select Confirm to lock in the slot.
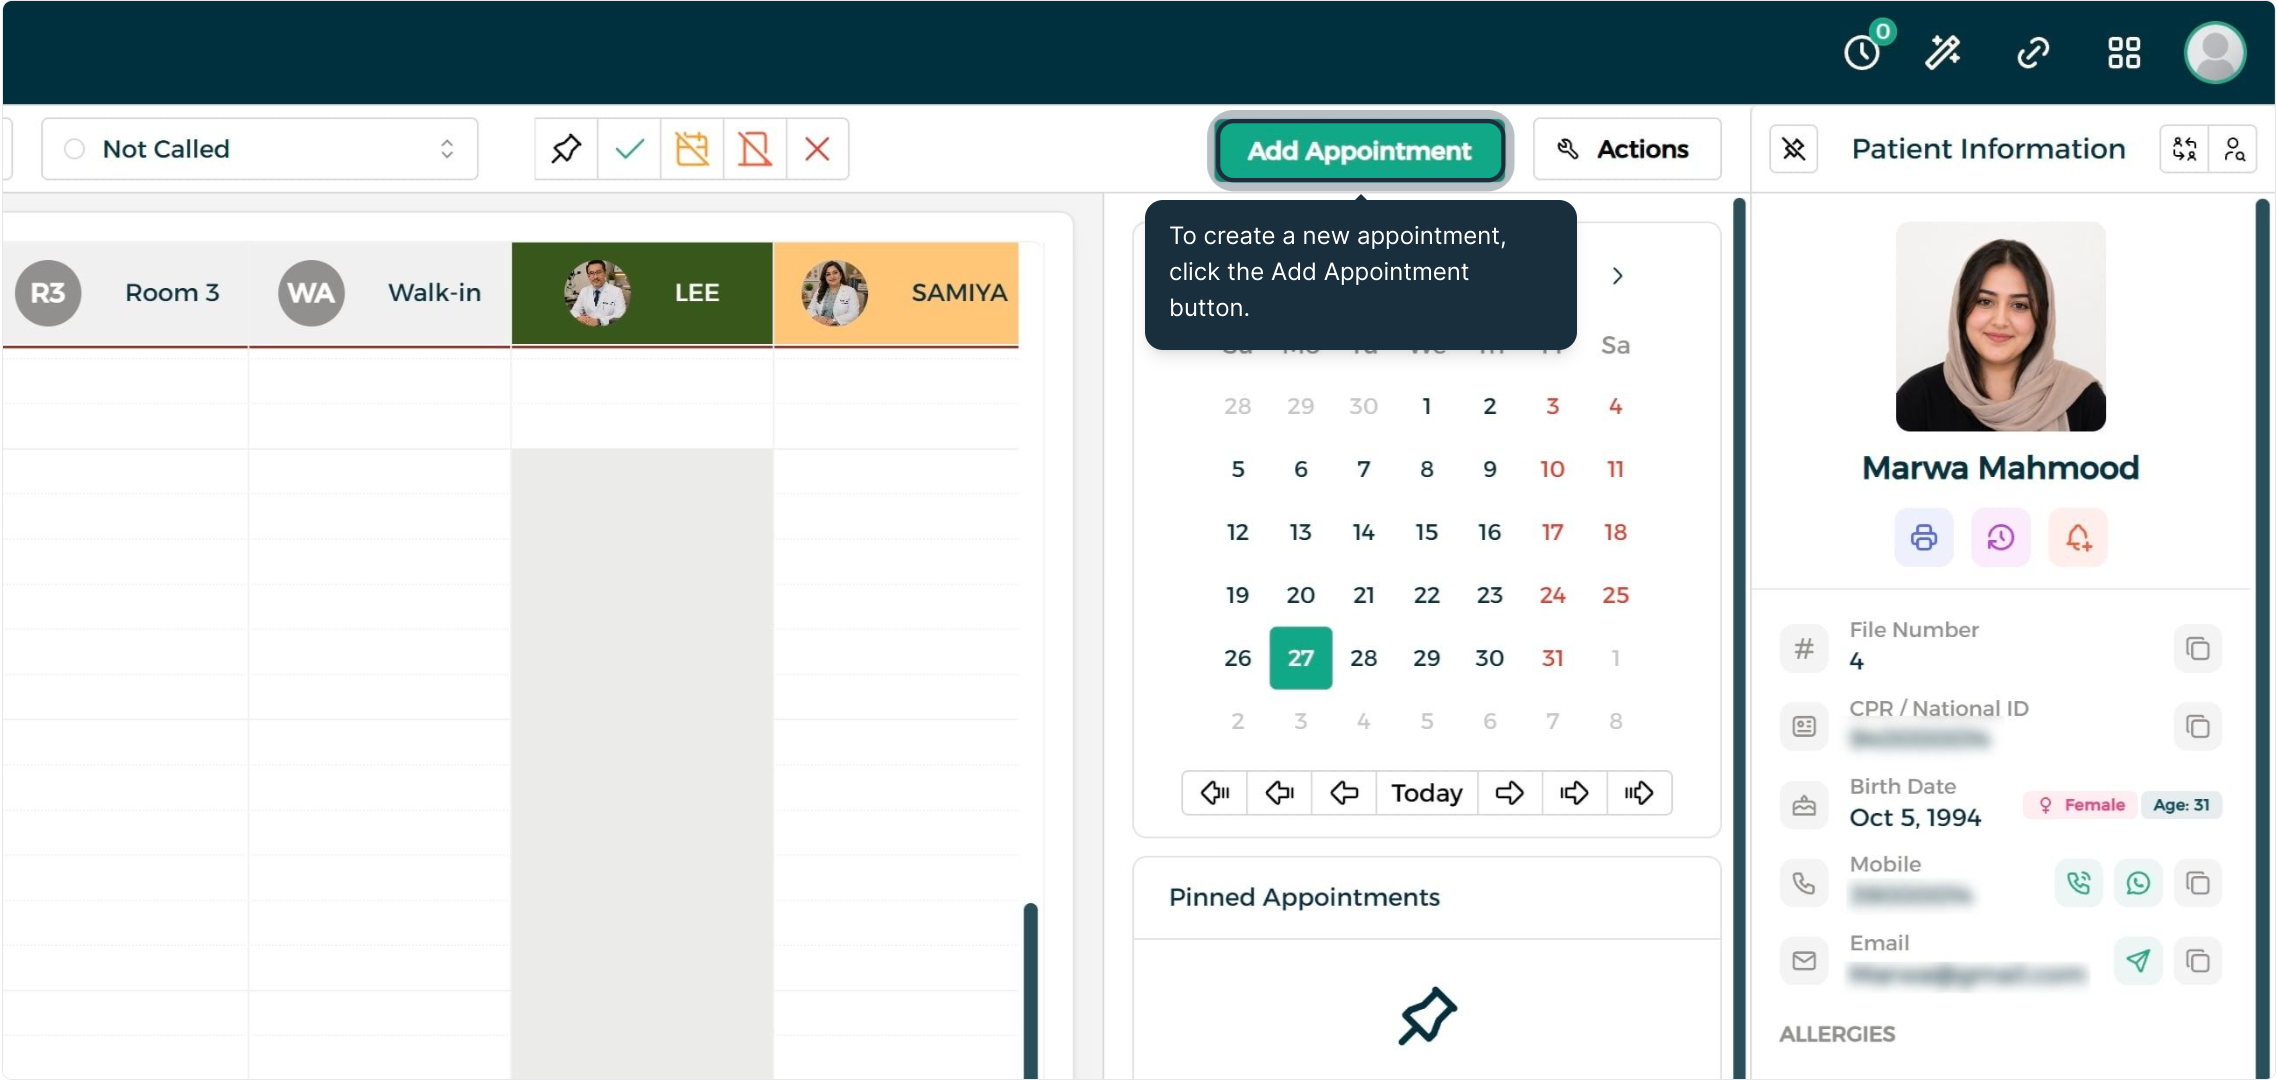
Step 3: Detailed Appointment Setup
Select Add Appointment to open the comprehensive booking form for clinical procedures and billing.
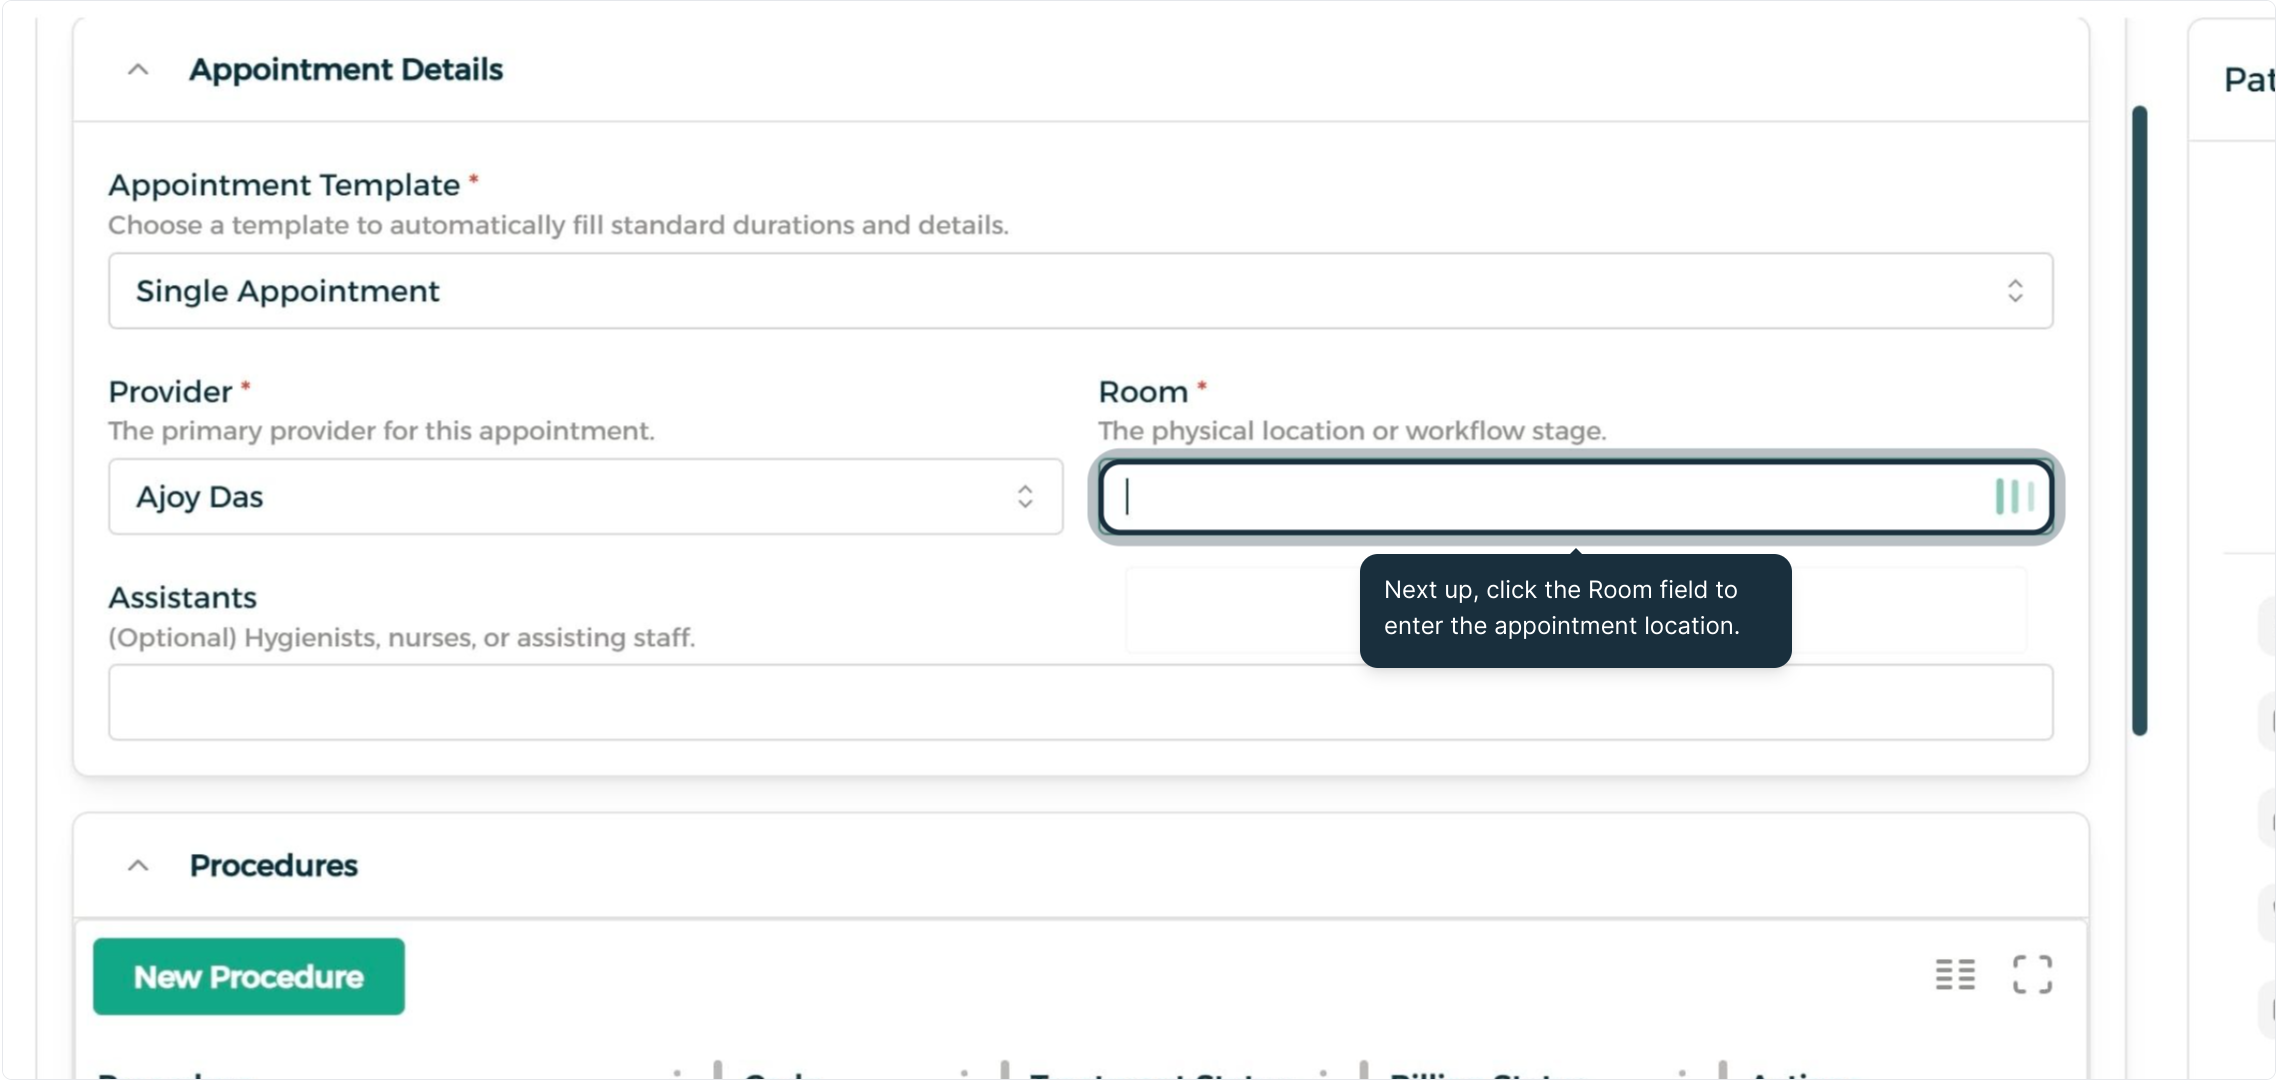
Step 4: Room & Template Selection
Assign the Room location. The default appointment template applies automatically; modify it via the Appointment Template menu or create custom configurations in the Configuration tab.
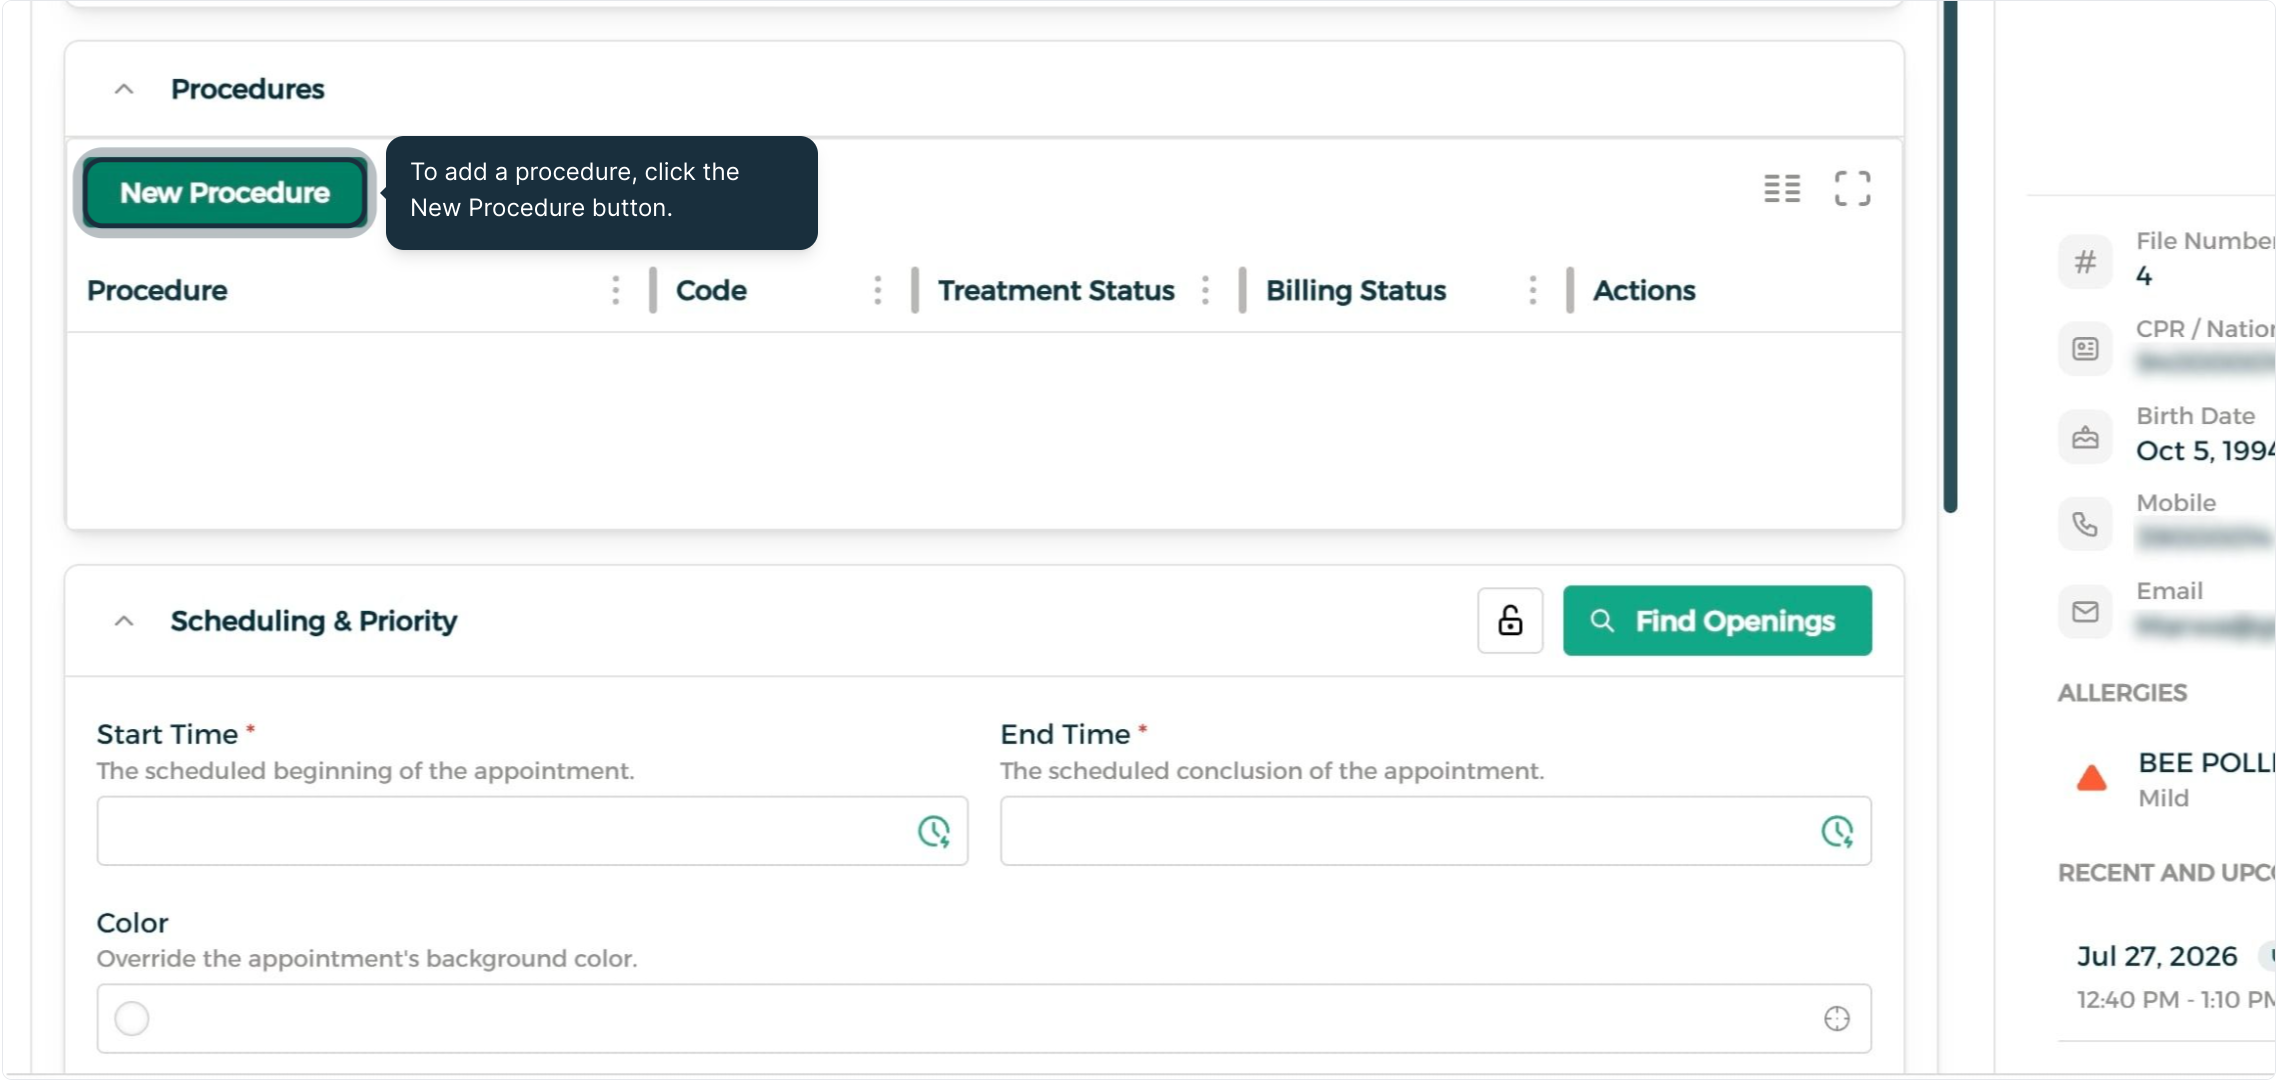
Step 5: Procedure Attachment
Select New Procedure to link specific medical services to the appointment.
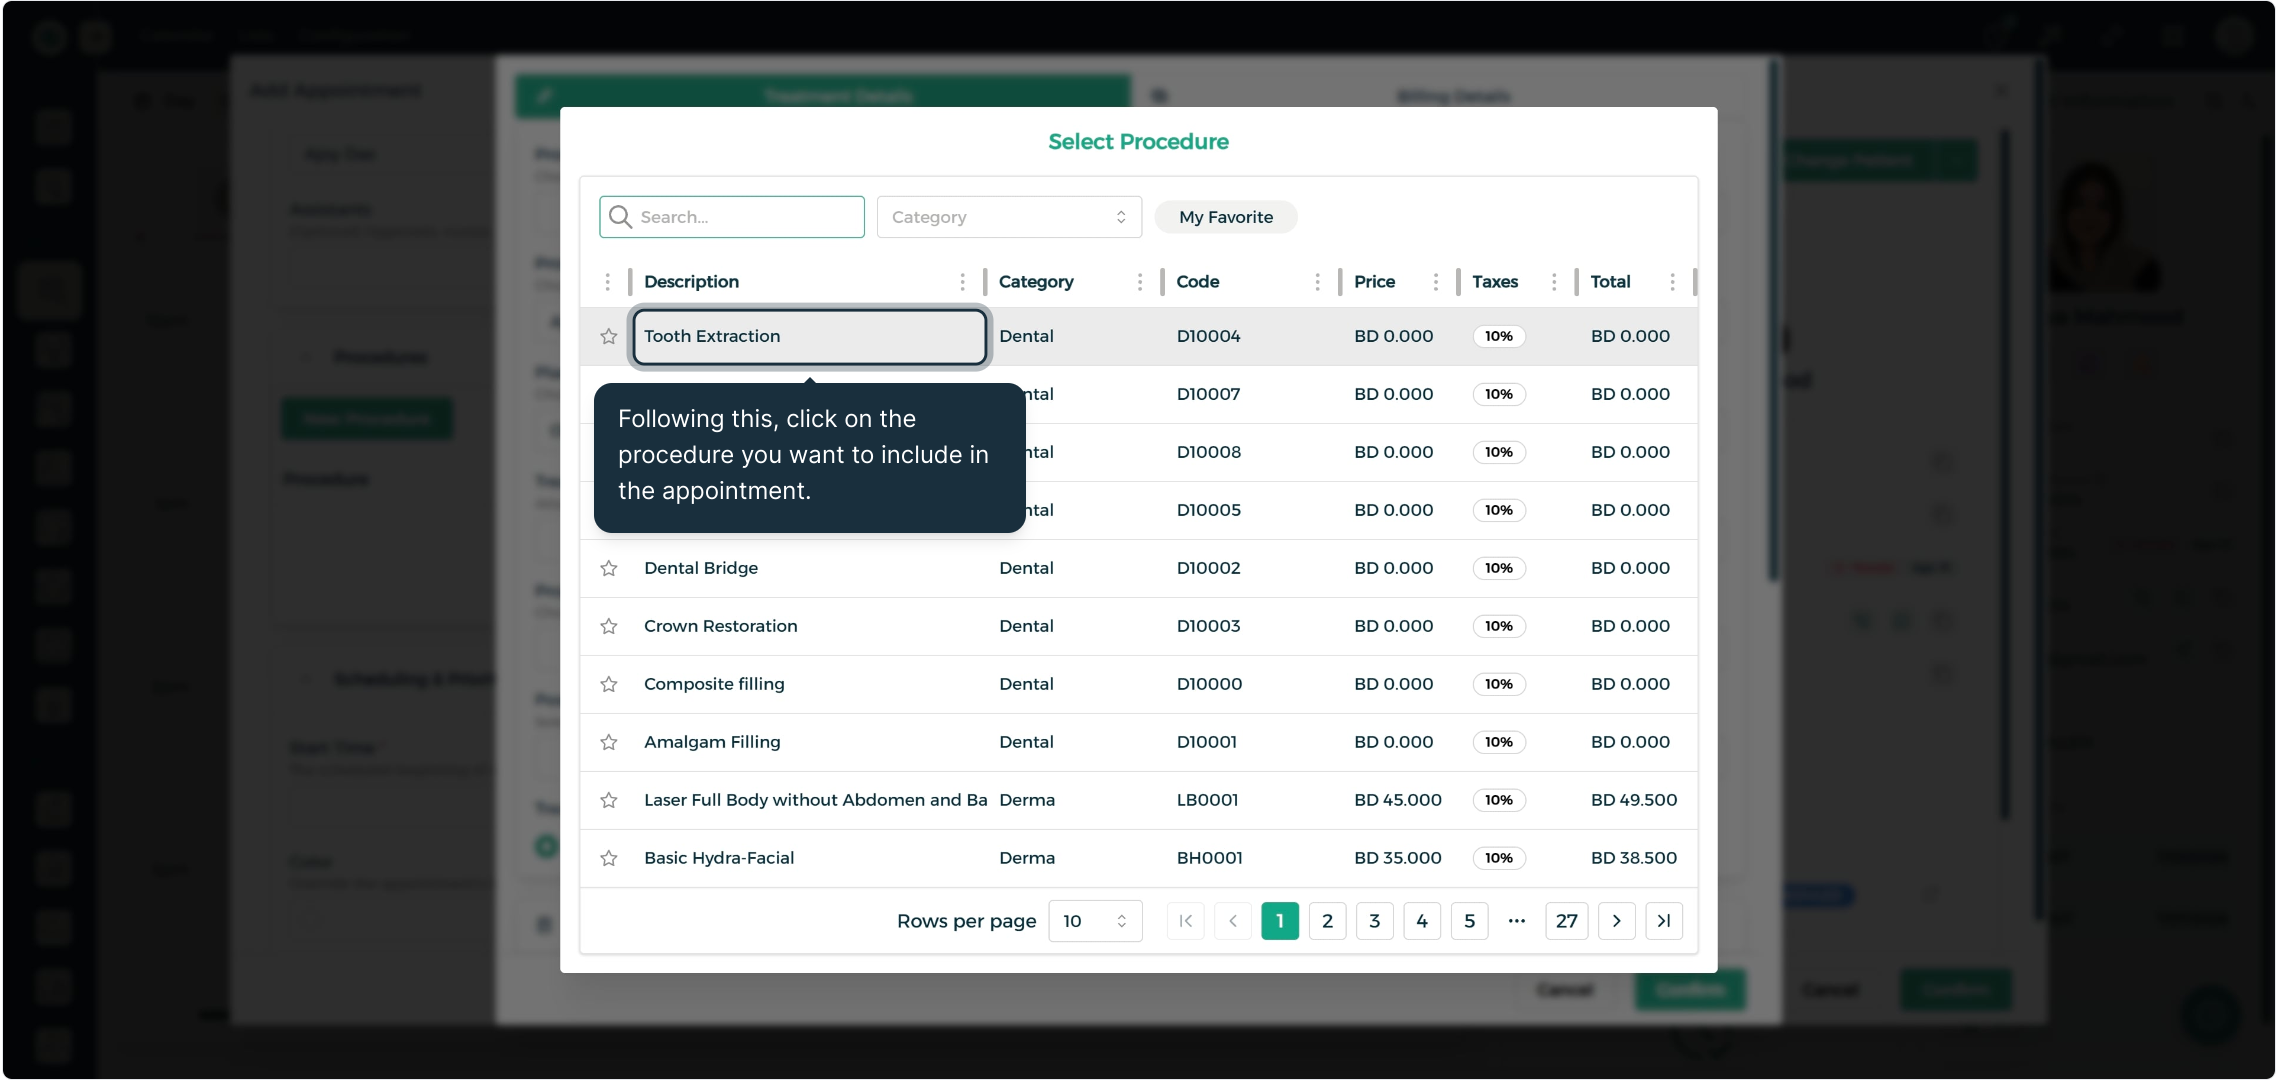
Step 6: Medical Procedure & Billing Configuration
Choose the procedure from the list, then navigate to Billing Details to establish payment methods and insurance coverage. Select Confirm to attach the details.
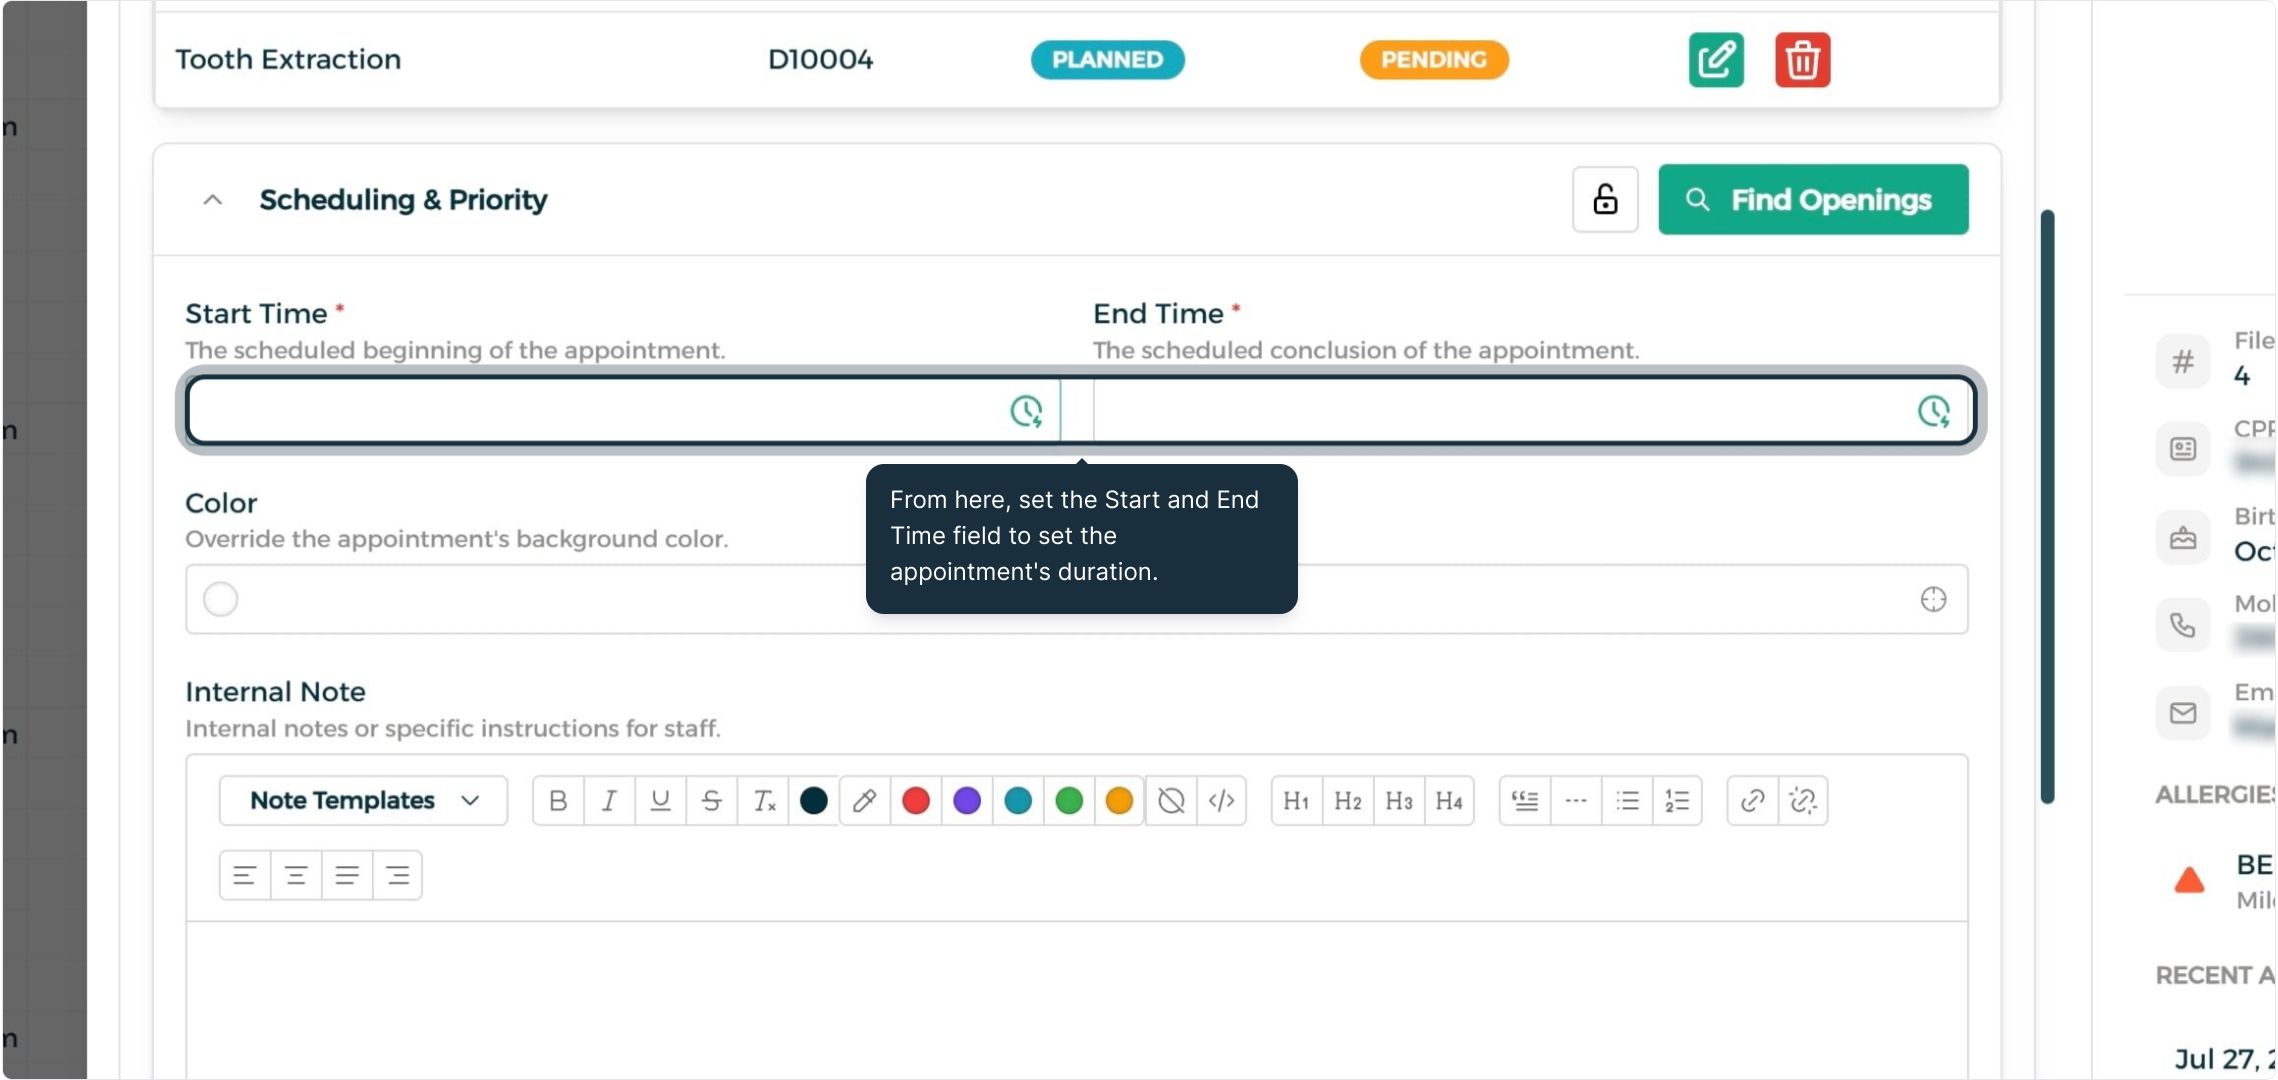
Step 7: Duration, Notes, & Follow-up Status
Set the visit duration using Start Time and End Time. Add internal clinical notes and assign the appropriate Follow-up Status.
Step 8: Appointment Finalization
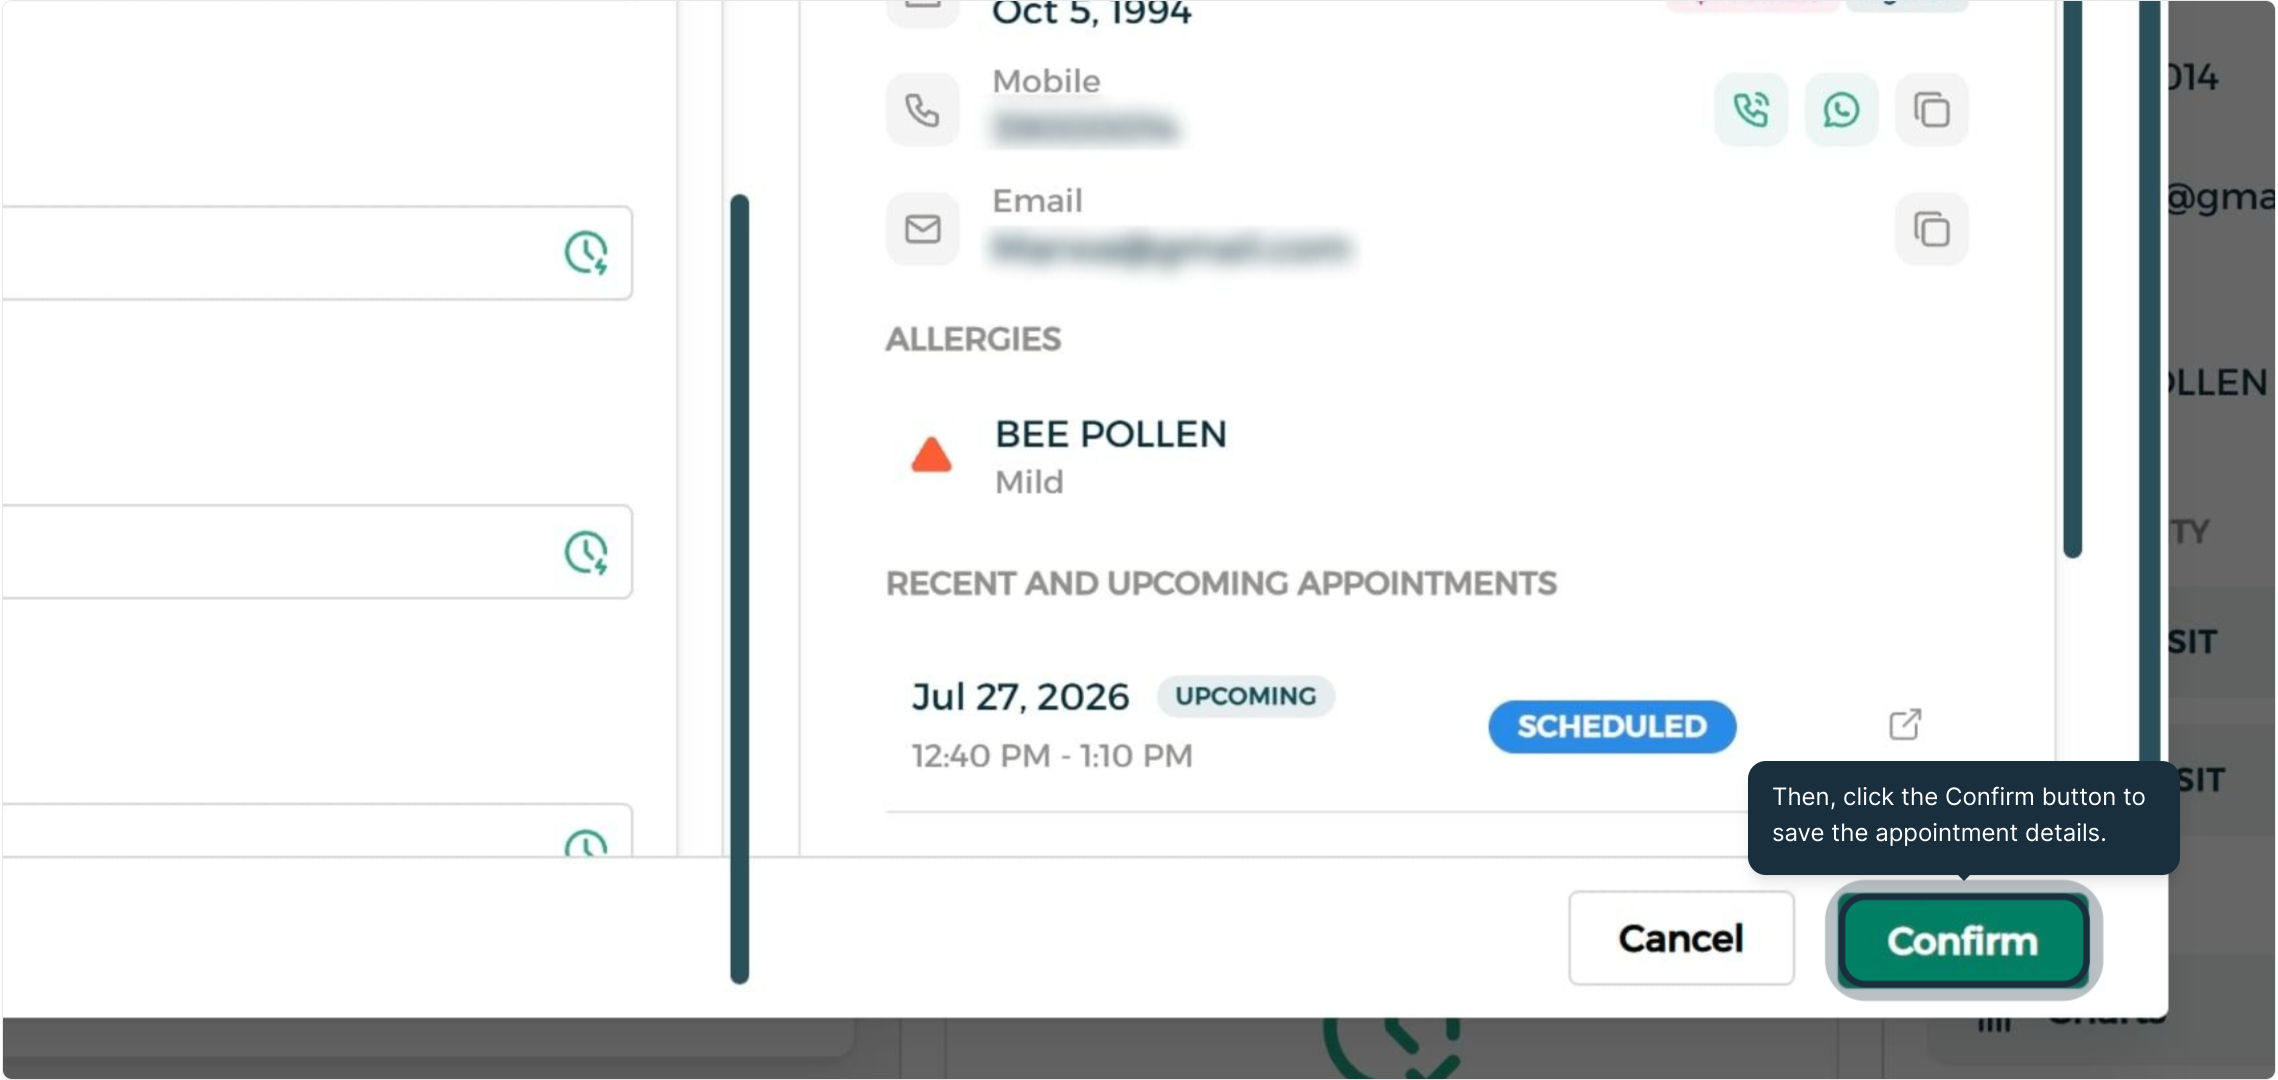
Select Confirm to finalize and post the appointment to the schedule.
Managing Scheduled Appointments
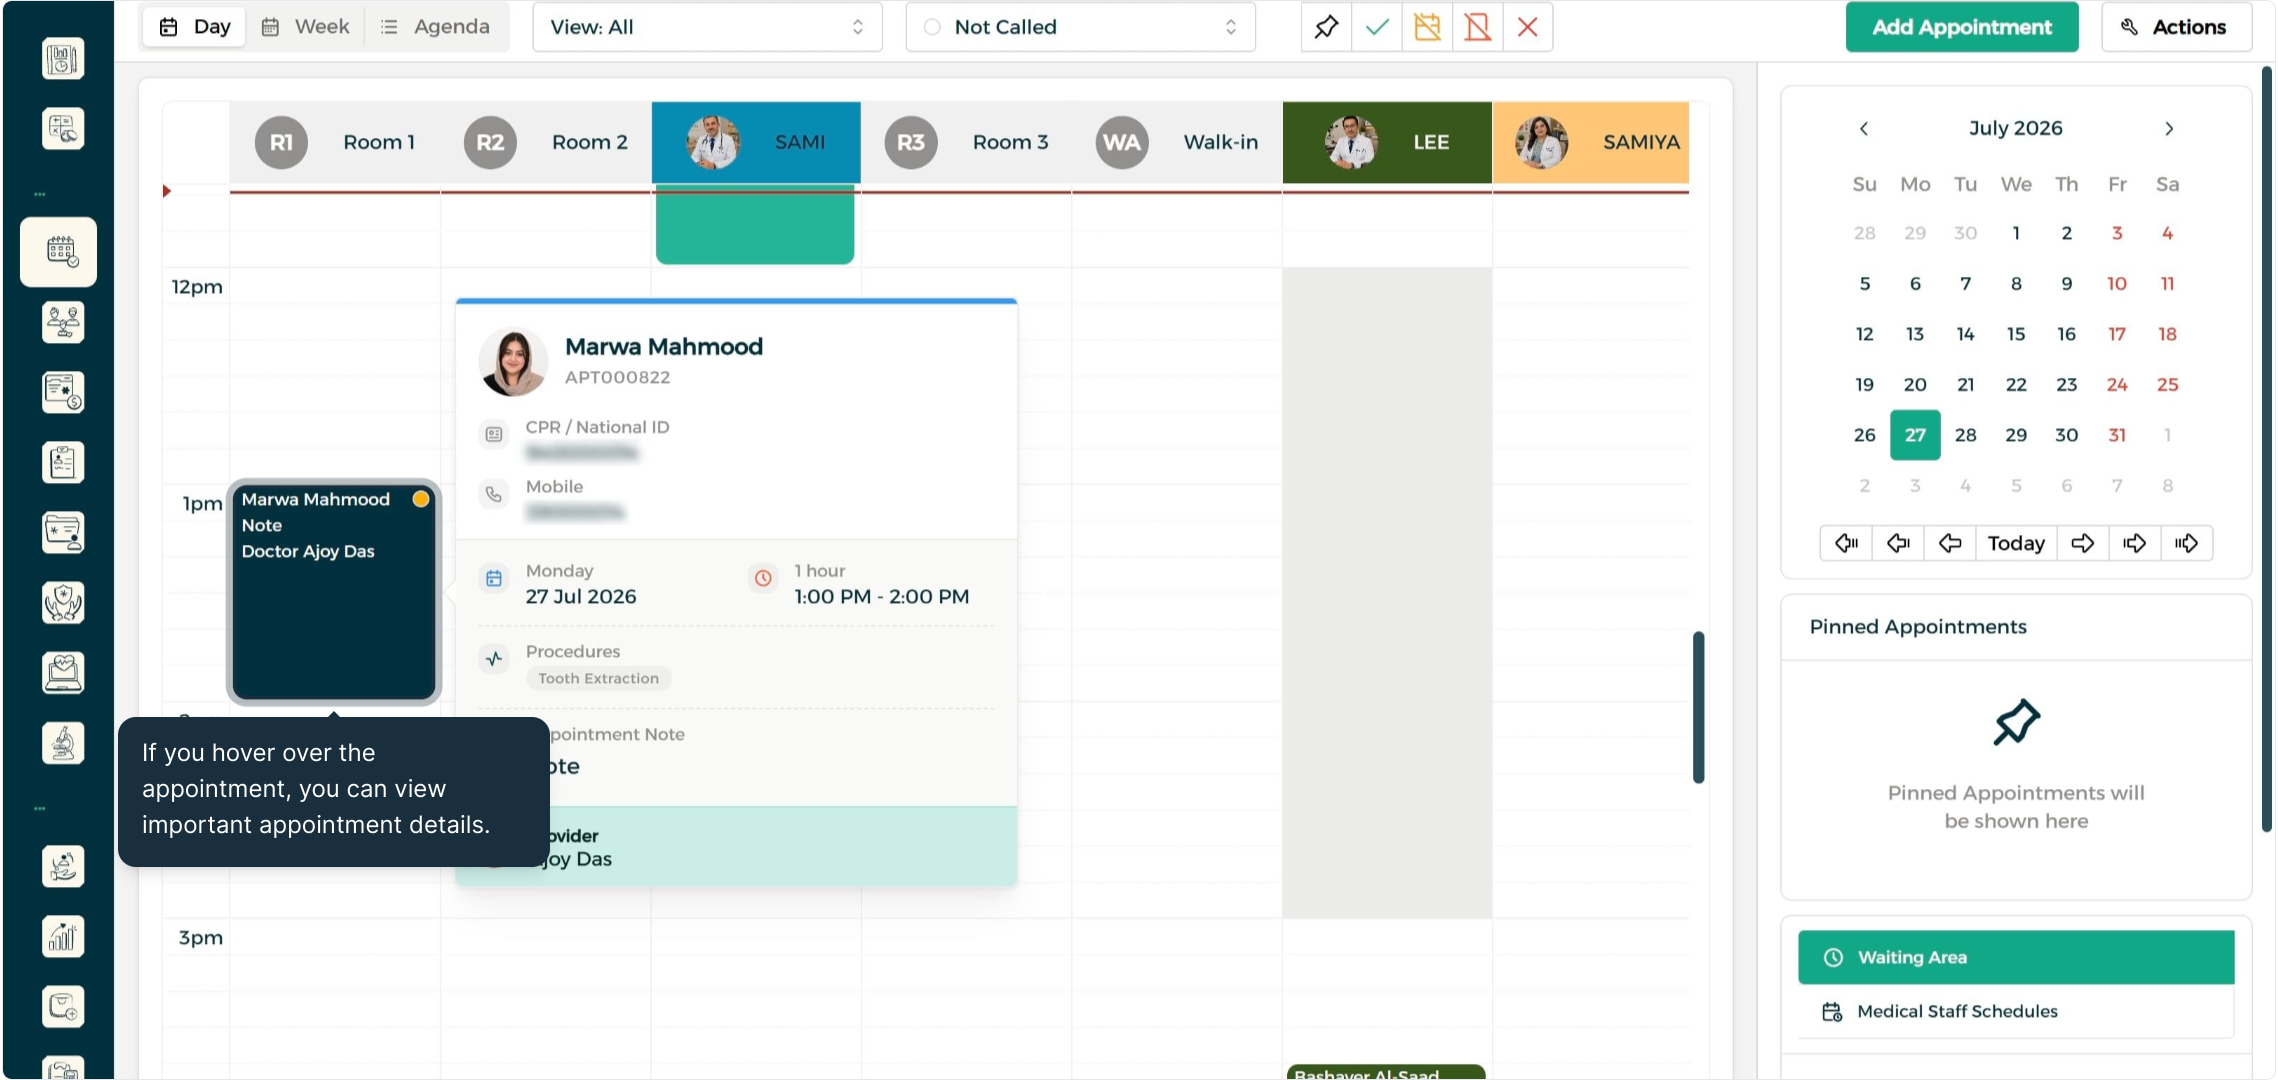
Step 1: Quick Details Preview
Hover over any calendar entry to review summary information at a glance.
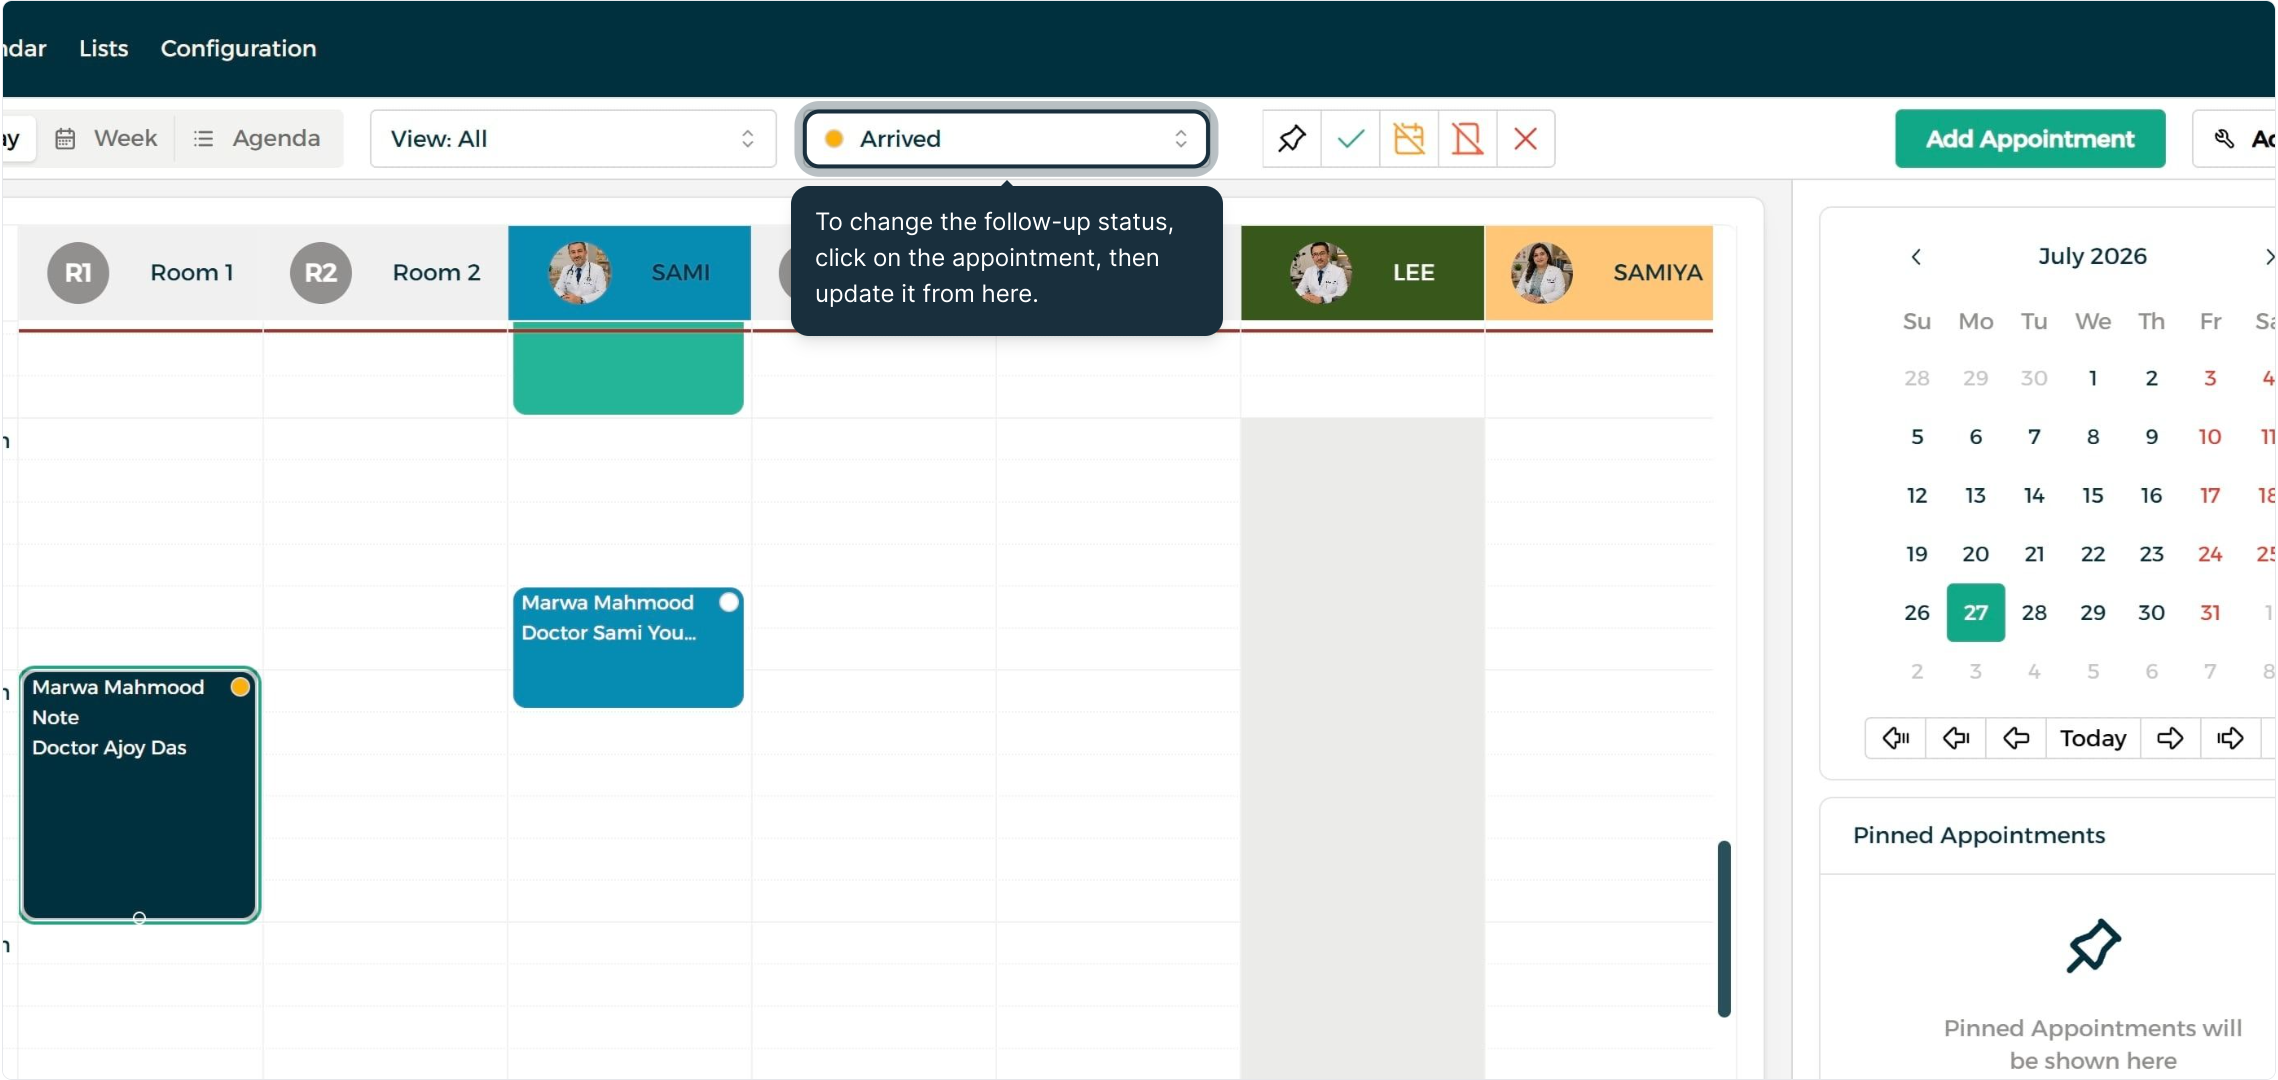
Step 2: Follow-up Status Updates
Select the appointment card to update its status directly from the side panel.
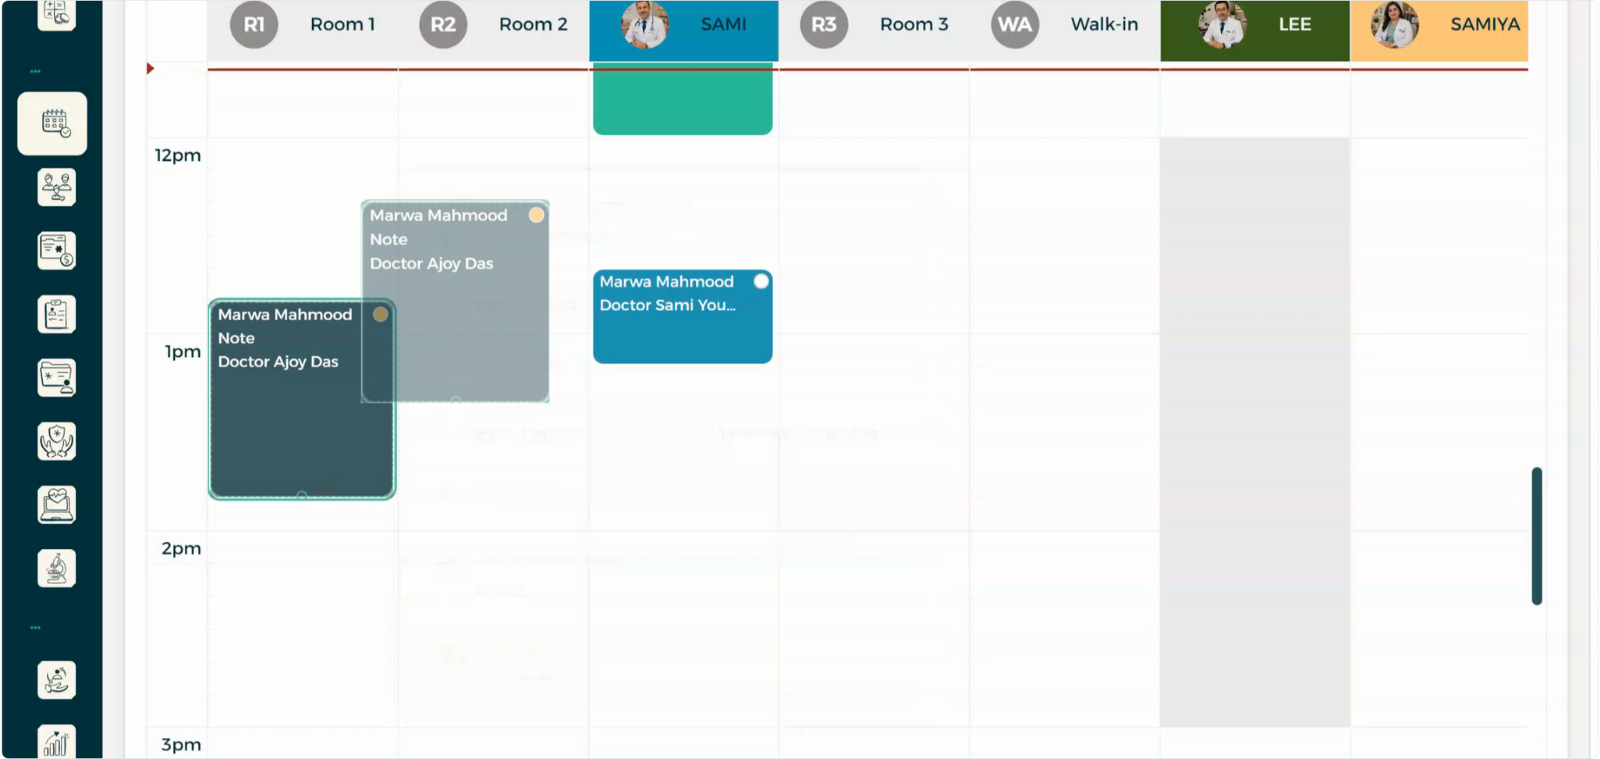
Step 3: Calendar Rescheduling & Resizing
Drag and drop cards across time slots or room columns to reschedule. Drag card edges to adjust visit duration dynamically.
Step 4: Pinned Appointments Dock
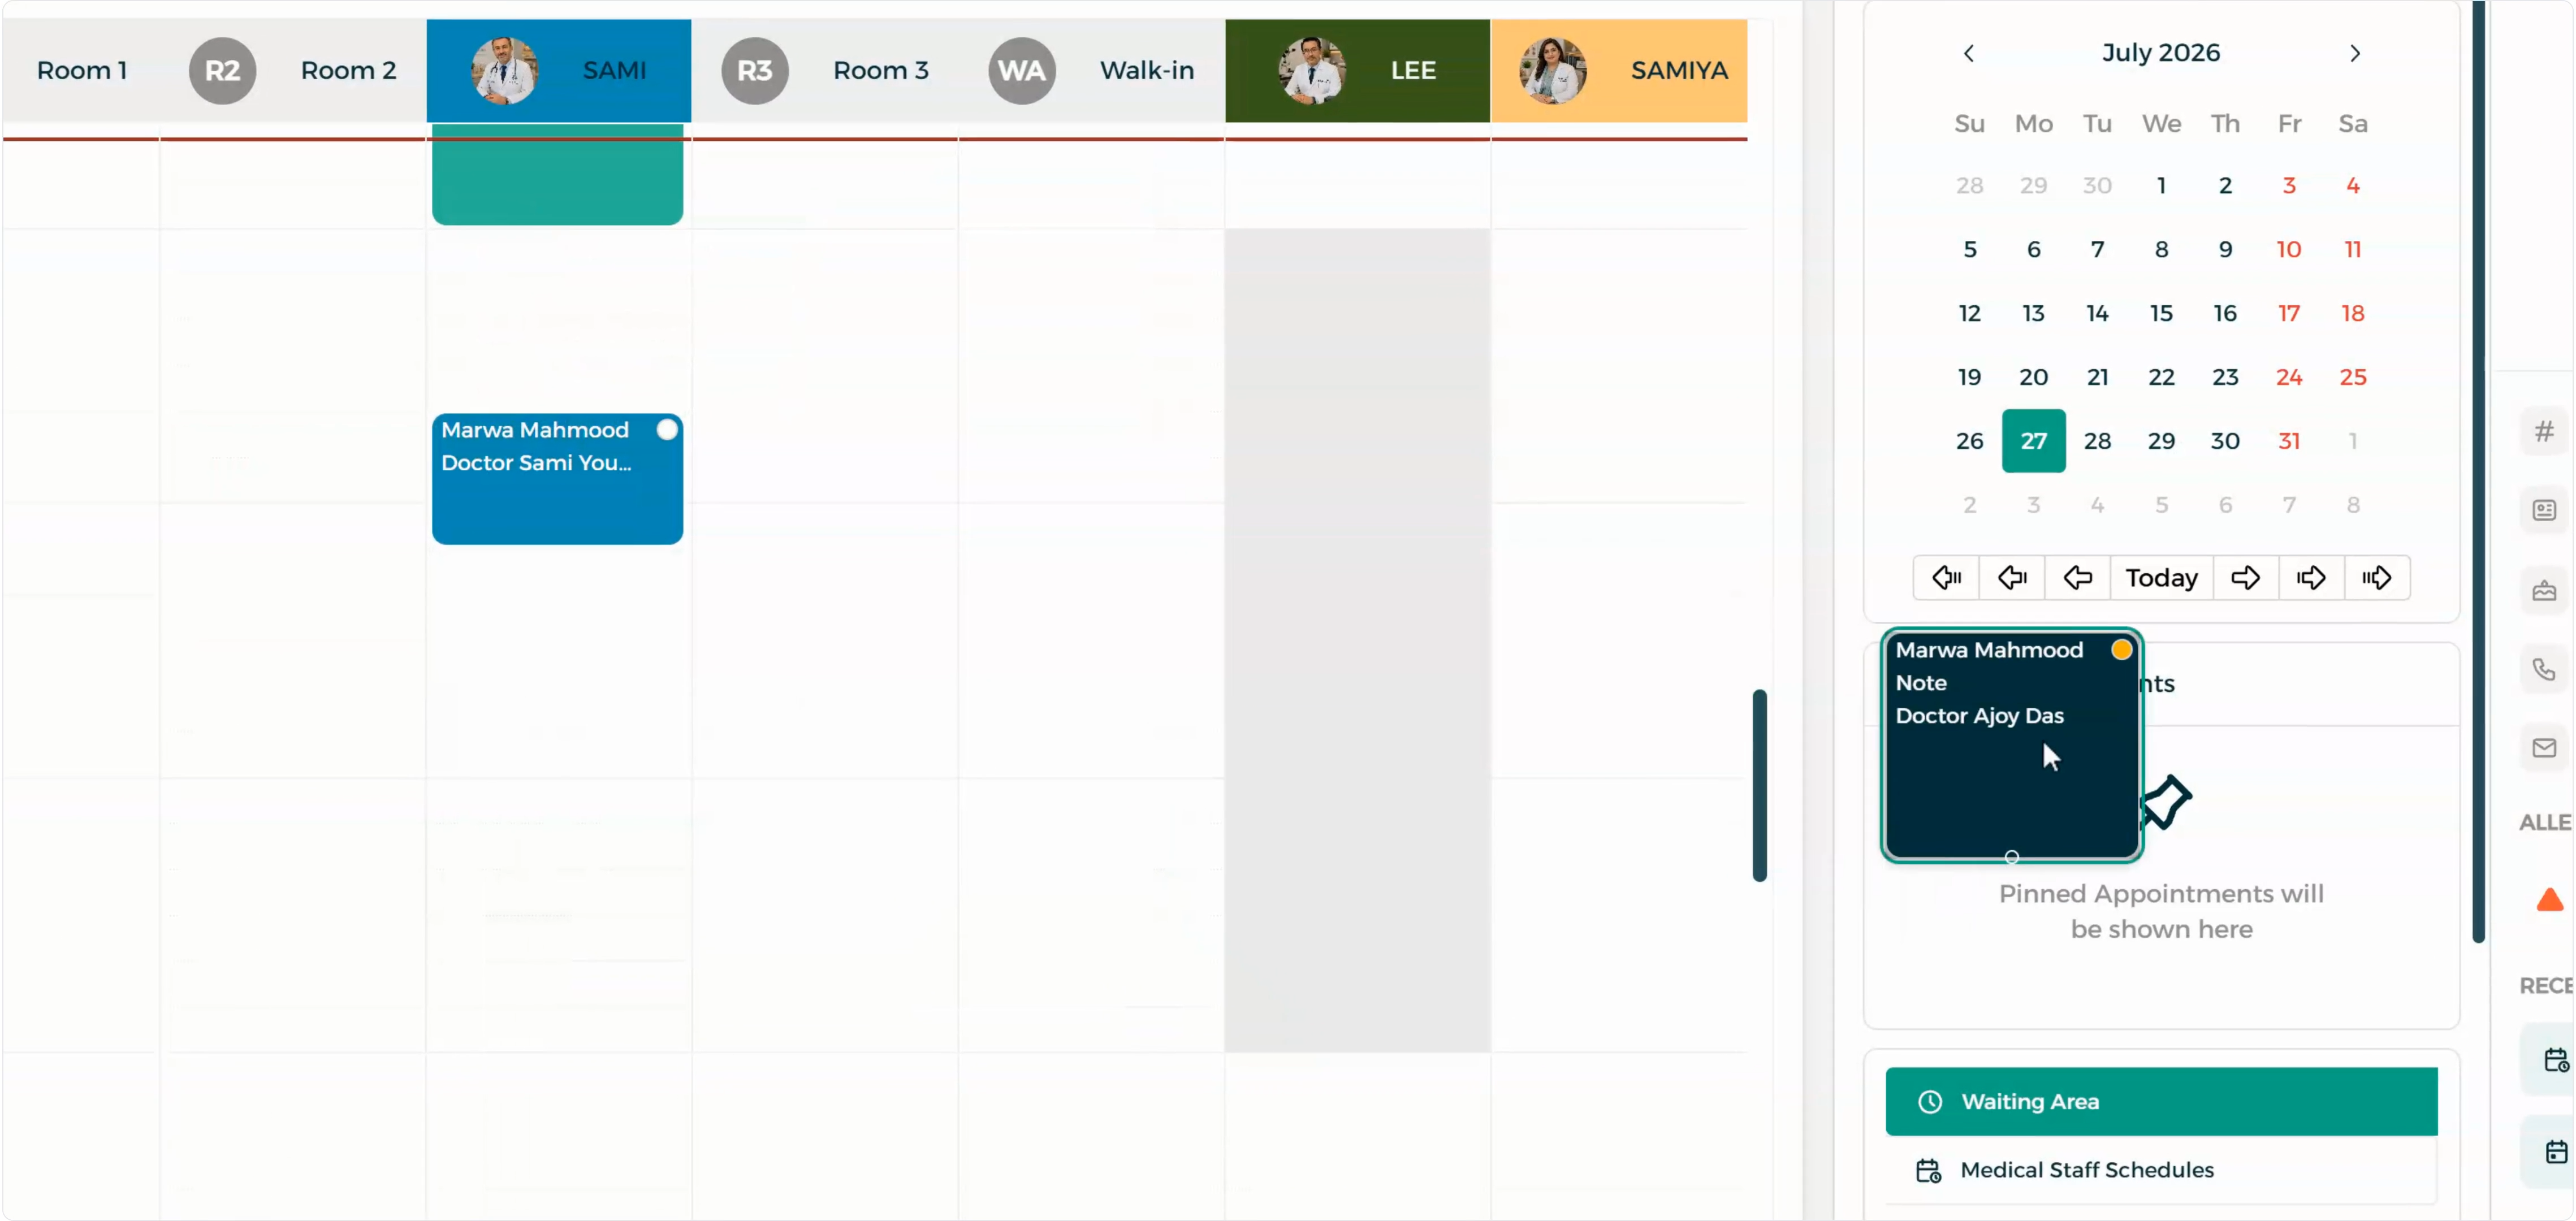
Drag important appointments into the pinned section to maintain visibility while navigating across different calendar dates.
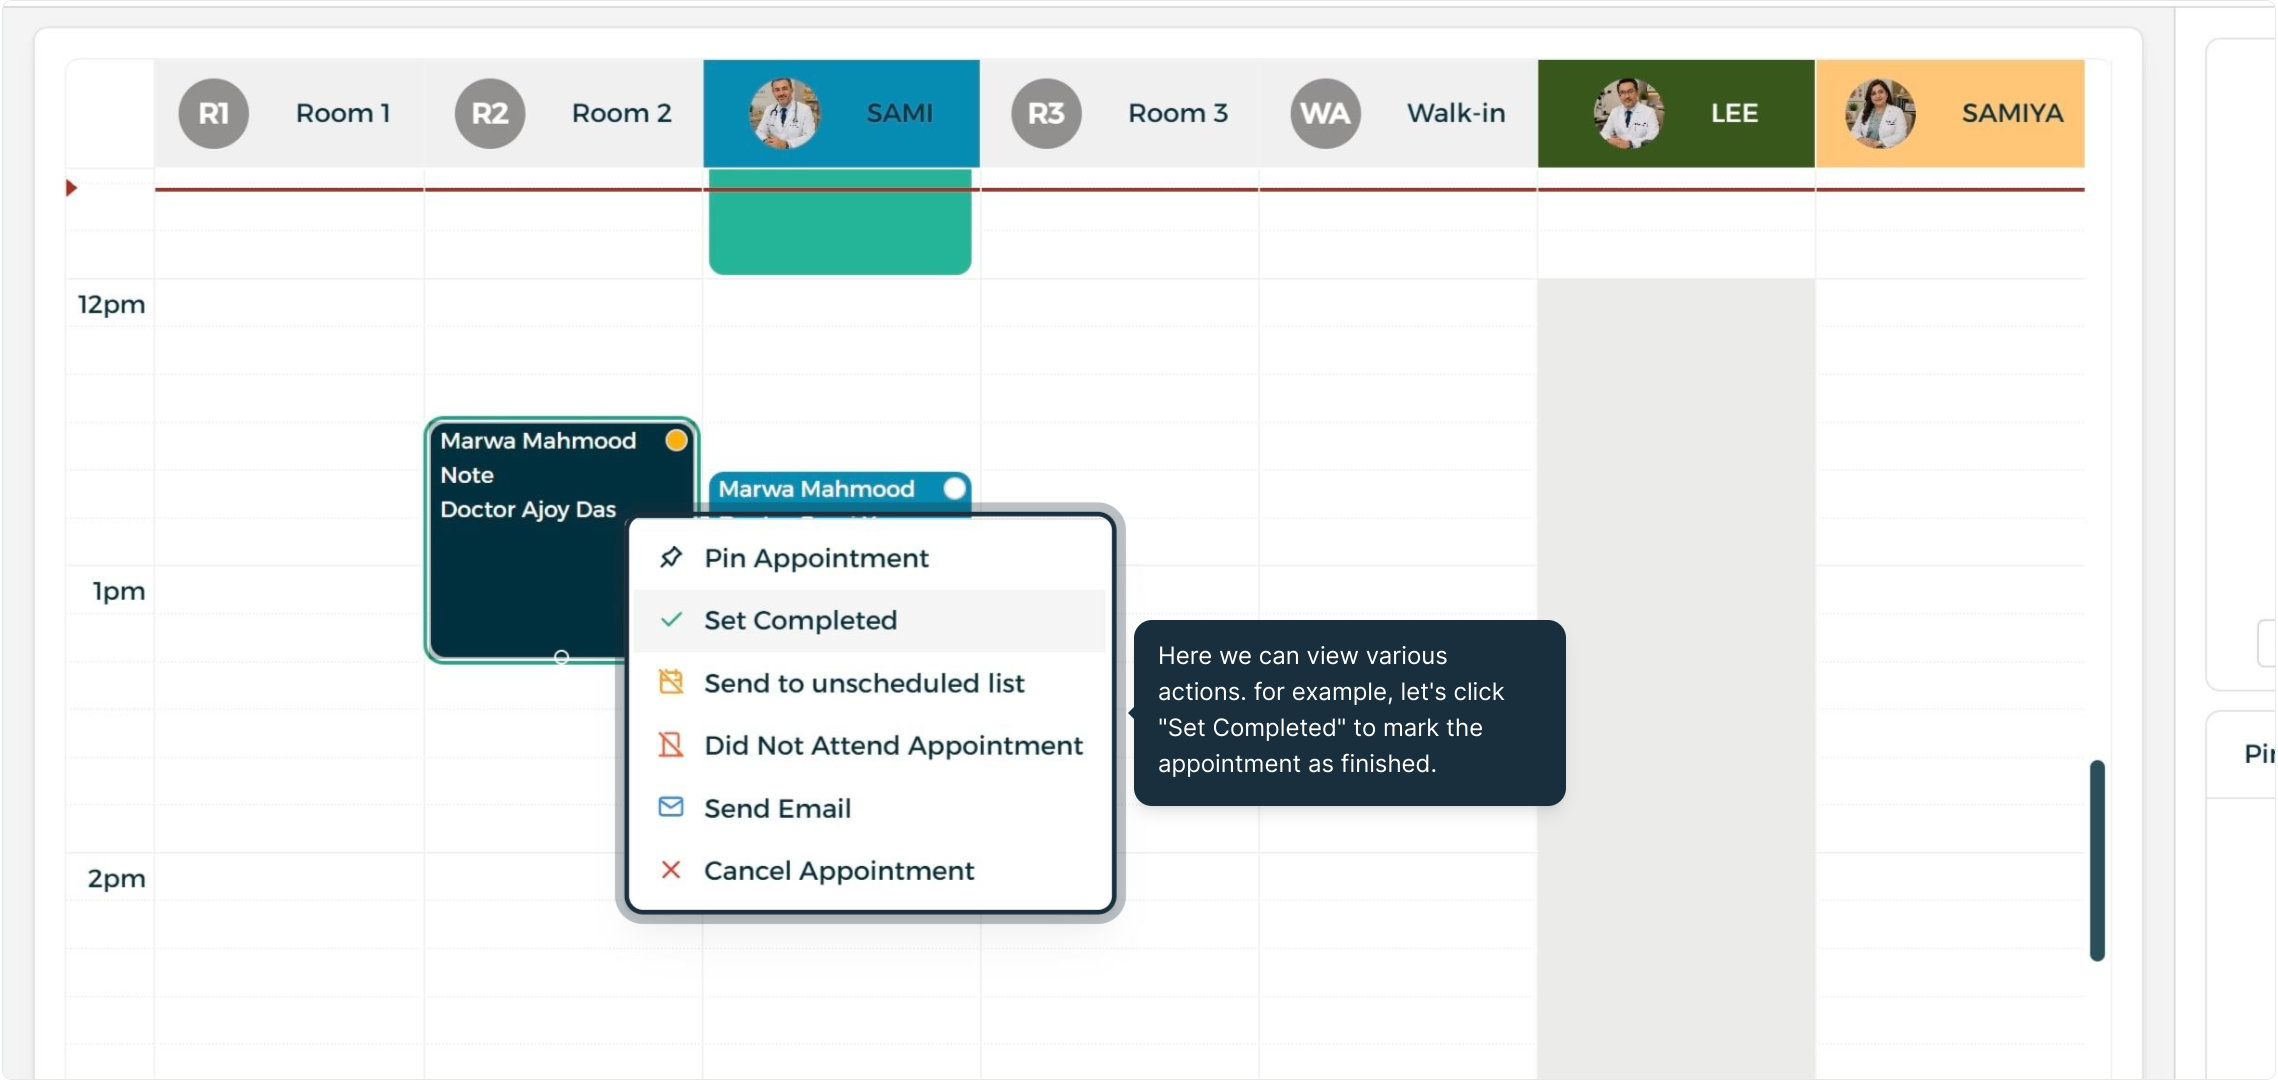
Step 5: Contextual Action Menu
Right-click an appointment card to access instant management options, such as Set Completed.
Time Blocks & Filters
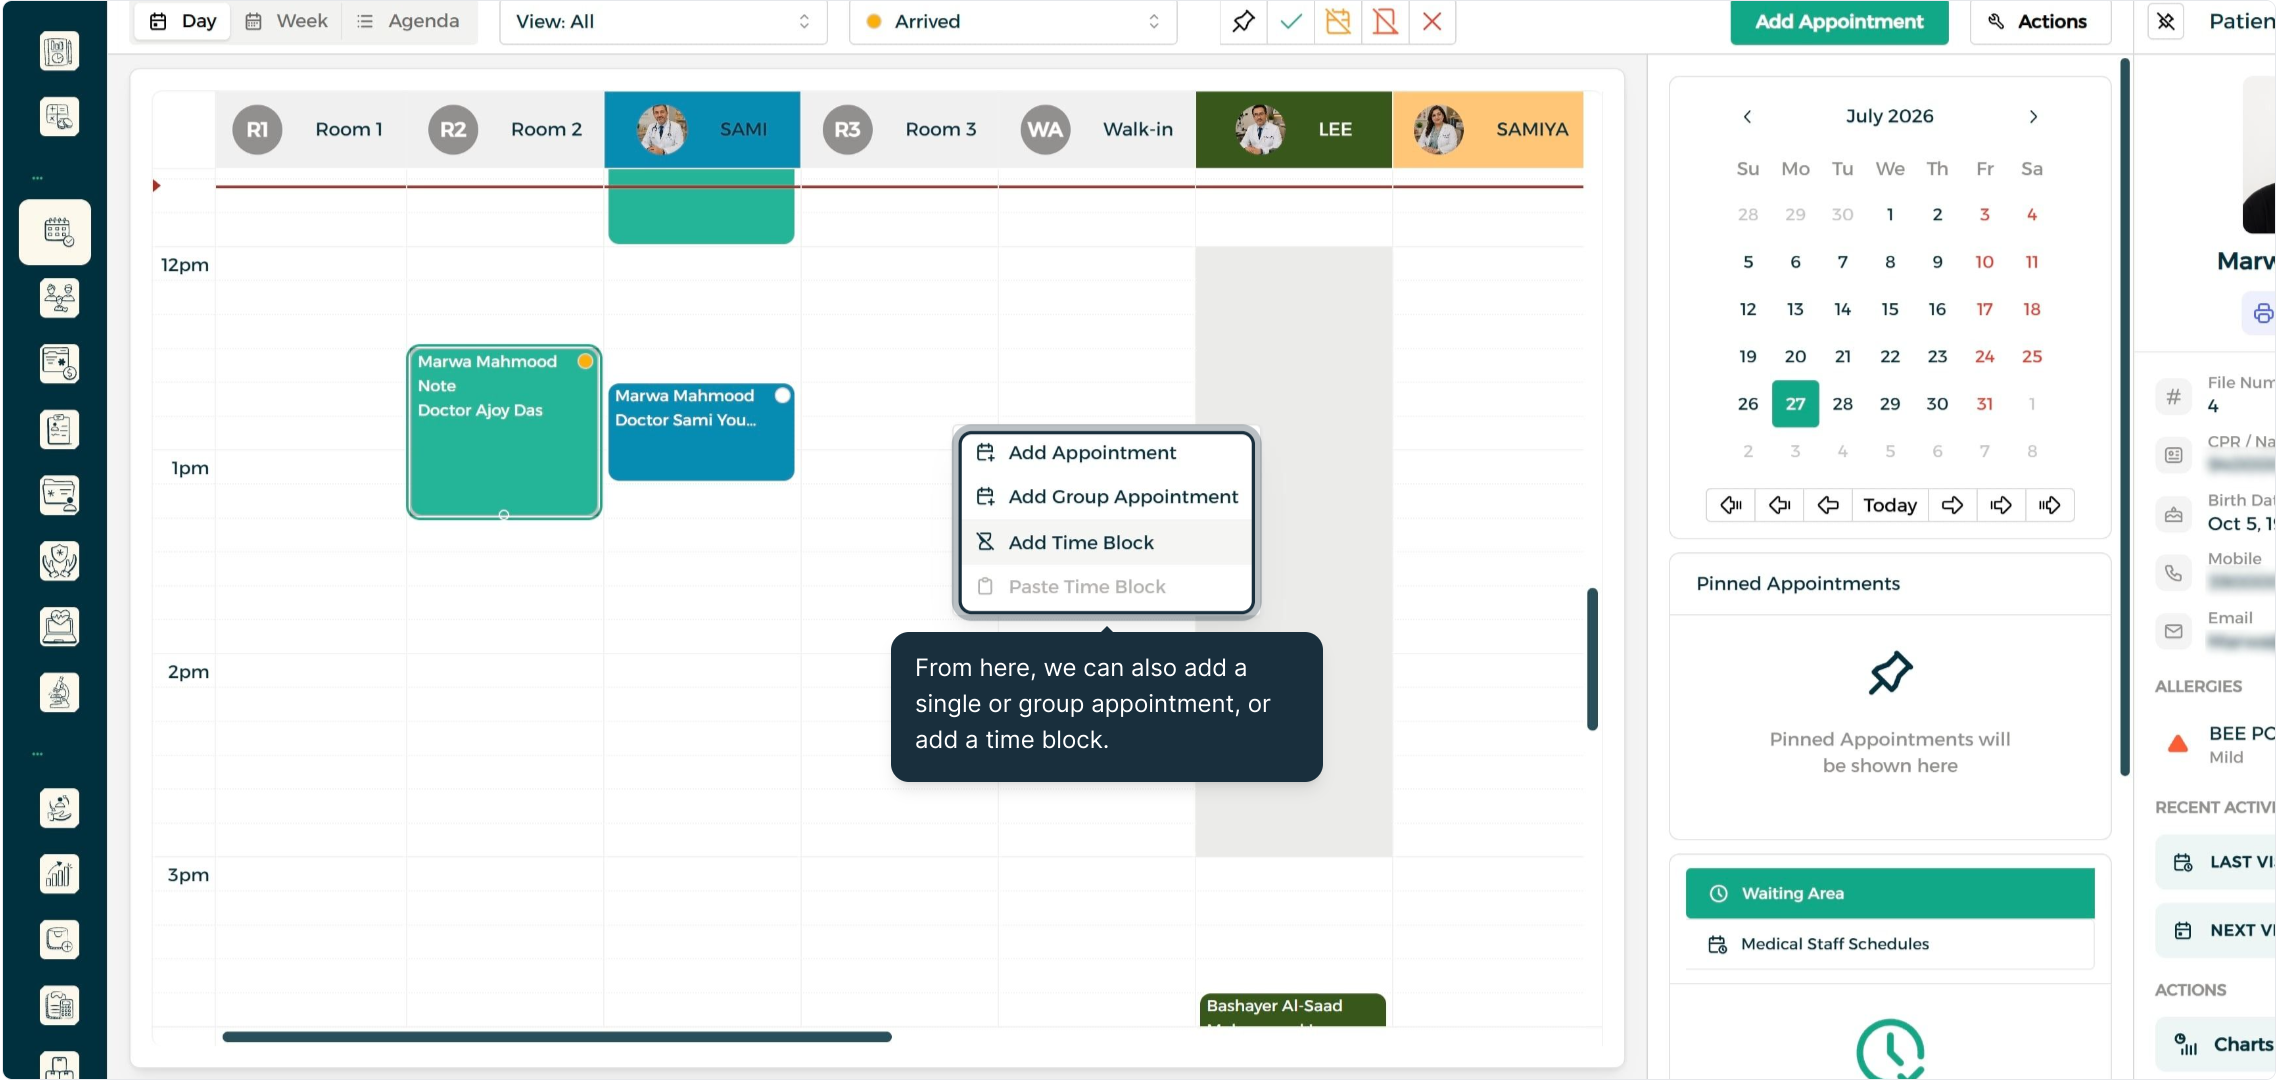
Step 1: Calendar Context Menu
Right-click any open space on the calendar grid and select Add Time Block.
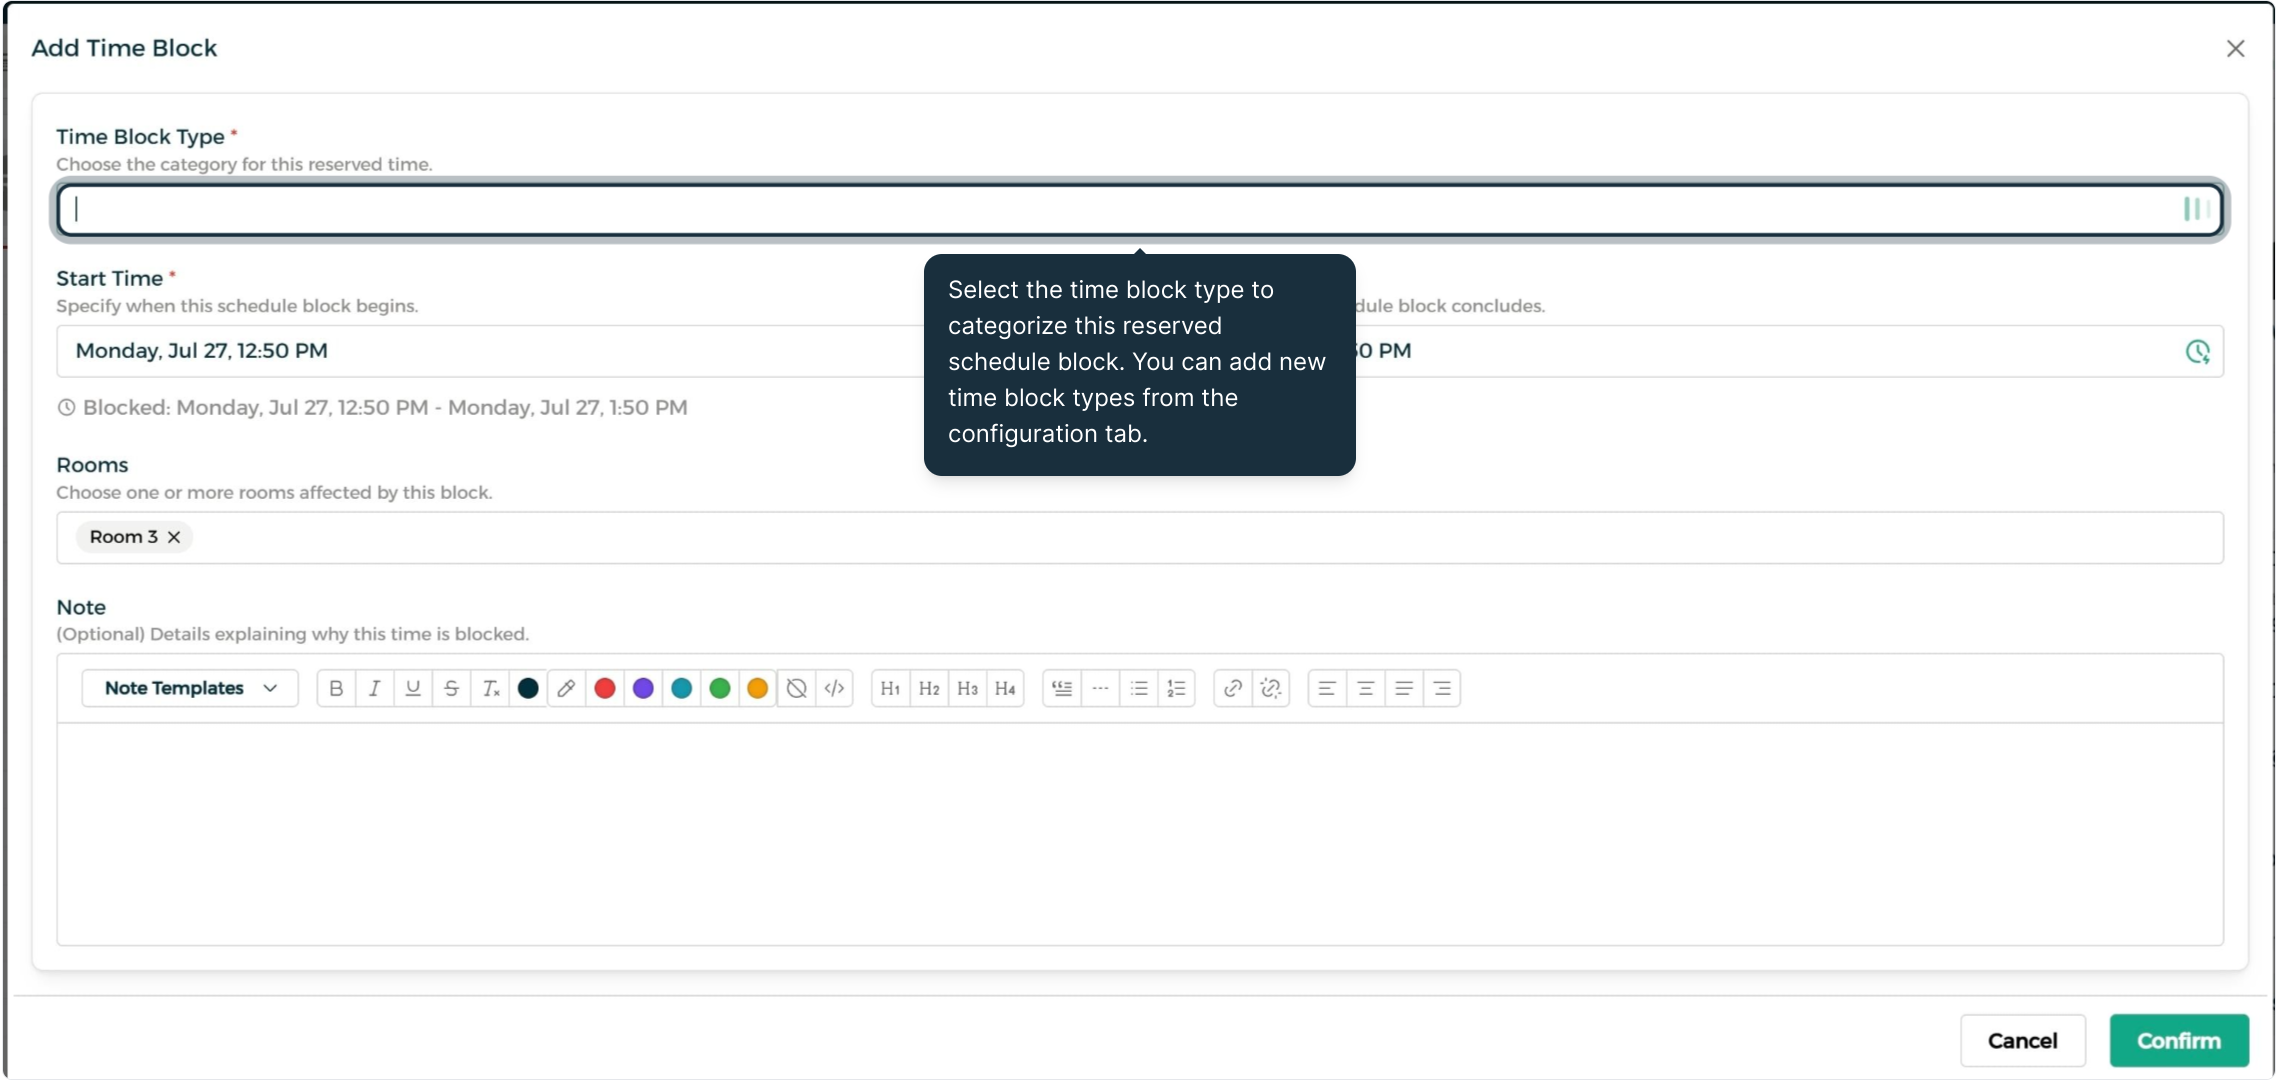
Step 2: Time Block Configuration
Set the category, affected rooms, notes, and duration for non-patient calendar holds.
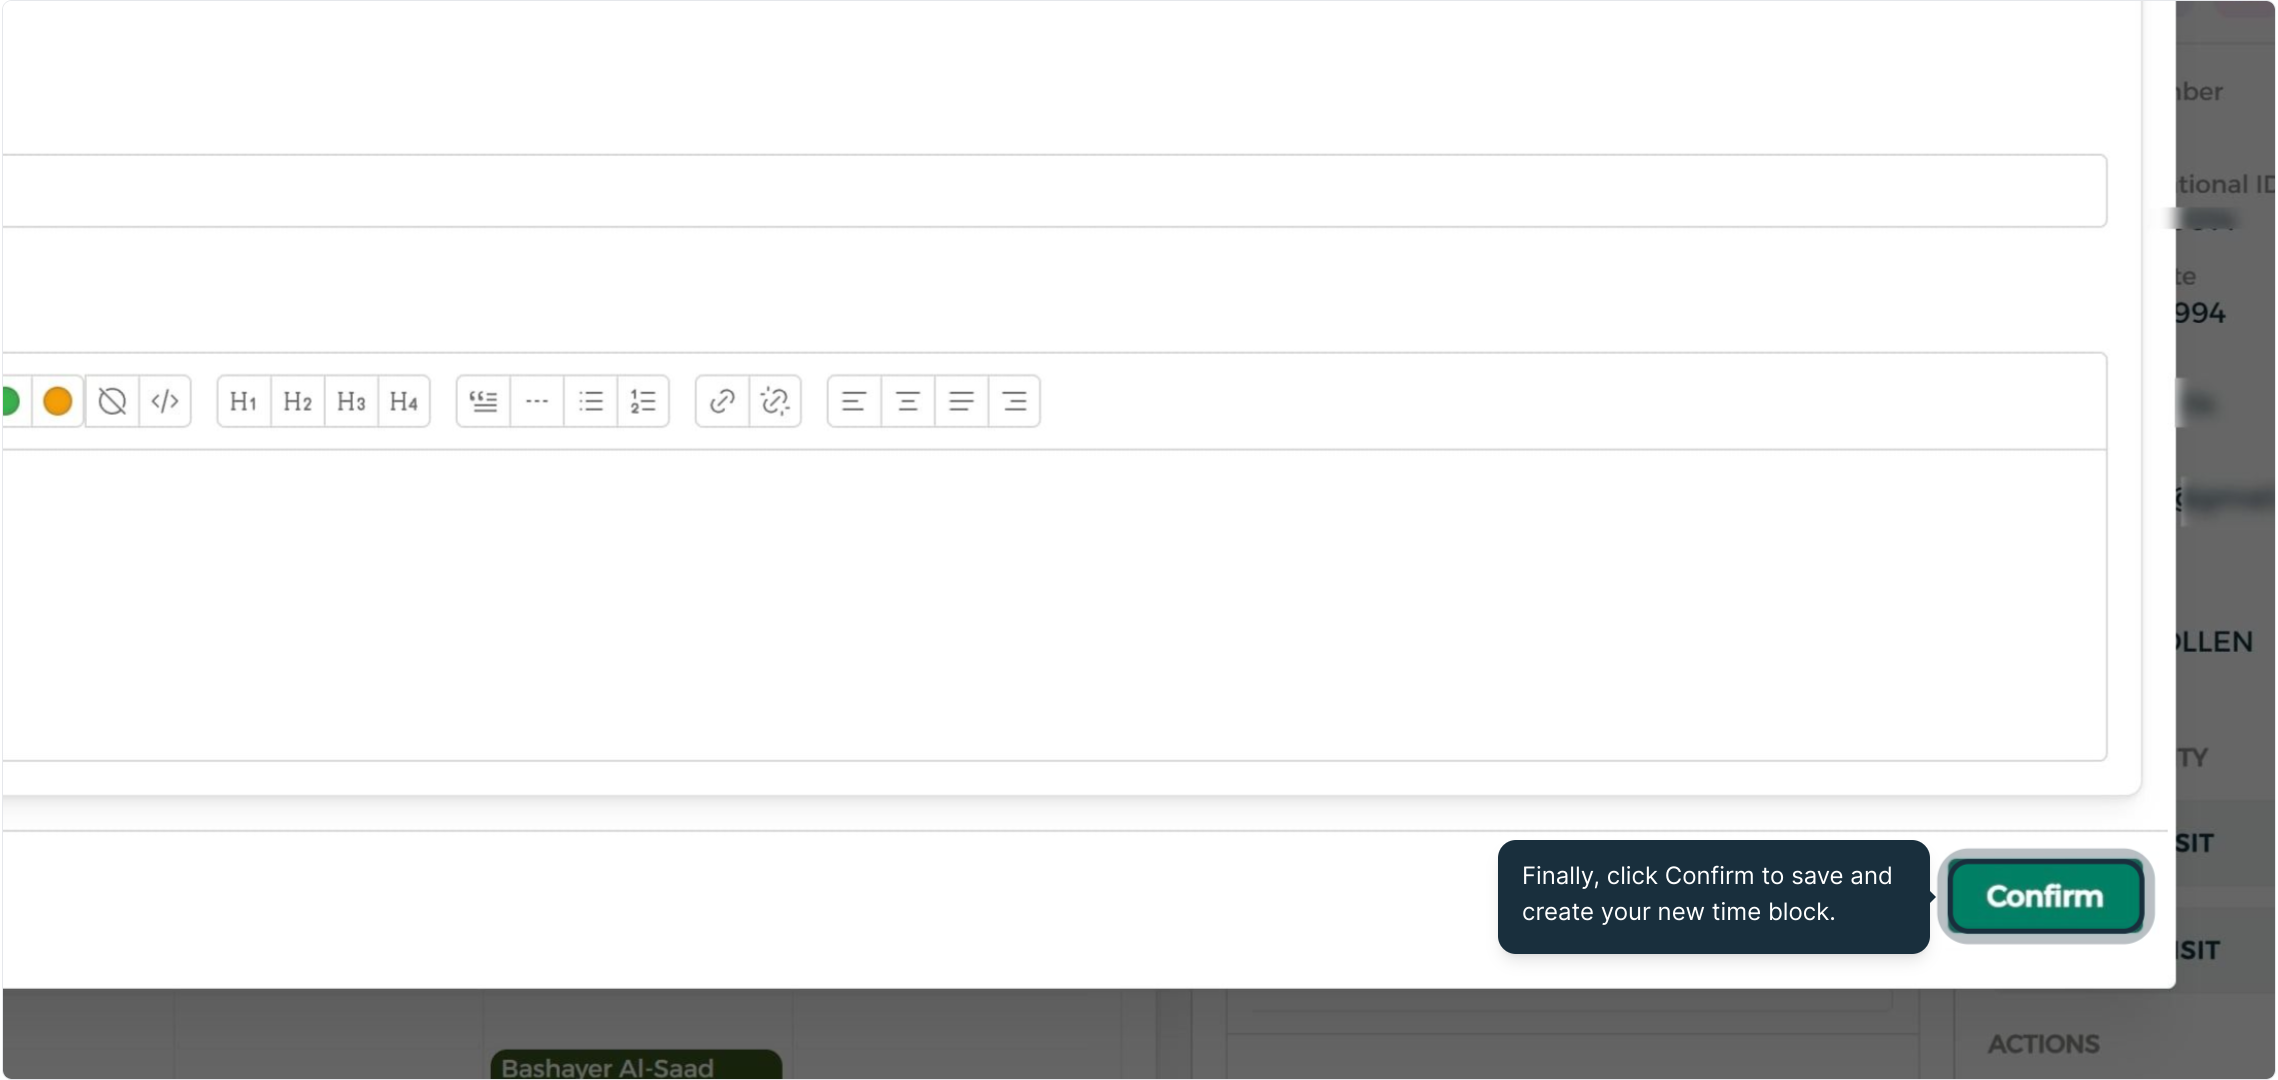
Step 3: Time Block Confirmation
Select Confirm to publish the reserved block on the calendar grid.
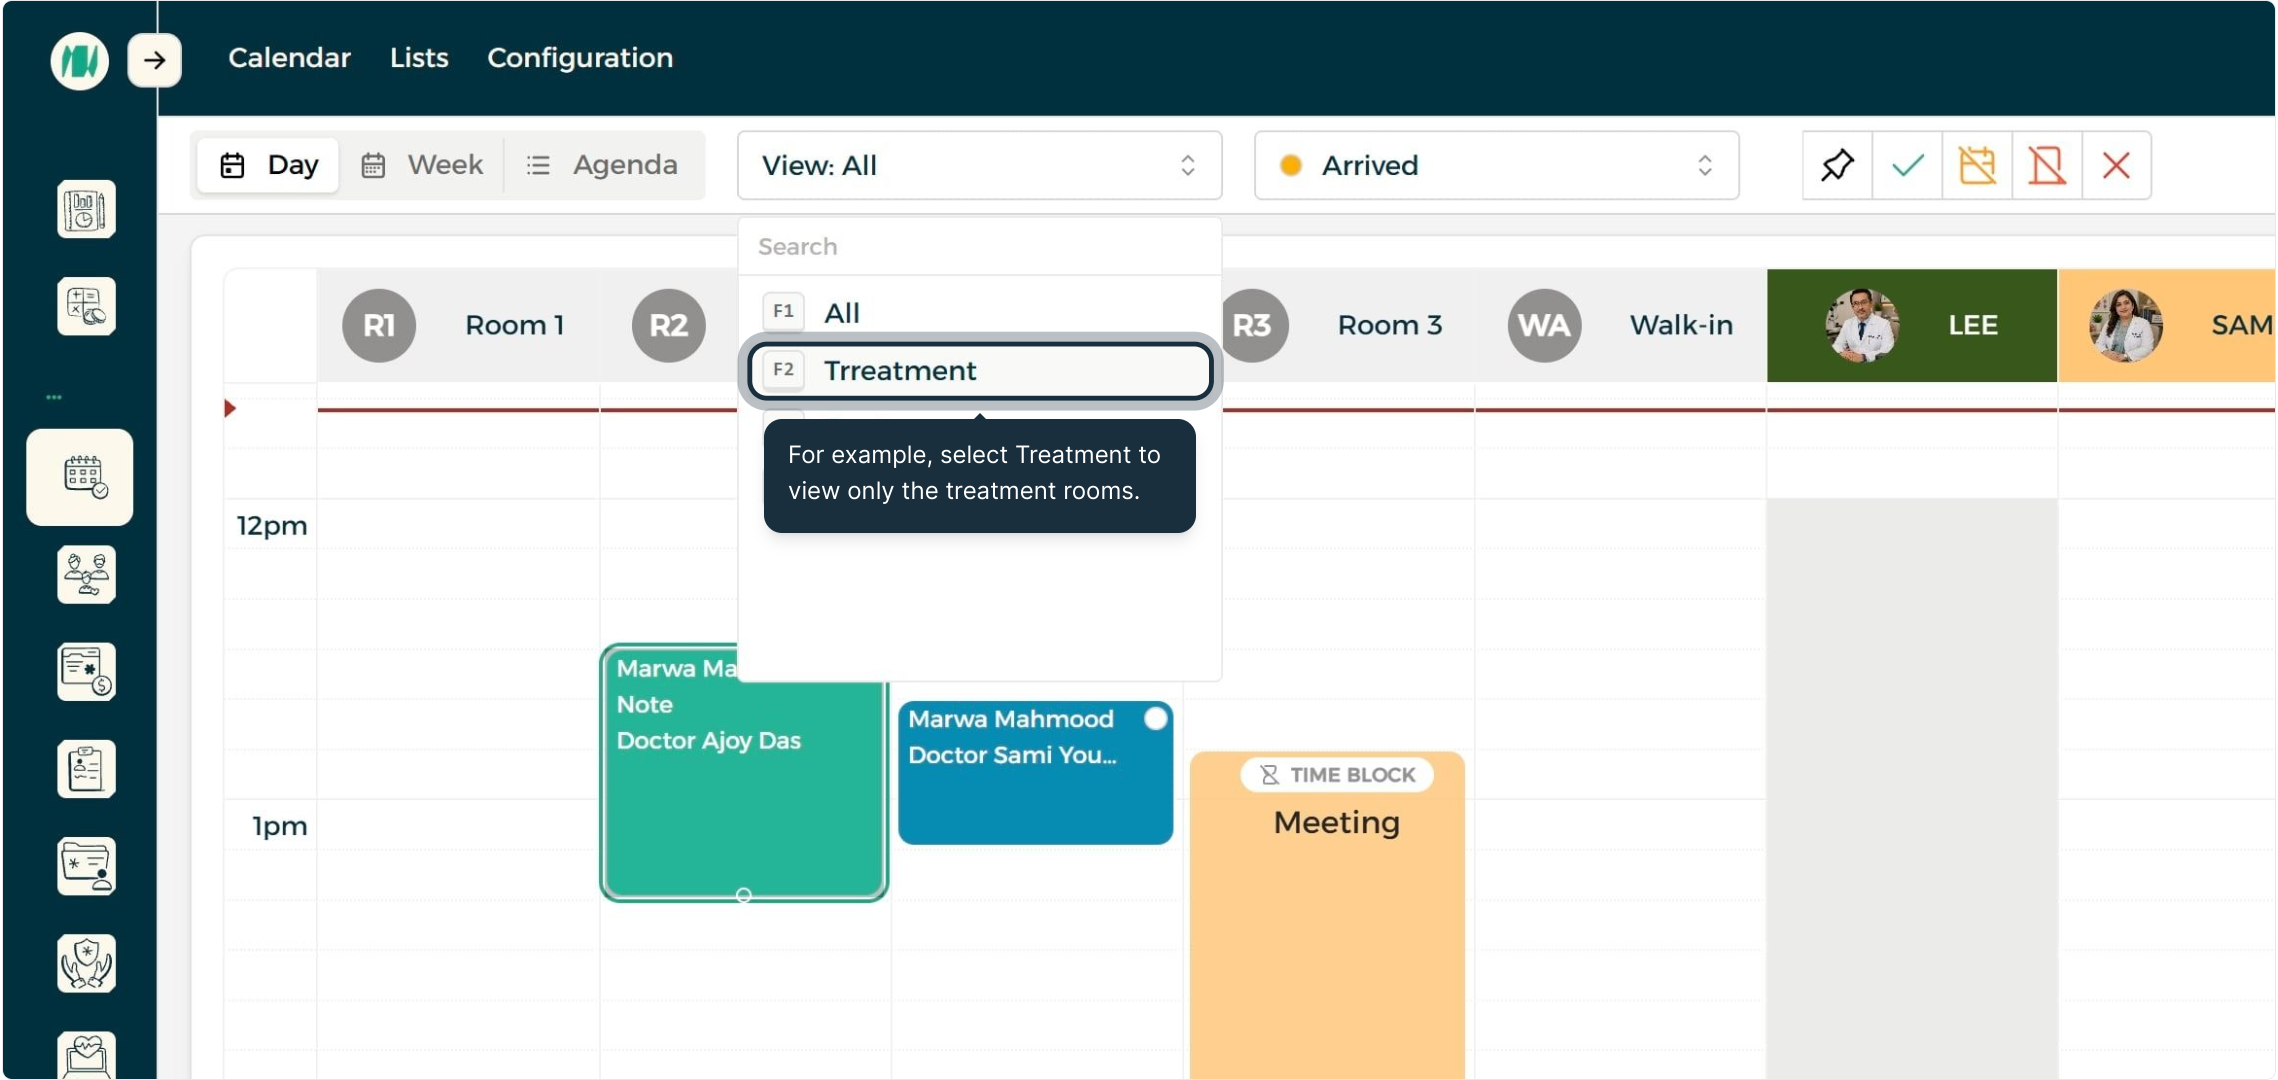
Step 4: Room Category Filtering
Filter room views via the dropdown menu (e.g., Treatment). Select View All to restore full room visibility.
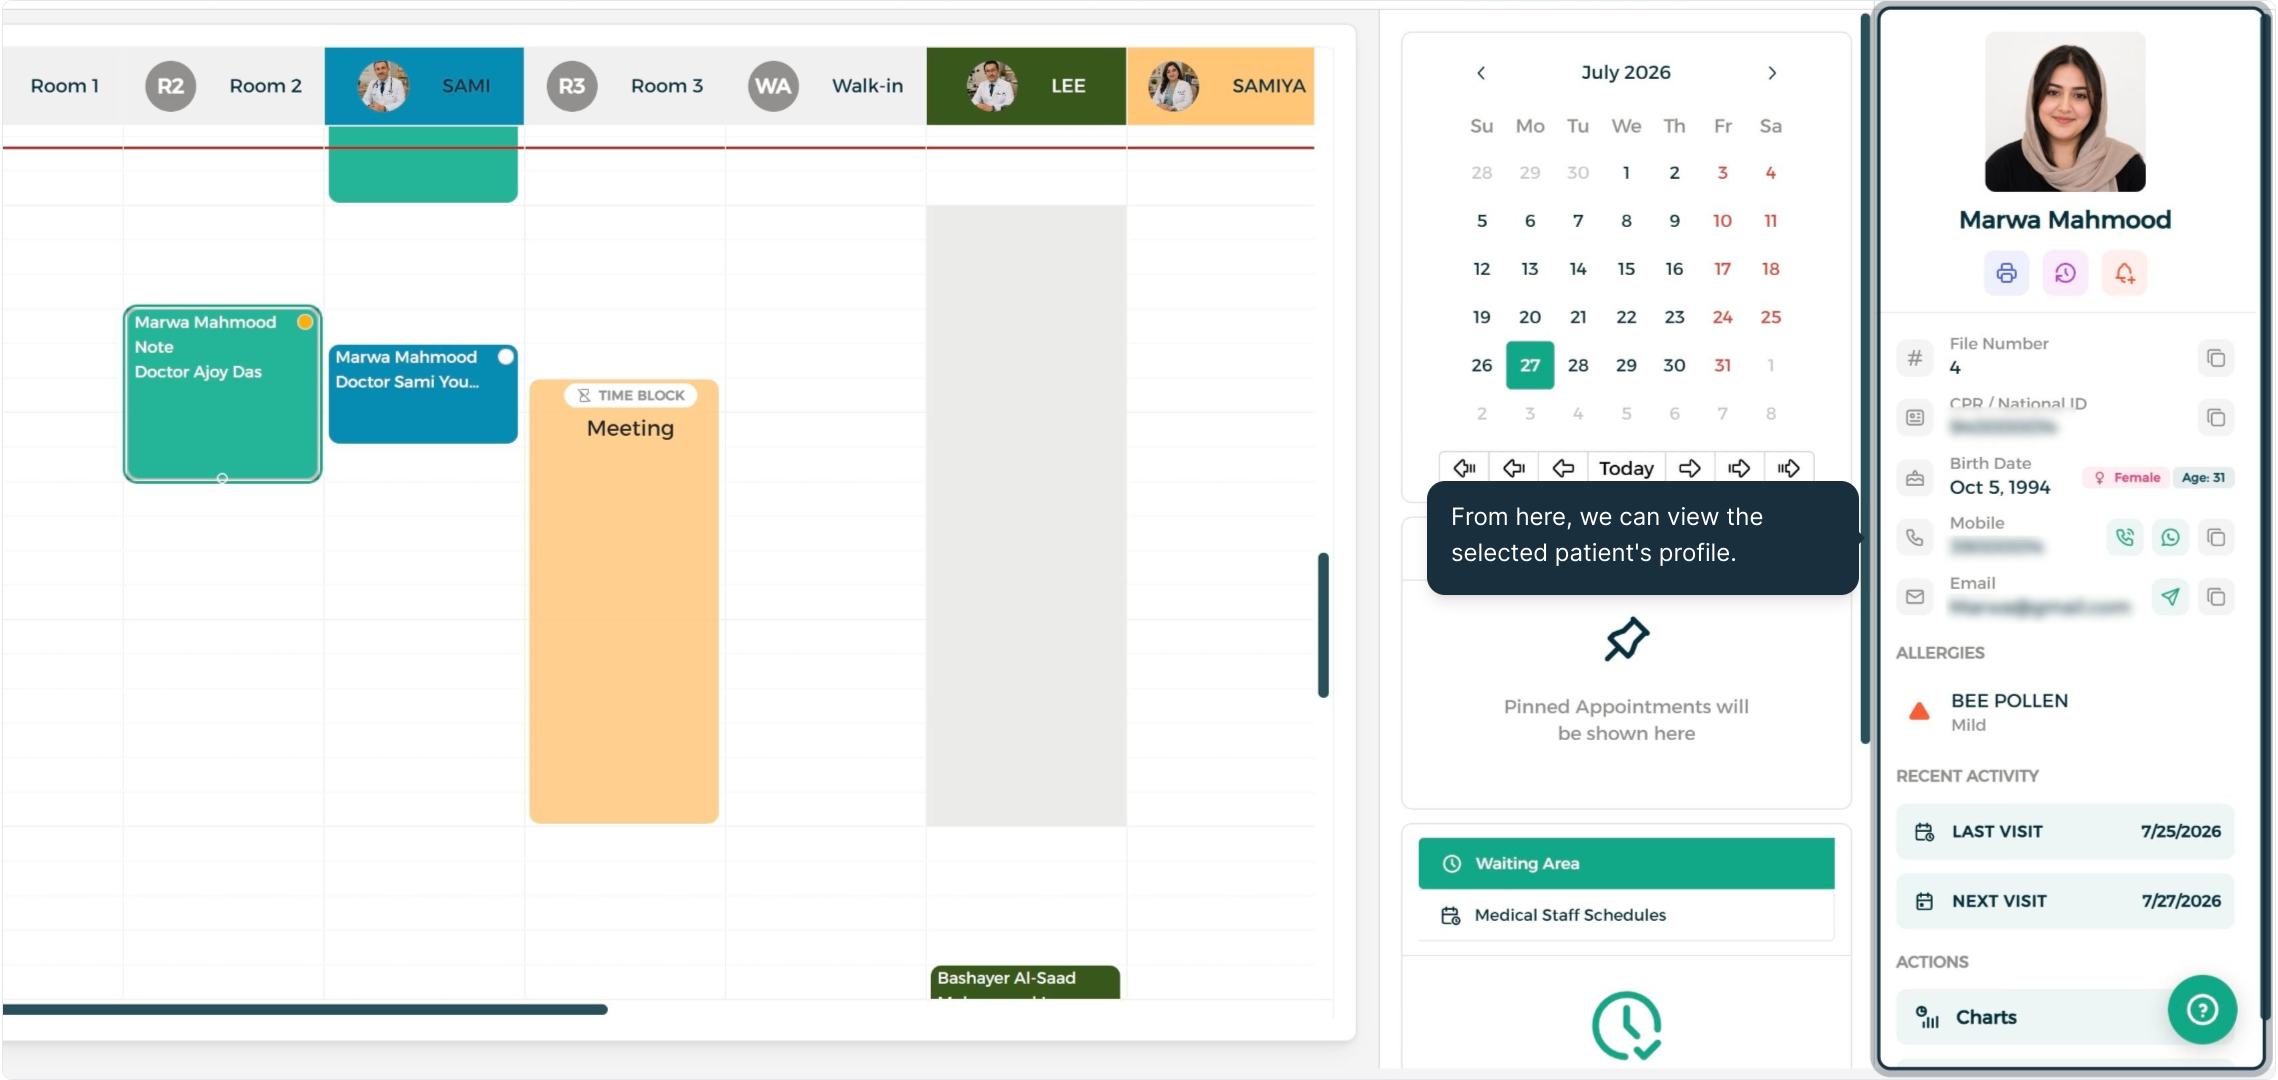
Step 5: Patient Profile & Quick Utilities
Open the active patient profile panel. Minimize it using the unpin option, or use Actions to schedule visits, set time blocks, establish recurring plans, or enable Smart Time Adjust.
Configuration & Lists
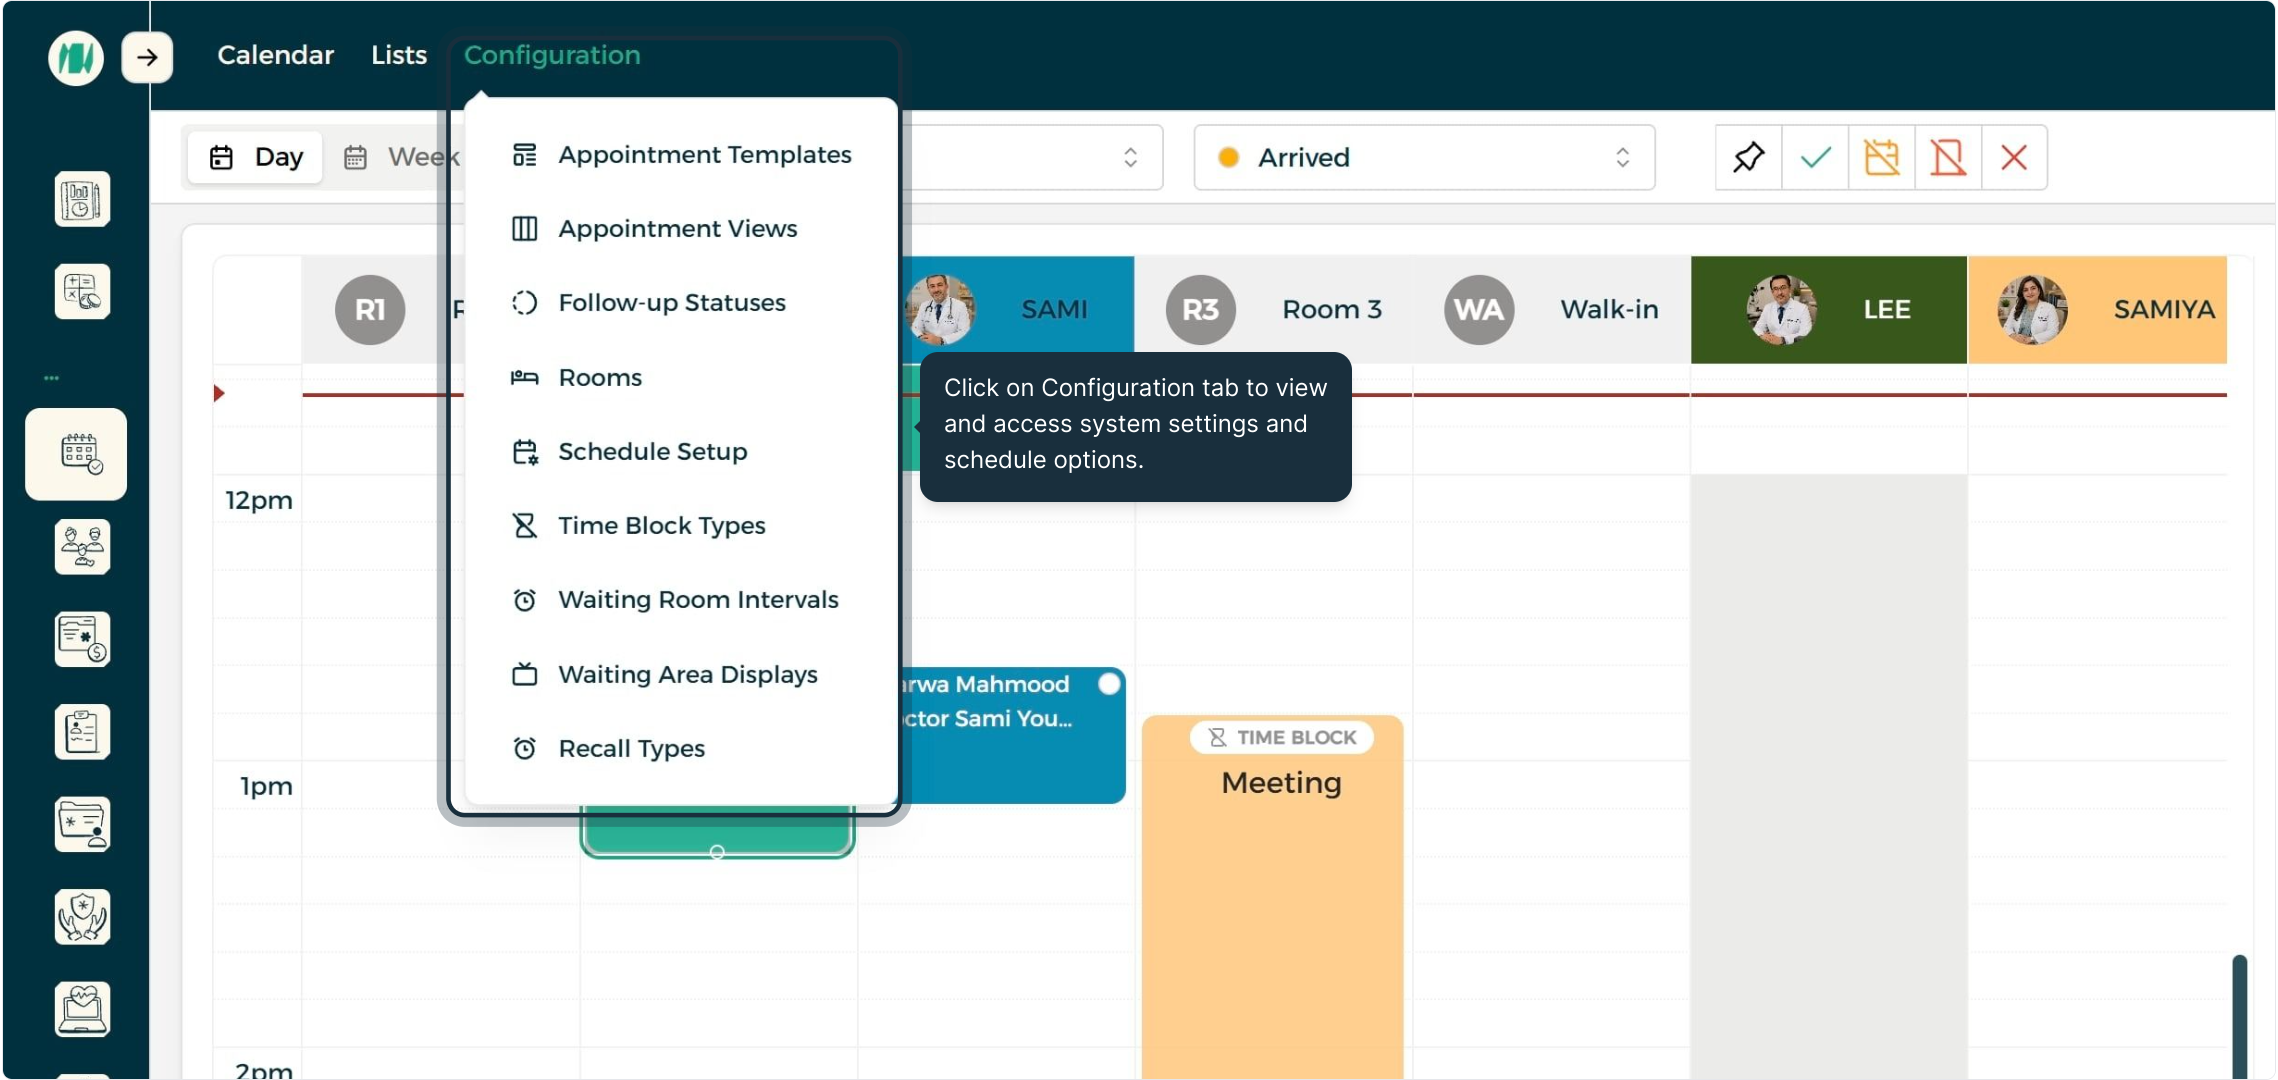
Step 1: System Settings & Templates
Navigate to Configuration to manage templates, room categories, and time block types.
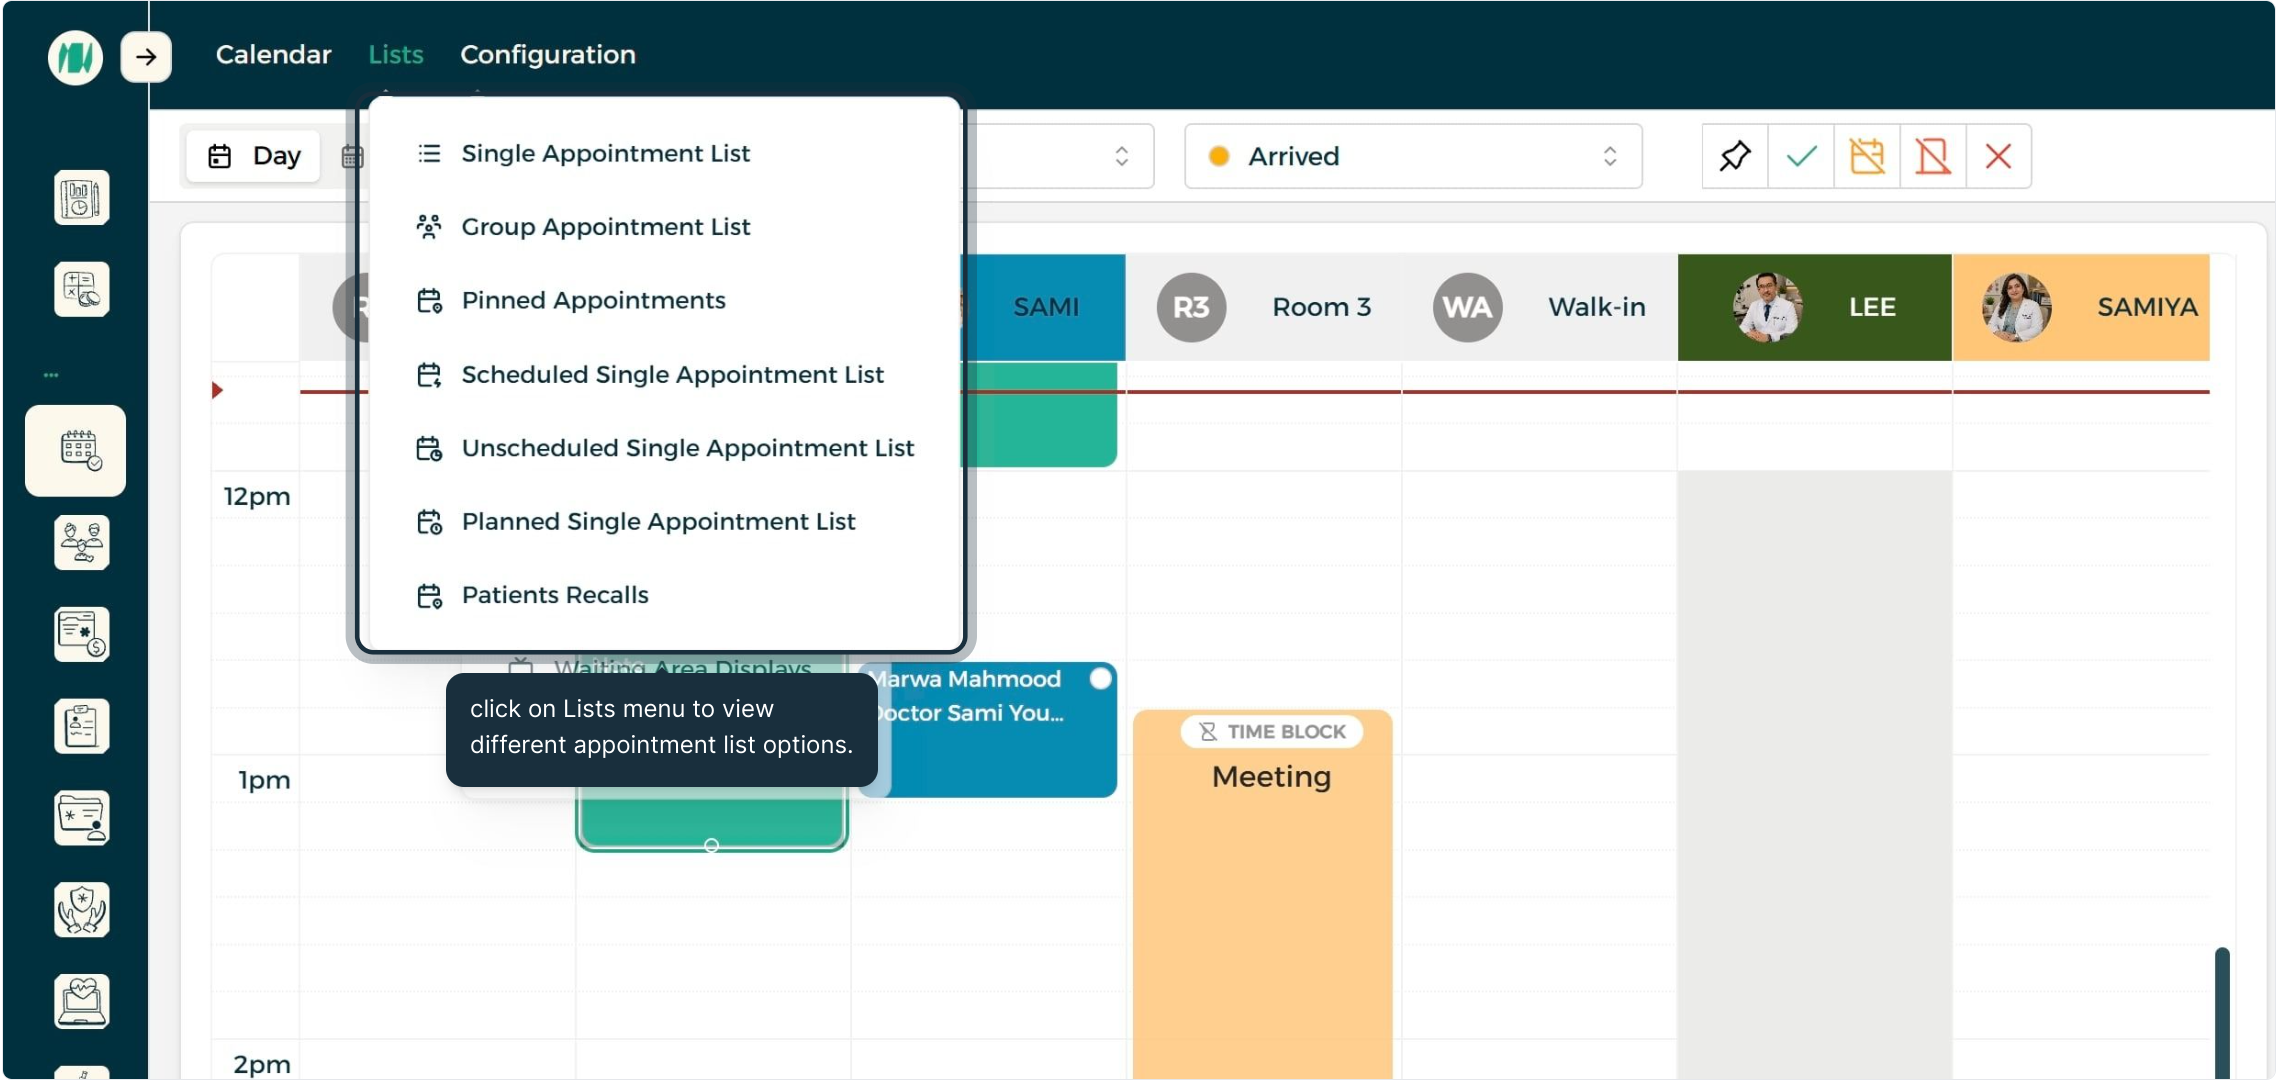
Step 2: Appointment Lists
Access the Lists menu to view tabular schedule summaries and reports.
End-to-End Workflow
- Patient Selection: Select an existing patient record or register a new one.
- Slot Reservation: Create a quick appointment via drag-and-drop or use the detailed form for procedures and insurance billing.
- Confirmation: Confirm the entry to lock it onto the calendar grid.
- Active Management: Reschedule, resize, pin, or update follow-up statuses as patient visits progress.
- Non-Clinical Holds: Apply time blocks to reserve facility resources for maintenance or meetings.
- Operational Review: Monitor daily workflow using room filters, patient panels, and system list views.
Best Practices
- Use quick booking for walk-in traffic — Reserve slots rapidly using drag-and-drop instead of completing full forms during busy periods.
- Pin critical visits — Keep high-priority appointments visible in the pinned dock while navigating different calendar dates.
- Maintain real-time statuses — Update follow-up statuses promptly as patients arrive, enter consultations, or check out.
- Apply room filters — Focus on specific treatment areas to reduce visual complexity during peak hours.
FAQ
Q: What is the difference between a quick appointment and a detailed appointment?
A quick appointment reserves a time slot rapidly with minimal input. A detailed appointment incorporates procedure selection, insurance policies, staff notes, and follow-up tracking.
Q: How do I book an appointment for a new patient?
Select the Add New Patient button within the patient panel to create a record prior to finalizing the booking.
Q: How are appointment follow-up statuses updated?
Select any booked appointment card on the calendar and modify its status directly from the side panel.
Q: Can schedule slots be reserved for staff meetings or room maintenance?
Yes. Access the context menu on the calendar and select Add Time Block to hold time for administrative tasks or breaks.
Q: Is it possible to view specific treatment rooms only?
Yes. Use the room view dropdown to filter by room category, and select View All to return to the complete schedule.